
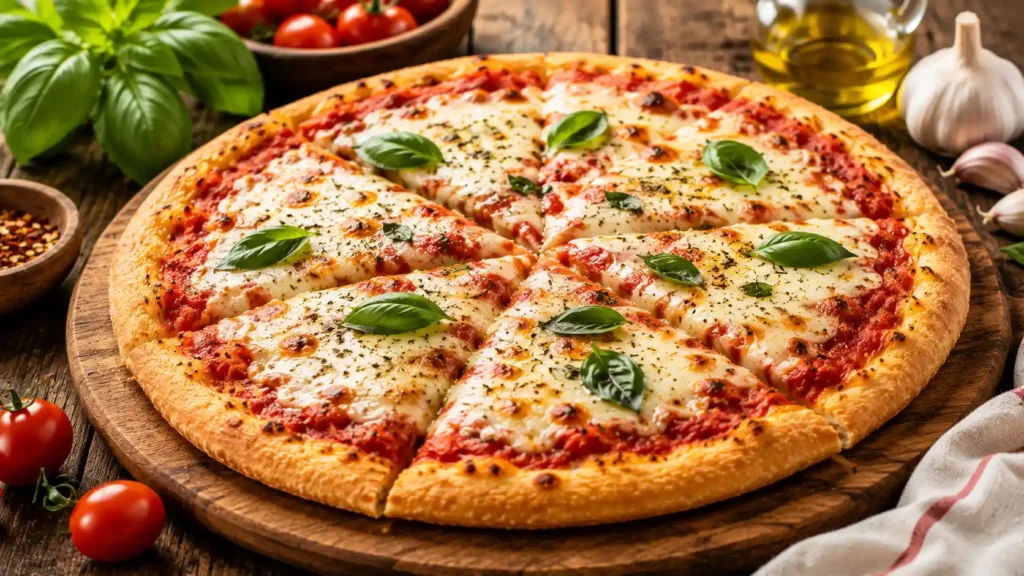
If you have spent any time following a gluten-free diet, you likely know the deep heartbreak of bad gluten-free pizza. All too often, store-bought frozen options or quick restaurant substitutes deliver a base that is either dry, cardboard-hard, crumbly, or unpleasantly gummy in the center. Finding a gluten free pizza crust recipe that truly captures the magic of a traditional pizzeria crust can feel almost impossible.
That changes today. This homemade gluten free pizza dough delivers everything you have been missing: a beautifully golden, crackly outer rim, a light and airy structure underneath, and a pliable, chewy center sturdy enough to fold without breaking under the weight of your favorite toppings.
Unlike wheat dough, which relies on long kneading sessions to build strong gluten strands, making a crispy gluten free pizza crust at home is shockingly fast and forgiving. There is no intensive kneading required—just a quick whisk of dry ingredients, a warm pour of active yeast water, a brief 30-minute rise, and a swift pre-bake to lock in the crust’s structure.
Whether you are hosting a festive Friday night family dinner, cooking for a friend with celiac disease, or simply craving an easy gluten free pizza crust that beats takeout hands-down, this recipe is designed for foolproof success. Read on for exact measurements, ingredient breakdowns, and step-by-step guidance to master pizzeria-quality pizza without gluten!
Quick Recipe Card
| Detail | Information |
| Recipe Name | Crispy & Chewy Gluten-Free Pizza Crust |
| Cuisine | Italian / American |
| Course | Main Course |
| Prep Time | 20 Minutes |
| Rise/Rest Time | 30 Minutes |
| Cook Time | 18 Minutes (Pre-bake + Final Bake) |
| Total Time | 1 Hour 8 Minutes |
| Servings | 2 Pizzas (8 slices per pizza; 12-inch diameter) |
| Calories | Approx. 210 kcal per slice (crust only) |
| Difficulty | Intermediate / Beginner Friendly |
Why You’ll Love This Gluten Free Pizza Crust
- Pizzeria Texture Profile: Yields a sturdy, golden-crisp exterior with a delightfully chewy, soft interior.
- Holds Heavy Toppings: No more soggy, drooping centers! This crust easily supports sauce, heavy cheeses, meats, and veggies.
- Requires Zero Kneading: Because there is no gluten to develop, you simply mix the wet and dry ingredients until smooth—no arm workout required!
- Fast 30-Minute Rise: Uses instant or active yeast to deliver authentic fermented bread flavor in a fraction of the time needed for wheat doughs.
- 100% Celiac-Safe & Customization-Friendly: Naturally gluten-free, easily adaptable to dairy-free or vegan diets, and free of artificial additives.
- Incredible Freezer-Friendly Meal Prep: Pre-bake individual bases, freeze them solid, and have quick “slice-and-bake” pizzas ready in under 10 minutes.
- Saves Money: Making your own gluten free homemade pizza costs a fraction of buying pre-made store-bought frozen crusts or restaurant specialty pies.
What Makes a Great Gluten Free Pizza Crust?
Understanding how gluten-free baking differs from traditional breadmaking helps you master your dough every single time.
The Role of Gluten-Free Flour Blends
Standard pizza dough relies on gluten proteins (gliadin and glutenin) to stretch, trap gas bubbles produced by yeast, and form an elastic matrix. To replicate this structure without wheat, a gluten free pizza recipe must use a balanced blend of starches and grains:
- White/Brown Rice Flour: Provides structure, body, and traditional grain flavor.
- Tapioca Starch & Potato Starch: Adds chewiness, flexibility, and helps the crust brown evenly.
Why Xanthan Gum or Psyllium Husk Is Essential
Without gluten, dough lacks natural elasticity. Xanthan gum acts as a binder, mimicking gluten’s elasticity by trapping moisture and air bubbles inside the dough as it rises. If your 1-to-1 flour blend does not contain xanthan gum, you must add it separately. Alternatively, psyllium husk powder can be used to create a supple, dough-like texture that can actually be rolled out with a rolling pin.
Hydration & High Heat
Gluten-free starches absorb significantly more water than wheat flour. As a result, raw gluten-free pizza batter looks more like a thick cake batter or sticky drop-biscuit dough than a smooth, hand-tossed ball. High moisture content, combined with intense oven heat (425°F to 450°F / 220°C to 230°C), creates steam inside the dough, puffing it up while scorching the bottom into a crispy base.
Ingredients
To achieve the ultimate easy gluten free pizza dough, combine these kitchen staples:
For the Yeast Mixture:
- ¾ cup Warm Water (105°F–110°F / 40°C–43°C): Warm water blooms the yeast; hot water will kill it!
- 2¼ teaspoons Instant or Active Dry Yeast: 1 standard packet.
- 1 tablespoon Sugar or Honey: Feeds the yeast, kickstarting fermentation and aiding crust browning.
For the Flour & Dry Base:
- 2 cups (approx. 280g) 1-to-1 Gluten-Free Baking Flour: Must contain xanthan gum (e.g., King Arthur Measure for Measure, Bob’s Red Mill 1-to-1, or Caputo Fioregut).
- ½ teaspoon Xanthan Gum: Only add this if your commercial flour blend does NOT already include it!
- 1 teaspoon Fine Sea Salt: Essential for seasoning the dough so it doesn’t taste flat.
- 1 teaspoon Italian Seasoning or Garlic Powder (Optional): Adds subtle herbal flavor directly into the crust.
For the Wet Mixture:
- ¼ cup Warm Water: Added gradually to reach ideal sticky-batter consistency.
- 2 tablespoons Extra Virgin Olive Oil: Adds rich flavor, supple texture, and helps crispy browning.
- 1 Large Egg (Room Temperature) OR 1 Flax Egg: Adds structure, stability, and moisture to the crumb.
Best Gluten Free Flour for Pizza
Not all commercial flour blends perform equally when baking pizza crust without gluten. Here is how popular options compare:
| Flour Type / Brand | Texture Profile | Crispness | Chewiness | Best For |
| Caputo Fioregut GF Flour | Authentic Italian Pizzeria | ⭐⭐⭐⭐⭐ | ⭐⭐⭐⭐⭐ | BEST OVERALL (Stretches like real dough; contains wheat starch with gluten removed—check celiac safety). |
| King Arthur Measure for Measure | Tender, light crumb | ⭐⭐⭐⭐ | ⭐⭐⭐⭐ | EXCELLENT (Great balance of starches; easy to find in most grocery stores). |
| Bob’s Red Mill 1-to-1 (Blue Bag) | Crispy rim, sturdy base | ⭐⭐⭐⭐ | ⭐⭐⭐ | VERY GOOD (Great crispiness; slightly denser center). |
| Almond Flour (Standalone) | Soft, dense, nutty | ⭐⭐ | ⭐ | Keto/Low-Carb (Requires eggs/cheese to set; will not rise with yeast). |
| Single-Grain Rice Flour | Gritty, dry, crumbly | ⭐ | ⭐ | AVOID ALONE (Must be blended with tapioca starch and starches to work). |
Kitchen Equipment Needed
- Digital Kitchen Scale: Weighing flour (in grams) guarantees precision that volume cups cannot match.
- Large Mixing Bowl & Wooden Spoon: Or a stand mixer fitted with the paddle attachment.
- Parchment Paper: Non-negotiable! Gluten-free dough is sticky; pressing and baking directly on parchment prevents sticking.
- Pizza Stone, Steel, or Cast-Iron Pan: Retains high heat to shatter-crisp the bottom of the crust.
- Offset Spatula or Wet Hands: For spreading and shaping the sticky dough into a flat, round disk.
- Pizza Cutter Wheel: For clean cuts through crispy rims and melted cheese.
How to Make Gluten Free Pizza Dough
Follow these detailed steps to build your crust:
Step 1: Activate the Yeast
In a measuring cup, whisk together ¾ cup warm water (105°F–110°F), 1 tablespoon sugar, and 2¼ teaspoons yeast. Let sit undisturbed for 5–7 minutes until a thick, frothy head of foam forms on top.
Step 2: Combine Dry Ingredients
In a large mixing bowl (or the bowl of a stand mixer), whisk together 2 cups gluten-free 1-to-1 flour, 1 teaspoon salt, and any optional herbs or extra xanthan gum (if required).
Step 3: Mix Wet Ingredients & Knead
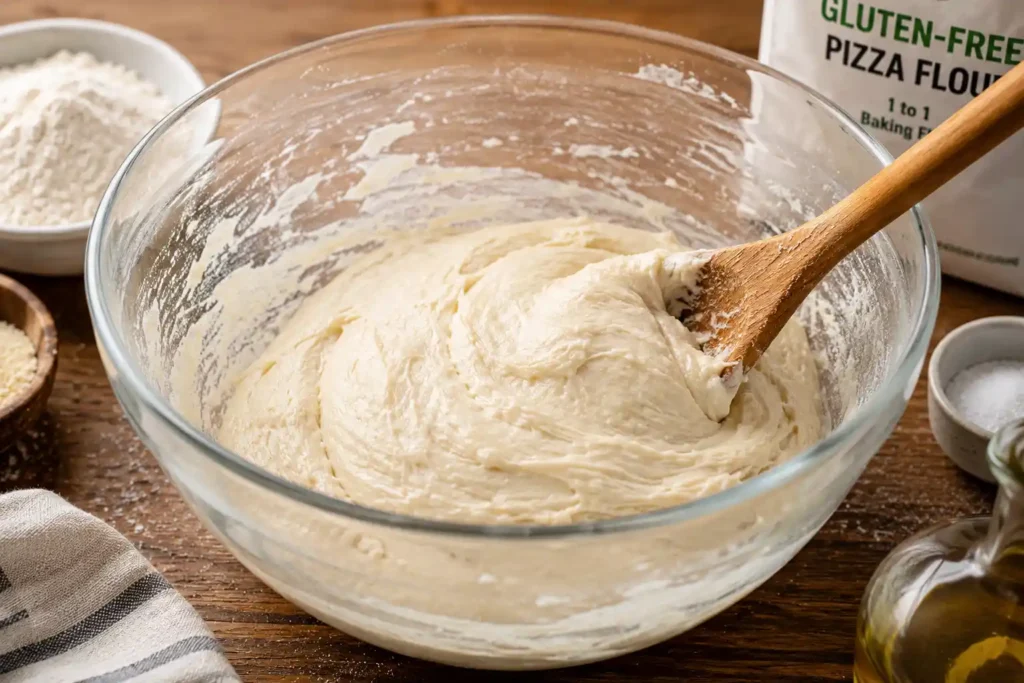
Pour the bloomed yeast mixture, 2 tablespoons olive oil, 1 large room-temperature egg, and the remaining ¼ cup warm water into the dry flour bowl. Stir vigorously with a wooden spoon or beat on medium speed with a paddle attachment for 2 to 3 minutes. The dough should resemble a smooth, thick, spreadable batter (similar to drop-biscuit dough).
Step 4: Rest and Rise
Cover the bowl with a clean kitchen towel or plastic wrap. Place in a warm, draft-free spot for 30 minutes. The dough will puff up slightly and become airy, though it will not double in size like wheat dough.
Step 5: Shape the Crust
Preheat your oven to 425°F (220°C). If using a pizza stone or baking steel, place it on the middle rack while the oven heats up.
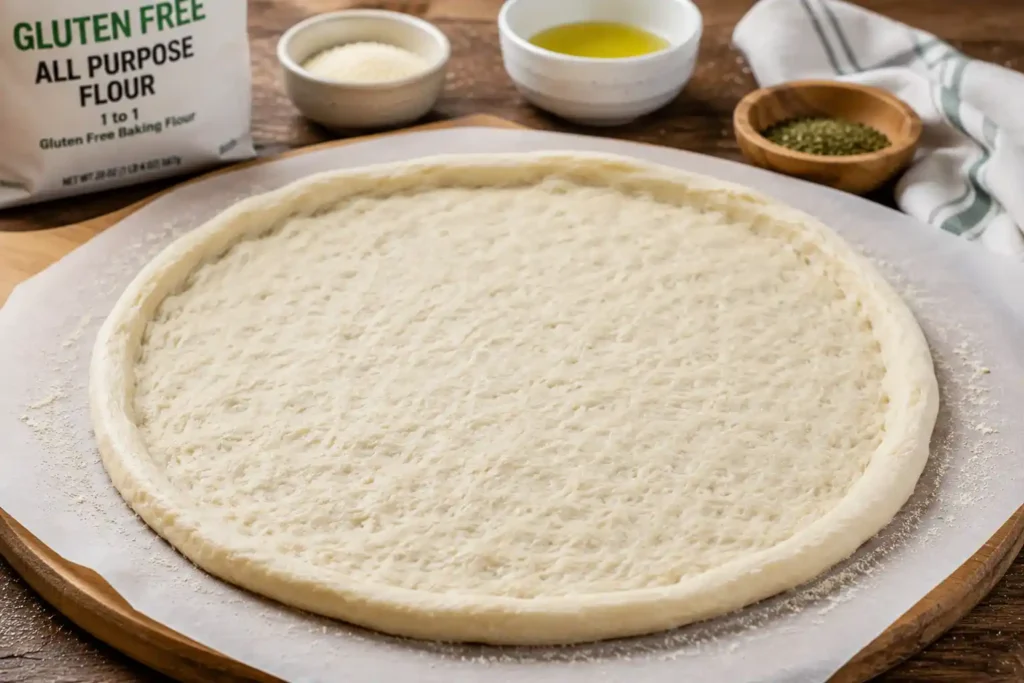
Lay a large sheet of parchment paper on your counter and lightly drizzle it with olive oil. Plop the rested dough onto the center of the parchment. Drizzle a tiny bit of olive oil over your hands (or wet your fingers with water), and press the dough outward from the center into a 12-inch circle about ¼-inch thick. Build up a slightly thicker rim around the outer edge to form your crust border.
Step 6: Pre-Bake the Base (Crucial Step!)
Use a fork to prick a few tiny holes across the surface of the dough (this stops steam pockets from inflating the center). Slide the parchment paper with the dough onto your hot pizza stone or a inverted baking sheet. Pre-bake for 10 to 12 minutes until the edges are set and the top looks matte and dry.
Step 7: Top and Final Bake
Remove pre-baked crust from the oven. Spread a thin layer of pizza sauce, sprinkle shredded mozzarella, and arrange your favorite toppings. Return the pizza to the oven and bake for an additional 8 to 10 minutes until the cheese is melted, bubbling, and the edges of the crust are deep golden-brown.
Step 8: Slice and Enjoy
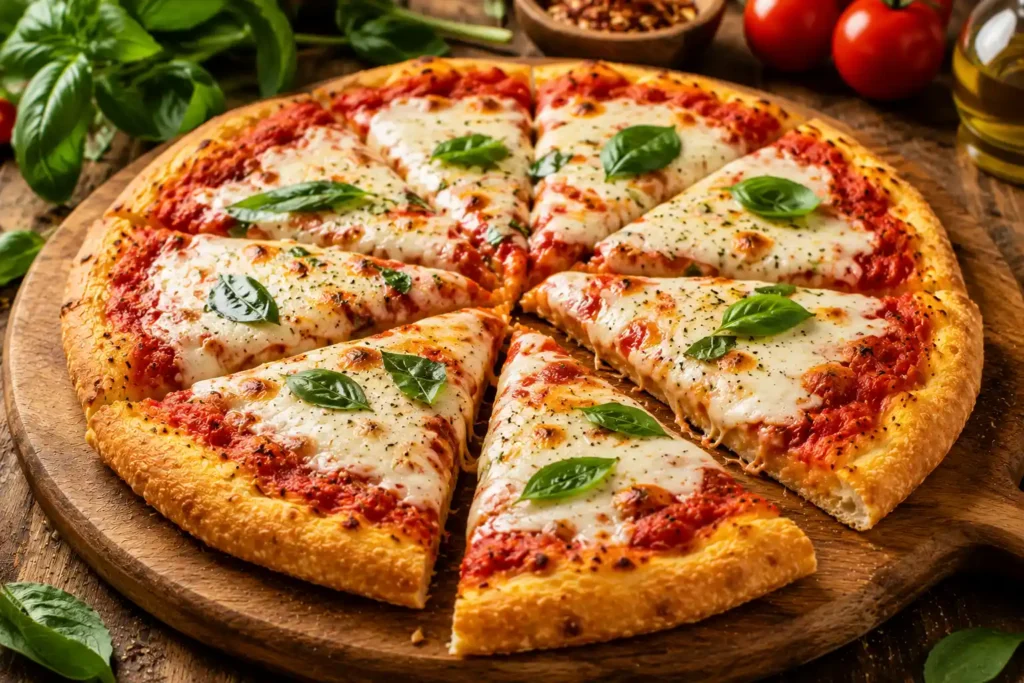
Remove from oven and let rest on a cutting board for 3 minutes before slicing. Garnish with fresh basil, cut into wedges, and serve piping hot!
Pro Tips for Success
- Always Pre-Bake the Base: Never spread sauce onto raw gluten-free dough! Pre-baking sets the starch matrix, preventing wet tomato sauce from turning your pie into a soggy paste.
- Weigh Your Flour: Measuring flour by scoop cups can accidentally compress up to 20% extra flour into your bowl, leading to a dry, dense crust. Use a digital scale (280g for 2 cups).
- Bake with High Heat: High heat evaporates moisture rapidly, creating steam pockets inside while frying the bottom against oil-slicked parchment paper.
- Oil Your Hands for Shaping: Gluten-free dough is naturally wet and sticky. Coating your palms in olive oil prevents sticking and coats the top in flavor-packed oil that browns in the oven.
- Don’t Over-Sauce: Keep sauce layers light! Excessive heavy sauce weighs down the middle and introduces unwanted moisture.
Common Mistakes to Avoid
- Using Flour Without Xanthan Gum: Skipping xanthan gum yields a crust that crumbles into sand when lifted.
- Rolling with a Rolling Pin Without Oil/Parchment: Trying to roll sticky gluten-free dough directly on a floured counter results in a stuck, messy disaster.
- Water Temperature Too Hot: Water above 120°F (49°C) kills live yeast, preventing your crust from rising or developing fermented bread flavors.
- Slicing Immediately Out of the Oven: Hot starches need 2–3 minutes to set. Slicing instantly causes melted cheese and crumb to tear apart.
Best Pizza Toppings
Enhance your thin crust gluten free pizza with these classic, well-balanced combinations:
Classic Margherita
- San Marzano tomato sauce
- Fresh mozzarella slices
- Fresh basil leaves (added after baking)
- Drizzle of extra virgin olive oil
Meat Lover’s Delight
- Traditional pizza sauce
- Shredded low-moisture mozzarella
- Crispy pepperoni slices, cooked Italian sausage, and bacon crumbles
Gourmet White Pizza (Pizza Bianca)
- Garlic-olive oil base (no red sauce)
- Ricotta cheese, mozzarella, and dollops of goat cheese
- Fresh baby arugula tossed in lemon juice placed on top post-bake
Veggie Supreme
- Homemade marinara
- Mozzarella and Parmesan
- Sliced bell peppers, red onion, black olives, and sliced cremini mushrooms
Gluten Free Pizza Variations
- Dairy-Free / Vegan Pizza: Swap shredded mozzarella for plant-based cheeses (like Violife or Miyoko’s) and replace the egg in the dough with 1 tablespoon flax meal mixed with 3 tablespoons warm water.
- Garlic Herb Crust: Whisk 1 teaspoon garlic powder, 1 teaspoon dried oregano, and 2 tablespoons grated Parmesan directly into the dry flour blend.
- Ultra-Thin & Crispy: Divide dough into two smaller portions and press them paper-thin (⅛-inch thick) onto separate parchment sheets before pre-baking for 8 minutes.
What to Serve with Gluten Free Pizza
Turn your pizza night into a full feast with these complementary dishes:
- Crispy Caesar Salad: Tossed romaine lettuce, shaved Parmesan, and gluten-free croutons with creamy Caesar dressing.
- Garlic Butter Dipping Sauce: Melted butter, minced garlic, parsley, and sea salt for dipping crispy crust ends.
- Buffalo Chicken Wings: Crispy oven-baked wings tossed in spicy buffalo sauce.
- Gluten-Free Garlic Knots / Breadsticks: Made using extra batches of this versatile dough!
Storage & Meal Prep Instructions
Refrigerator Storage
Keep leftover cooked pizza slices wrapped in foil or stored in an airtight container in the fridge for up to 4 days.
Freezing Pre-Baked Crusts (Meal Prep)
- Pre-bake the plain crust for 10 minutes as directed.
- Allow crust to cool completely to room temperature.
- Wrap tightly in plastic wrap, then foil, and freeze flat for up to 3 months.
- To Bake from Frozen: Add sauce, cheese, and toppings directly onto the frozen crust and bake at 425°F (220°C) for 12–15 minutes until cheese is hot and bubbling.
Reheating Leftover Slices
- Skillet Method (BEST): Place slice in a dry skillet over medium heat for 2 minutes to re-crisp the bottom, then drop in 3 drops of water, cover with a lid, and steam for 1 minute until cheese remelts.
- Air Fryer: Heat at 350°F (175°C) for 3 to 4 minutes for a super crispy finish.
- Avoid Microwaving: Microwaving turns gluten-free starches rubbery and tough!
Frequently Asked Questions
1. Can I freeze raw gluten-free pizza dough?
It is not recommended to freeze the raw dough. Gluten-free yeast dough lacks the strong structure of wheat dough and will not rise well after thawing. Instead, pre-bake the crust first, then freeze it!
2. Why is my gluten-free pizza crust crumbly?
Crumbly crusts usually stem from leaving out xanthan gum, using a poor quality single-grain flour, or measuring flour by volume instead of weight (adding too much flour).
3. Can I make this gluten-free crust yeast-free?
Yes. If avoiding yeast, replace yeast, sugar, and warm water with 2 teaspoons of baking powder. The crust will resemble a flatbread biscuit texture rather than a fermented bread crust.
4. Can I use almond flour for this recipe?
You cannot substitute almond flour 1:1 in this recipe. Almond flour lacks starches and requires high egg ratios to bind. Use a commercial 1-to-1 rice-and-starch blend instead.
5. What is the best oven temperature for gluten-free pizza?
Bake at high temperatures—at least 425°F to 450°F (220°C–230°C). High heat cooks the wet starches rapidly, locking in a crispy outer rim.
6. Do I have to pre-bake gluten-free pizza crust?
Yes! Pre-baking is essential to set the starches so wet toppings and sauce don’t turn the middle into uncooked mush.
7. How do I shape sticky gluten-free pizza dough?
Do not try to roll it with a floured rolling pin. Place dough on parchment paper, oil your hands, and gently press and pat it outward into a circle.
8. Can I use active dry yeast instead of instant yeast?
Yes! Active dry yeast works identically—just bloom it in warm water with sugar for 5–7 minutes until foamy before adding it to dry ingredients.
9. Is xanthan gum required if my flour already has it?
No. If your 1-to-1 baking flour blend lists xanthan gum on the ingredient panel, do not add extra, or your dough will turn gummy.
10. How long does homemade gluten-free pizza dough take to rise?
Gluten-free dough only requires a single brief rise of 30 minutes to develop yeast flavor and puff up slightly.
11. Can I make this pizza crust dairy-free?
Yes, this crust recipe is naturally dairy-free when using olive oil! Just ensure your cheese toppings are plant-based.
12. How do I get a super crispy bottom crust?
Bake on a preheated pizza stone or steel, use parchment paper underneath, and lightly oil the parchment before pressing out the dough.
13. Can kids help make this pizza dough?
Absolutely! Because there is no complicated kneading or pulling involved, kids love pressing the dough into shape with oiled hands.
14. How many pizzas does this dough recipe yield?
This recipe yields two 10-to-12-inch medium thin-crust pizzas, or one thick pan pizza.
15. How long do leftovers stay fresh?
Leftover baked pizza lasts up to 4 days wrapped tightly in the refrigerator.
Expert Tips
- Invest in a Pizza Steel or Stone: A preheated stone radiates heat directly into the bottom of your parchment paper, evaporating excess moisture instantly for a shatteringly crisp bottom.
- Store Flour Properly: Keep gluten-free starches in airtight containers in a cool, dark pantry. Cold flour retards yeast blooming, so bring flour to room temperature before baking!
Printable Recipe Card
================================================================================
                 CRISPY GLUTEN-FREE PIZZA CRUST RECIPE
================================================================================
Prep Time: 20 Mins | Rise Time: 30 Mins | Cook Time: 18 Mins | Yield: Two 12" Crusts

INGREDIENTS:
  Yeast Bloomer:
  • ¾ cup warm water (105°F–110°F)
  • 2¼ tsp (1 packet) instant or active dry yeast
  • 1 tbsp sugar or honey

  Dough Base:
  • 2 cups (280g) 1-to-1 Gluten-Free Baking Flour (with xanthan gum)
  • 1 tsp fine sea salt
  • 1 tsp Italian seasoning (optional)
  • ¼ cup warm water (extra)
  • 2 tbsp extra virgin olive oil
  • 1 large egg, room temperature

INSTRUCTIONS:
  1. BLOOM YEAST: Whisk warm water, sugar, and yeast in a glass cup. Let sit
     5-7 minutes until foamy.
  2. MIX DRY: Whisk GF flour, salt, and herbs in a large bowl.
  3. COMBINE: Add bloomed yeast, extra warm water, olive oil, and egg to flour.
     Stir vigorously for 2-3 minutes until a thick, spreadable batter forms.
  4. RISE: Cover bowl; let rest in a warm area for 30 minutes.
  5. PREHEAT: Set oven to 425°F (220°C). Place pizza stone inside if using.
  6. SHAPE: Divide dough in half. Press each half onto oiled parchment paper
     with oiled hands into a 12-inch circle. Dock with a fork.
  7. PRE-BAKE: Slide parchment onto stone/baking sheet. Pre-bake 10-12 mins until dry.
  8. TOP & BAKE: Add sauce, cheese, and toppings. Bake 8-10 mins until cheese
     melts and rim is golden. Rest 3 mins, slice, and enjoy!
================================================================================
Conclusion
Enjoying a hot, freshly sliced pizza with a crackly, golden crust doesn’t have to be a distant memory just because you follow a gluten-free lifestyle. With this easy gluten free pizza crust recipe, you can enjoy restaurant-quality results right from your home oven in under an hour.
Gather your favorite toppings, preheat your oven, and enjoy a delicious homemade pizza night. Don’t forget to rate this recipe and leave a comment below telling us your favorite toppings!