
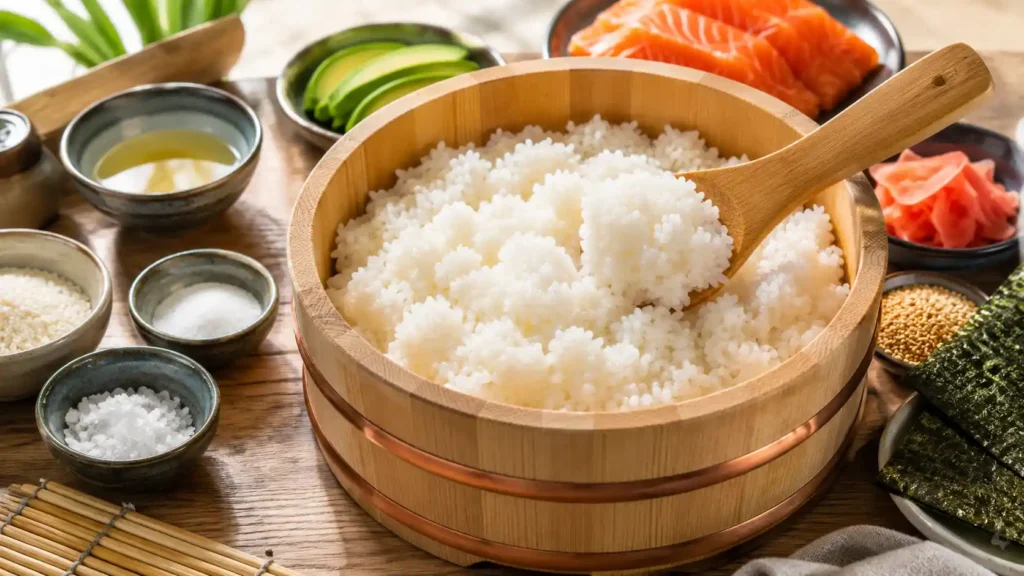
If you have ever tried making sushi at home only to find your rolls falling apart or tasting surprisingly flat, there is a good chance the culprit wasn’t your rolling technique or your fish—it was the rice. In traditional Japanese cuisine, sushi rice (known as sumeshi or shari) is considered the true soul of sushi. Mastering a best sushi rice recipe is the single most important step in elevating your homemade sushi from an okay dinner experiment to a restaurant-quality meal.
Unseasoned rice just doesn’t deliver that signature subtle tartness, slight sweetness, and glistening shine that holds together under pressure without feeling heavy or gummy. The ideal sushi rice recipe gives you plump, distinct grains that cling together effortlessly while remaining tender and light on the palate.
The best part? Learning how to make sushi rice at home is surprisingly simple, deeply rewarding, and requires just a handful of basic pantry staples. Whether you are assembling classic sushi rolls for dinner, building vibrant poke bowls, crafting elegant hand rolls (temaki), or shaping precise nigiri, this authentic, step-by-step guide will walk you through washing, cooking, seasoning, and cooling homemade sushi rice in under an hour.
Quick Recipe Card
| Detail | Information |
| Recipe Name | Authentic Japanese Sushi Rice (Sumeshi) |
| Cuisine | Japanese |
| Course | Side Dish / Base Ingredient |
| Prep Time | 20 Minutes (includes rinsing & soaking) |
| Cook Time | 20 Minutes |
| Cooling/Seasoning Time | 15 Minutes |
| Total Time | 55 Minutes |
| Servings | 4 Cups Cooked Rice (approx. 4–6 servings) |
| Calories | Approx. 240 kcal per 1-cup serving |
| Difficulty | Easy / Beginner Friendly |
Why You’ll Love This Sushi Rice Recipe
- Authentic Japanese Flavor Profile: Uses the precise balance of rice vinegar, sugar, and salt preferred by Japanese home cooks and sushi chefs.
- Perfect Sticky Texture Every Time: Yields plump, glossy grains that stick together effortlessly without turning into a mushy paste.
- Short Prep & Cooking Time: Goes from raw grain to perfectly seasoned sushi rice in under an hour with minimal active effort.
- Simple & Budget-Friendly Ingredients: Requires basic pantry items—Japanese short-grain rice, rice vinegar, sugar, salt, and water.
- Far Better Than Takeout: Freshly seasoned, warm sushi rice tastes noticeably superior to cold, day-old restaurant rice.
- Versatile Base for Dozens of Meals: Works seamlessly for California rolls, spicy tuna rolls, poke bowls, onigiri rice balls, and bento lunches.
- Beginner Friendly & Reliable: Clear instructions provided for rice cookers, stovetop cooking, and Instant Pot pressure cookers.
What Is Sushi Rice?
To truly master Japanese sushi rice, it helps to understand what sets it apart from everyday table rice.
Short-Grain Japanese Rice vs. Standard White Rice
In western grocery stores, “sushi rice” typically refers to Japanese short-grain white rice (such as Koshihikari or Tamanishiki). Short-grain varieties contain a higher ratio of amylopectin starch compared to medium- or long-grain rice varieties. This unique starch structure gives short-grain rice its characteristic plump shape and naturally sticky quality when cooked.
The Magic of Awase-zu (Sushi Rice Seasoning)
Plain cooked short-grain rice is not yet sushi rice. It becomes sumeshi (vinegared rice) only after being seasoned with awase-zu—a heated and dissolved blend of rice vinegar, sugar, and sea salt.
The acid in the vinegar cuts through rich toppings like raw salmon, tuna, or avocado, while the sugar and salt enhance the grain’s natural umami sweetness. Furthermore, folding this liquid seasoning into hot cooked rice coats each grain, creating a gorgeous glossy sheen and helping preserve the rice safely at room temperature while you roll your sushi.
Ingredients
To make perfect sticky rice, stick to these essential ingredients:
For the Rice:
- 2 cups Japanese Short-Grain Rice: Look for bags specifically labeled “Sushi Rice,” “Koshihikari,” or “Calrose short-grain.”
- 2 cups Cold Water (for stovetop/rice cooker): Use filtered water for the cleanest, purest taste.
- Optional – 1 small strip Kombu (Dried Kelp): A 2×2-inch piece wiped clean with a damp towel to add subtle umami richness during cooking.
For the Sushi Vinegar Seasoning (Awase-zu):
- ¼ cup Rice Vinegar: Use plain, unseasoned rice vinegar (do not use pre-seasoned “sushi vinegar” tubs, which contain added sugars and high sodium).
- 2 tablespoons Granulated White Sugar: Dissolves smoothly to balance the vinegar’s acidity.
- 1 teaspoon Fine Sea Salt: Enhances savory flavor and balances sweetness.
Best Rice for Sushi: A Detailed Comparison
Choosing the correct grain type is non-negotiable when making homemade sushi rice. Here is how different varieties stack up:
| Rice Variety | Grain Length | Texture & Starch | Suitable for Sushi? | Why or Why Not? |
| Japanese Short-Grain (e.g., Koshihikari) | Very Short & Round | High Amylopectin / Very Sticky | ⭐ BEST (Authentic) | Plump, holds moisture, clings together effortlessly without getting mushy. |
| Calrose Medium-Grain | Medium & Oval | Moderate-High Starch / Mildly Sticky | 👍 GREAT (Accessible) | Widely available in North America; makes excellent sushi rolls on a budget. |
| Jasmine Rice | Long & Slender | High Amylose / Dry & Fluffy | ❌ NOT RECOMMENDED | Grains stay separate and dry; rolls will crumble instantly. |
| Basmati Rice | Extra Long | High Amylose / Light & Non-Sticky | ❌ DO NOT USE | Dry, aromatic, and completely lacks the cohesive starch needed for sushi. |
| Short-Grain Brown Rice | Short & Chewy | Moderate Starch / Nutty | ⚠️ CONDITIONAL | Healthy alternative, but requires more water/soaking and yields a chewier roll. |
Kitchen Equipment Needed
Having the right tools makes the sushi-making process smooth and foolproof:
- Fine Mesh Strainer: Essential for thoroughly rinsing raw rice to remove excess surface starch.
- Rice Cooker OR Heavy-Bottomed Pot with Tight Lid: For consistent, even heat distribution during cooking.
- Small Saucepan: To gently warm and dissolve the rice vinegar, sugar, and salt.
- Hangiri (Traditional Wooden Sushi Tub) OR Large Glass/Wooden Bowl: Wide wooden tubs absorb excess surface moisture and help cool the rice quickly without making it soggy. Avoid metal bowls, as react with vinegar and alter taste.
- Shamoji (Wooden Rice Paddle) OR Silicone Spatula: For gently slicing and folding the seasoning into the hot grains without crushing them.
- Hand Fan or Paper Cardboard: Used to fan the rice while folding in seasoning, giving each grain a brilliant glossy shine.
How to Wash Sushi Rice (Crucial Step)
Skipping or rushing the rinsing phase is the single most common reason homemade sushi rice turns out gummy or pasty. Rinsing strips away loose surface starches that accumulate during milling.
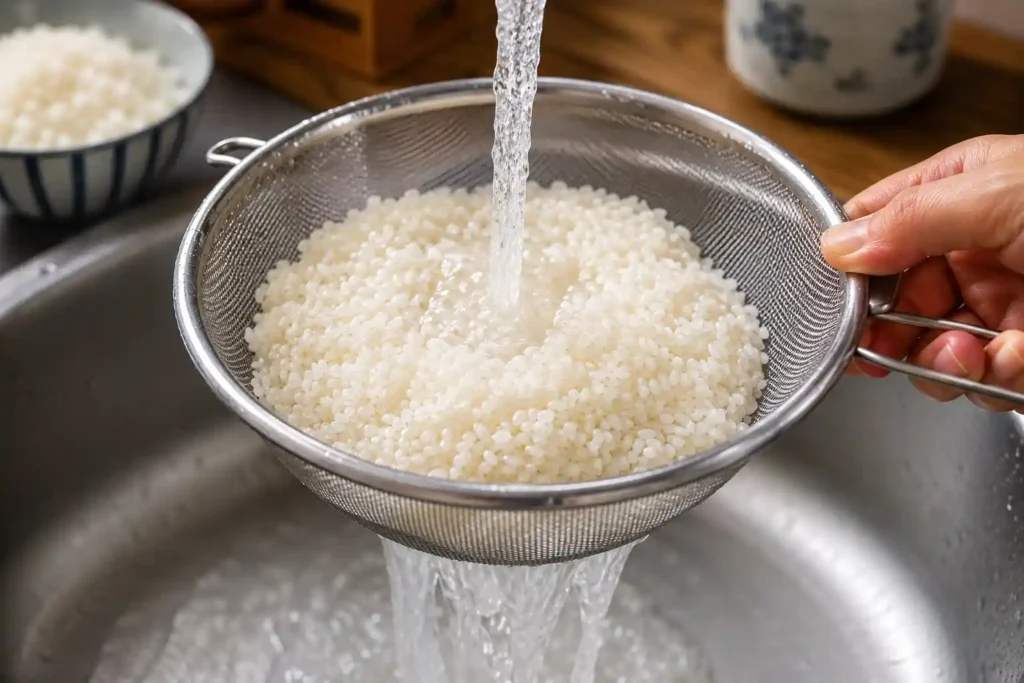
- Measure the Grain: Place 2 cups of dry short-grain rice into a large mixing bowl or fine-mesh strainer.
- Initial Cold Rinse: Cover rice with cold tap water. Swirl gently with your fingers in a circular motion for 10–15 seconds. The water will instantly turn milky white. Drain off the cloudy water immediately.
- Gently Agitate & Repeat: Refill with cold water and gently polish the rice grains by swirling them underwater. Drain and repeat this process 4 to 5 times.
- Check Clarity: By the 4th or 5th rinse, the water should be almost completely clear (a faint, slight haze is normal).
- Drain Thoroughly: Pour rice into a fine mesh strainer and let it drain completely for 10–15 minutes before cooking.
How to Cook Sushi Rice
You can cook Japanese short-grain rice using whichever kitchen vessel you prefer.
Method 1: Rice Cooker (Easiest & Most Consistent)
- Add rinsed and drained rice to the inner pot of your rice cooker.
- Add 2 cups of cold water (or fill to the “Sushi Rice” / “White Rice” 2-cup line). If using kombu, rest it gently on top of the rice.
- Allow the rice to soak in the water for 15–20 minutes before pressing start (this allows grains to hydrate evenly to the center).
- Close lid and select the standard “White Rice” or “Sushi Rice” setting.
- Once cooked, keep the lid closed and let the rice steam undisturbed on “Warm” for 10 to 15 minutes.
Method 2: Stovetop (Classic Method)
- In a heavy-bottomed saucepan or Dutch oven, combine rinsed rice and 2 cups of cold water (plus kombu if using).
- Let soak for 15–20 minutes before turning on heat.
- Bring to a rolling boil over medium-high heat uncovered.
- Once boiling, cover immediately with a tight-fitting lid, turn heat down to low, and cook for 15 minutes (do not lift lid!).
- Remove pot from heat (keep lid closed) and let steam for 10–15 minutes.
Method 3: Instant Pot / Pressure Cooker
- Combine rinsed rice and 2 cups of cold water in the inner pot (1:1 ratio).
- Secure lid, set valve to “Sealing,” and cook on HIGH PRESSURE for 4 minutes.
- Allow a 10-minute Natural Pressure Release (NPR), then release any remaining steam manually.
How to Make Sushi Vinegar (Awase-zu)
While your rice is steaming, prepare the vinegar seasoning:
- In a small saucepan, combine ¼ cup rice vinegar, 2 tablespoons sugar, and 1 teaspoon sea salt.
- Place over low heat for 1–2 minutes, stirring constantly until sugar and salt fully dissolve. Do not boil, as boiling evaporates the acetic acid and alters the bright flavor profile.
- Remove from heat and allow seasoning liquid to cool down to room temperature.
How to Season & Cool Sushi Rice
Seasoning rice while it is piping hot allows the grains to open up and drink in the vinegar mixture evenly.
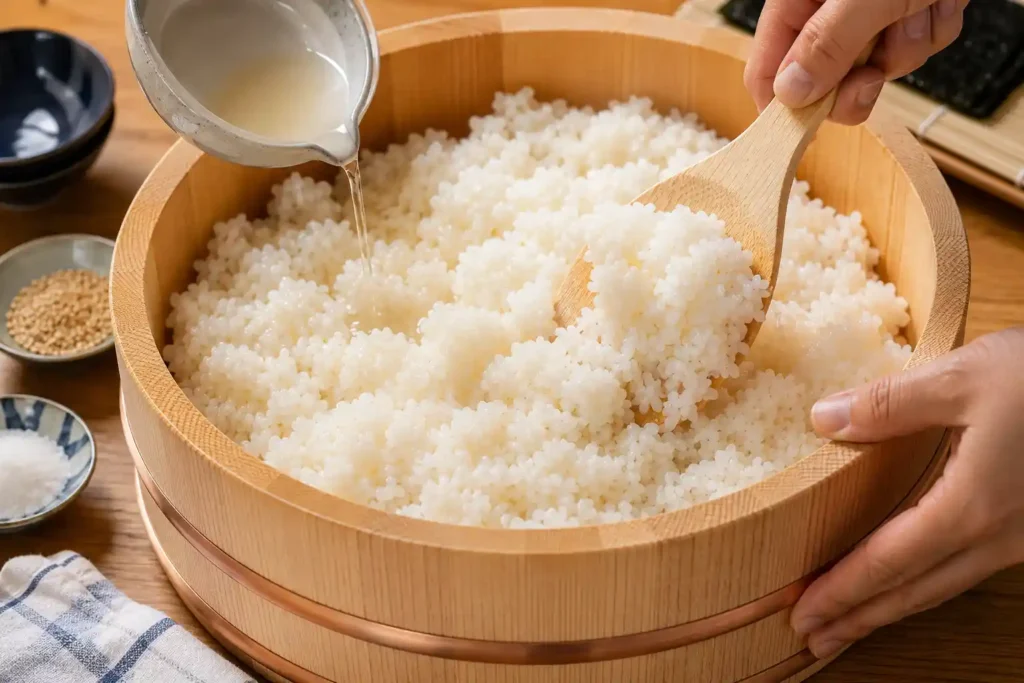
- Transfer Hot Rice: Discard kombu strip. Immediately scoop hot cooked rice out into a wide, non-metallic container (a wooden hangiri, glass baking dish, or wide wooden bowl).
- Drizzle Seasoning: Drizzle the room-temperature awase-zu evenly over a wooden paddle so it disperses gently across all the hot rice.
- Slice & Fold (Do Not Stir!): Using a cutting motion with your wooden paddle, slice through the rice at a 45-degree angle to break up clumps. Gently lift and turn the rice over. Never stir or mash the rice in circles, or you will rupture the starch cells and turn it into paste.
- Fan While Folding: Simultaneously fan the rice using a paper card, electric desk fan, or folded newspaper while folding. Fanning rapidly cools the exterior of the grains, locking in moisture and bestowing a signature crystal-clear shine.
- Cool to Body Temperature: Continue folding and fanning for 3–5 minutes until rice cools down to approximately body temperature (around 86°F–90°F / 30°C–32°C).
- Cover with Damp Towel: Cover the bowl with a clean, damp kitchen towel to prevent the top layer from drying out while you assemble your sushi rolls or bowls.
Pro Tips for Perfect Sushi Rice
- The Power of Pre-Soaking: Allowing raw rice grains to soak in cold water for 15–20 minutes before applying heat allows moisture to penetrate deep into the core. This guarantees tender, evenly cooked grains without hard centers.
- Always Use Non-Metallic Containers: Stainless steel or aluminum bowls react with vinegar acid, imparting a subtle metallic twang to your delicate rice. Glass, ceramic, or traditional wooden containers are best.
- Season When Hot, Serve When Warm: Never add cold vinegar mix to lukewarm or cold rice—it won’t absorb properly. Conversely, never assemble raw fish rolls on piping hot rice, or you will cook the fish!
- Keep Hands Damp: When handling seasoned sticky rice, dip your hands into a small bowl of water mixed with a splash of rice vinegar (Tezu hand water) to prevent grains from sticking to your fingers.
Common Mistakes to Avoid
- Using Pre-Seasoned Rice Vinegar: Bottles labeled “Seasoned Rice Vinegar” or “Sushi Vinegar” already contain high amounts of sugar and salt. Using them alongside extra recipe sugar will render your rice unpleasantly sweet.
- Refrigerating Unrolled Rice: Placing warm, seasoned sushi rice into a refrigerator hardens the starches (retrogradation), causing grains to turn chalky and dry. Keep seasoned rice covered at room temperature for up to 6 hours.
- Stirring Rice Aggressively: Mashing hot rice with a spoon destroys the integrity of the grain, yielding a mushy glue rather than light, separate grains.
- Using Too Much Water: Short-grain rice absorbs water quickly. Adding too much liquid during cooking produces a watery, wet mess that can’t absorb the vinegar seasoning.
Flavor Variations
- Brown Sushi Rice: Swap white short-grain for short-grain brown rice. Increase water to 2½ cups and cook for 45 minutes on the stovetop.
- Sweet Dessert Sushi Rice: Increase sugar to 3 tablespoons and fold in a splash of coconut milk for dessert sushi rolls topped with fresh mango and berries.
- Low-Sugar / Keto-Friendly: Replace granulated sugar with allulose or erythritol sweetener for a low-glycemic vinegar seasoning.
- Furikake Seasoned Rice: Sprinkle 1–2 tablespoons of savory furikake (Japanese rice seasoning containing sesame seeds, nori flakes, and sea salt) into seasoned rice for extra color and crunch.
Ways to Use Sushi Rice
Once you have mastered this easy sushi rice recipe, use it as a versatile base across dozens of delicious meals:
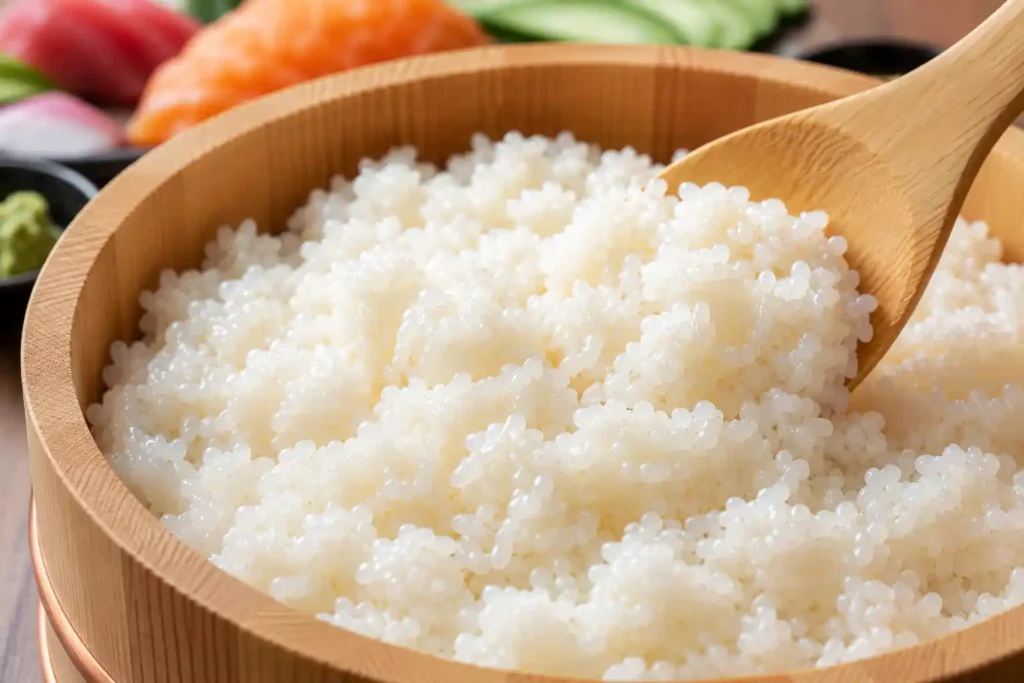
- Classic Rolls (Maki): California rolls, spicy salmon rolls, dragon rolls, and avocado-cucumber rolls.
- Hand Rolls (Temaki): Cone-shaped nori sheets stuffed with warm sushi rice, fresh fish, microgreens, and spicy mayo.
- Nigiri Sushi: Hand-pressed oval mounds of warm sushi rice topped with thin slices of raw sashimi-grade tuna or salmon.
- Ahi Tuna & Salmon Poke Bowls: A vibrant base of rice topped with cubed marinated fish, edamame, seaweed salad, and avocado.
- Onigiri (Japanese Rice Balls): Triangular stuffed rice balls wrapped in nori and filled with salted salmon, umeboshi, or spicy tuna.
- Chirashi Bowls: Scatterings of fresh sashimi, tamagoyaki (egg omelet), and pickled vegetables served over a bed of seasoned rice.
What to Serve with Sushi Rice
Complete your homemade Japanese feast by pairing your rice dishes with these complementary sides:
- Starters & Soups: Traditional Miso Soup, warm steamed Edamame tossed with coarse sea salt, and crisp Seaweed Salad.
- Crispy Fried Mains: Vegetable or Shrimp Tempura served with tempura dipping sauce, or crisp Chicken Katsu.
- Grilled Proteins: Teriyaki Salmon, Teriyaki Chicken, or grilled unagi (eel).
- Classic Condiments: Pickled pink ginger (Gari), high-quality soy sauce or tamari, and real grated wasabi paste.
Storage & Meal Prep Instructions
Short-Term Room Temperature Storage (Same Day)
Seasoned sushi rice is best enjoyed the day it is made. Keep it in a wide bowl covered tightly with a damp, clean dish towel at room temperature for up to 6 hours. Do not refrigerate it before assembling your rolls!
Refrigerator Storage (1 to 2 Days)
If you have leftover seasoned rice, store it in an airtight glass container in the fridge for up to 2 days. Note: Refrigeration hardens short-grain rice starches. To restore its tender texture, microwave leftovers covered with a damp paper towel for 20–30 seconds until warm and pliable again.
Freezing Instructions (Up to 1 Month)
- Scoop individual portions of fresh, lukewarm seasoned rice onto plastic wrap.
- Wrap tightly into flat packages and place inside a freezer-safe zip-top bag.
- Freeze for up to 1 month.
- To Reheat: Microwave frozen rice packages on high for 1½ to 2 minutes until steaming hot. Let cool down to body temperature before making bowls or rolls.
Frequently Asked Questions
1. Can I use Jasmine or Basmati rice to make sushi?
No. Jasmine and Basmati are long-grain rice varieties high in amylose starch, meaning they cook up dry, fluffy, and separate. They will not stick together to hold sushi rolls or nigiri shapes.
2. Can I use Calrose rice for sushi?
Yes! Calrose medium-grain rice is widely available in most grocery stores and works as a budget-friendly substitute for short-grain Japanese rice.
3. Why is my sushi rice mushy?
Mushy rice is caused by either failing to wash away loose starches before cooking, adding too much water, or aggressively mashing the rice while stirring in the vinegar.
4. Why is my sushi rice hard or crunchy in the middle?
Hard rice means it was undercooked, insufficient water was used, or you skipped the 15-minute resting/steaming phase after cooking.
5. Can I use apple cider vinegar instead of rice vinegar?
Apple cider vinegar can work in an emergency, but it possesses a fruity, pungent apple flavor profile. Stick to plain, unseasoned rice vinegar for authentic flavor.
6. Can I skip the sugar in the rice seasoning?
You can reduce the sugar, but skipping it completely yields sharp, overly acidic rice. The sugar balances the tartness of the vinegar.
7. How far in advance can I make sushi rice?
Make seasoned sushi rice 1 to 4 hours before serving. Keep it covered at room temperature under a damp towel.
8. What makes sushi rice glossy and shiny?
Fanning the hot rice while folding in the room-temperature vinegar seasoning evaporates surface moisture quickly, coating each grain in a shiny protective glaze.
9. Can I make sushi rice in an Instant Pot?
Yes! Combine rinsed rice and water in a 1:1 ratio. Cook on HIGH PRESSURE for 4 minutes, followed by a 10-minute natural pressure release.
10. Why do I need to soak the rice before cooking?
Soaking allows moisture to reach the core of the raw grain, ensuring even cooking throughout without leaving a hard center.
11. Is sushi rice healthy?
Short-grain white rice provides fat-free, easily digestible complex carbohydrates that offer clean energy.
12. Can I use brown short-grain rice for sushi?
Yes, short-grain brown rice works for a higher-fiber alternative. Increase cooking liquid to 2½ cups and cook for 45 minutes.
13. What is kombu, and do I have to use it?
Kombu is dried kelp used in Japanese stock making. Adding a small strip during cooking imparts natural umami depth to the rice, but it is completely optional.
14. How much cooked sushi rice does 2 cups of dry rice make?
Two cups of dry short-grain rice yields approximately 4 to 4½ cups of cooked seasoned sushi rice—enough for about 6 to 8 full sushi rolls.
15. Can I eat sushi rice cold?
Sushi rice should be eaten warm or at body temperature. Cold sushi rice feels hard, dry, and loses its delicate flavor profile.
Expert Tips
- Adjust Seasoning to Preference: Standard Japanese sushi seasoning uses a 4:2:1 ratio (4 parts vinegar, 2 parts sugar, 1 part salt). Feel free to adjust slightly if you prefer sharper or sweeter rice.
- The “Tezu” Trick: Keep a small bowl filled with 1 cup water and 2 tablespoons rice vinegar near your rolling station. Dipping your fingertips into this mixture prevents sticky starch build-up on your hands while shaping rolls.
- Never Drain Cooked Rice: Unlike pasta or boiled long-grain rice, sushi rice absorbs all liquid in the pot during cooking. Never strain cooked rice!
Printable Recipe Card
================================================================================
                    AUTHENTIC JAPANESE SUSHI RICE (SUMESHI)
================================================================================
Prep Time: 20 Mins  |  Cook Time: 20 Mins  |  Servings: 4 Cups  |  Calories: ~240 kcal

INGREDIENTS:
  Rice Base:
  • 2 cups Japanese Short-Grain Rice (Koshihikari or Calrose)
  • 2 cups Cold Water (filtered preferred)
  • 1 piece (2x2 inch) Dried Kombu (Kelp) - Optional

  Vinegar Seasoning (Awase-zu):
  • ¼ cup Unseasoned Rice Vinegar
  • 2 tbsp Granulated Sugar
  • 1 tsp Fine Sea Salt

INSTRUCTIONS:
  1. RINSE: Place rice in a strainer. Rinse under cold tap water 4-5 times, gently
     swirling until water runs clear. Drain for 10 minutes.
  2. SOAK: Combine drained rice, water, and optional kombu in your pot/rice cooker.
     Let soak for 15-20 minutes.
  3. COOK:
     - Rice Cooker: Cook on standard "White/Sushi Rice" setting.
     - Stovetop: Bring to boil, cover tightly, reduce heat to low for 15 mins.
  4. STEAM: Remove from heat (keep lid closed) and let steam for 10-15 minutes.
  5. SEASONING: Heat vinegar, sugar, and salt in a pan over low heat until dissolved.
     Do not boil. Cool to room temperature.
  6. FOLD & FAN: Transfer hot rice to a wide wooden or glass bowl. Discard kombu.
     Drizzle seasoning over paddle. Fold gently using cutting motions while fanning.
  7. COOL: Cool to body temperature. Keep covered with a damp towel until serving.

================================================================================
Conclusion
Creating perfect sushi rice at home is an empowering culinary skill that unlocks a world of fresh, authentic Japanese meals right in your own kitchen. By choosing short-grain Japanese rice, rinsing away loose starches, steaming gently, and folding in warm awase-zu seasoning, you ensure every sushi roll, poke bowl, and hand roll turns out completely delicious.
Put this recipe to work tonight! Try making homemade California rolls or a colorful salmon poke bowl, and leave a comment below to share your favorite sushi toppings!