
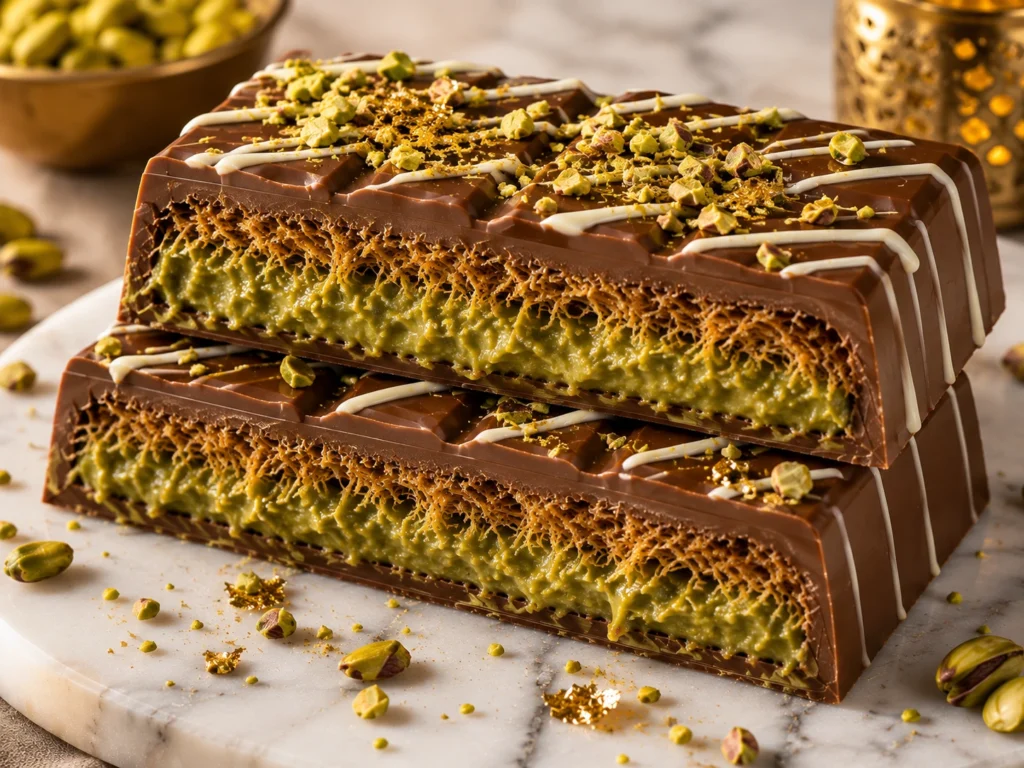
The first time I bit into a real homemade Dubai chocolate bar, the sound was unforgettable, an audible, shattering crunch followed immediately by an ultra-creamy, nutty burst of sweet pistachio.
Created by FIX Dessert Chocolatier in Dubai under the name “Can’t Get Knafeh of It,” this decadent confection quickly transformed into an absolute global phenomenon across social media. However, ordering imported bars can cost upwards of $20 to $40 per bar (if you can even find them in stock!).
After testing several batches in my kitchen to dial in the exact ratio of toasted kataifi, pistachio cream, and tahini, I can confidently tell you that making this at home is not only surprisingly simple, but it tastes vastly superior to mass-shipped alternatives. In this guide, I will walk you through my foolproof, step-by-step method to recreate this viral luxury treat right in your own kitchen for a fraction of the cost.
Why You’ll Love This Dubai Chocolate Recipe
- Viral Homemade Luxury: Enjoy the internet’s most sought-after dessert without paying exorbitant import fees or waiting weeks for shipping.
- Addictive Crispy & Creamy Texture: The sharp contrast between shatteringly crispy kataifi pastry and velvety pistachio cream creates a unique sensory experience.
- Rich, Balanced Chocolate Flavor: Pairing high-quality milk chocolate with a hint of dark chocolate keeps the sweetness perfectly balanced.
- Infinitely Customizable: Adjust the ratio of crunch to cream, tweak the chocolate darkness, or add your favorite nut toppings.
- The Ultimate Edible Gift: Wrapped in foil or presented in a clear box, these bars look like high-end artisan confections from a boutique chocolatier.
- Beginner Friendly: No complex candy-making skills or sugar thermometers required—just simple melting, pan-toasting, and assembly.
- No-Bake Dessert: Keep your oven off! Aside from a quick 5-minute stovetop toast for the pastry, the refrigerator does all the heavy lifting.
Dubai Chocolate Recipe Card
- Prep Time: 20 minutes
- Cook Time: 10 minutes
- Chill Time: 45 minutes
- Total Time: 1 hour 15 minutes
- Servings: 2 large chocolate bars (approx. 8–10 portions)
- Calories: 380 kcal per portion
- Course: Dessert / Candy
- Cuisine: Middle Eastern-Inspired / American Fusion
- Author: DishFry Culinary Team
Ingredients for Dubai Chocolate Recipe
Chocolate Shell
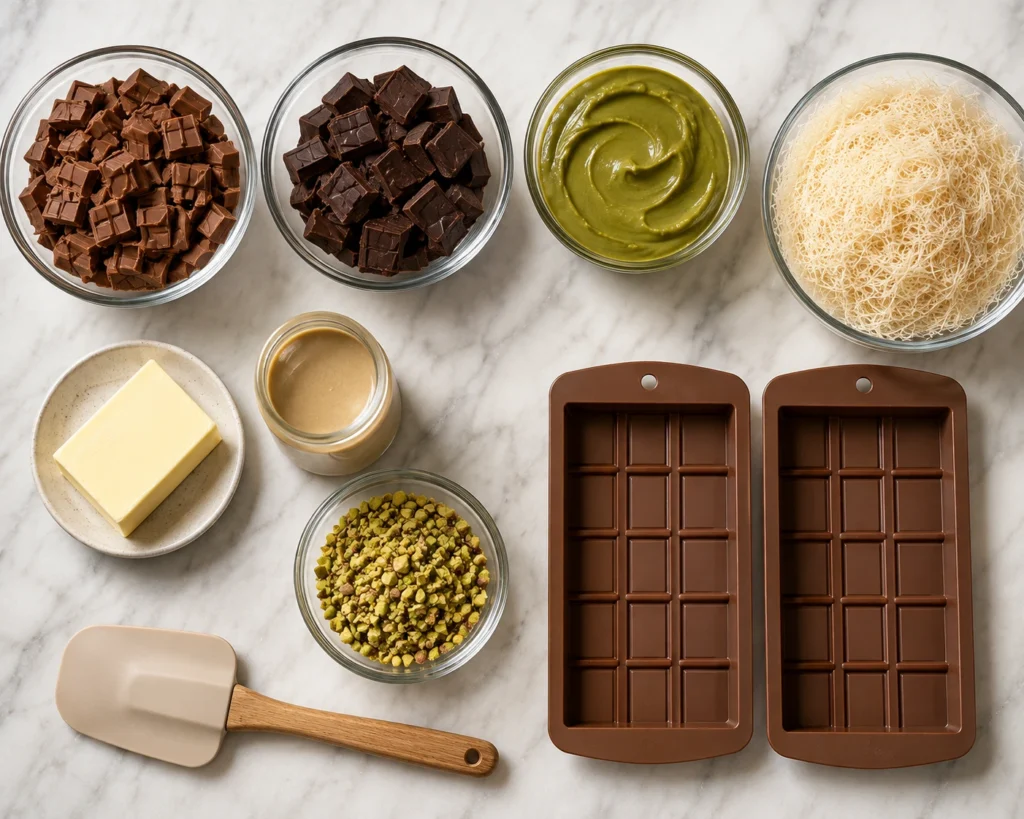
- 10 oz (280 g) high-quality milk chocolate (chopped or wafers)
- 2 oz (60 g) high-quality dark chocolate (optional, for tempering or mixed shell)
- 1 oz (30 g) white chocolate chips or melted white chocolate (optional, for artistic surface drizzle)
Filling
- 5 oz (140 g) kataifi pastry (shredded phyllo dough), finely chopped
- 2 ½ tablespoons (35 g) unsalted butter
- ¾ cup (200 g) smooth pistachio cream (pistachio spread)
- 1 ½ tablespoons (25 g) tahini (sesame paste)
- 1 pinch fine sea salt
Ingredient Notes
To recreate that signature restaurant-quality texture and rich flavor profile, each component requires careful selection:
- Kataifi Pastry (Shredded Phyllo): Found in the freezer section of Mediterranean, Middle Eastern, or specialty grocery stores. It consists of paper-thin strands of dough. You must chop it into tiny ½-inch pieces so it mixes evenly into the filling.
- Pistachio Cream: Look for Italian pistachio spread (Crema al Pistacchio) or Middle Eastern pistachio paste. It should be sweet, creamy, and vibrant green. Avoid 100% pure raw nut butter unless you plan to add powdered sugar, as pure nut butter lacks sweetness.
- Tahini (Sesame Paste): Do not skip this! A small splash of smooth sesame paste cuts through the intense sweetness of the pistachio cream and adds an authentic Middle Eastern depth of flavor.
- Chocolate Selection: Choose high-quality couverture chocolate bars or baking wafers containing real cocoa butter (such as Valrhona, Guittard, or Lindt) rather than compound chocolate chips. Real cocoa butter provides that luxurious snap and glossy sheen.
- Unsalted Butter: Clarified butter or standard unsalted butter toasts the kataifi dough evenly to a golden-brown finish without adding excess moisture.
Kitchen Equipment
Before starting your chocolate project, gather these essential kitchen tools:
- Deep Silicone Chocolate Bar Molds: Look for deep, thick-bar silicone molds (at least ¾-inch deep) so they can hold a substantial layer of filling.
- Large Non-Stick Frying Pan or Skillet: For evenly browning the shredded kataifi.
- Heatproof Glass Bowls: For melting chocolate using a microwave or a double boiler.
- Rubber Silicone Spatula: For gentle stirring and smooth folding.
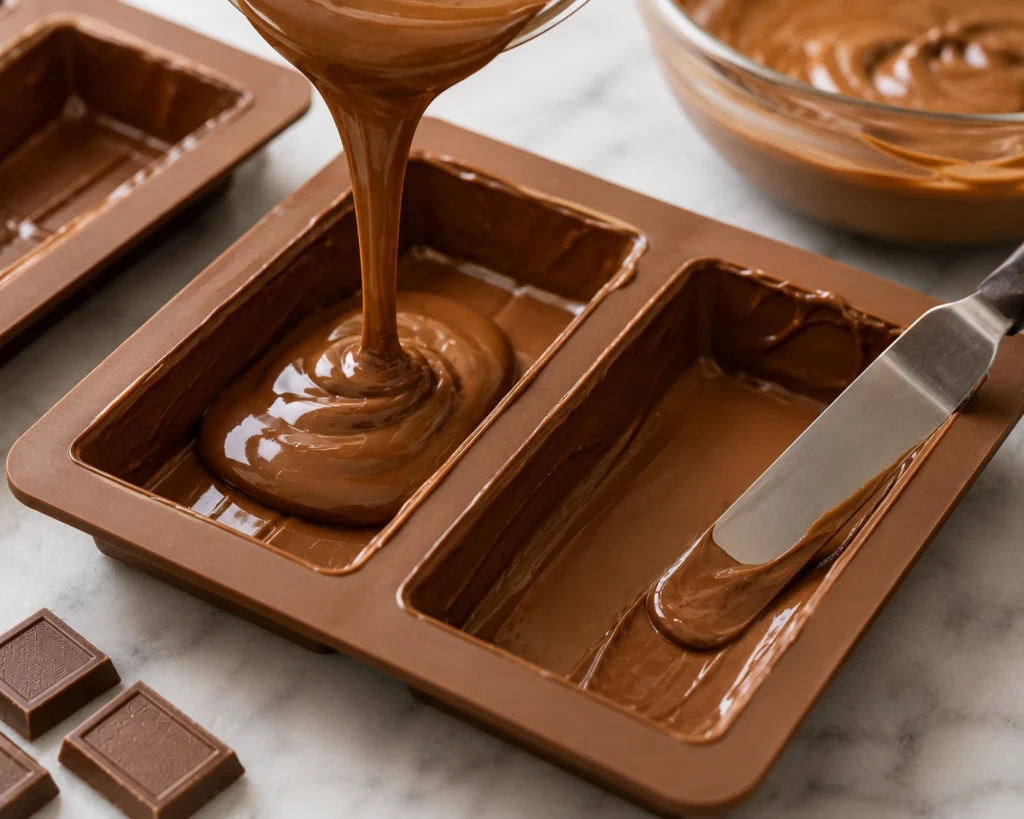
- Small Offset Spatula or Back of a Spoon: Essential for spreading the chocolate thinly along the mold walls and sealing the bases.
- Kitchen Scale: For accurate weighing of chocolate and pastry ratios.
How to Make Dubai Chocolate
Step 1: Toast the Kataifi Pastry
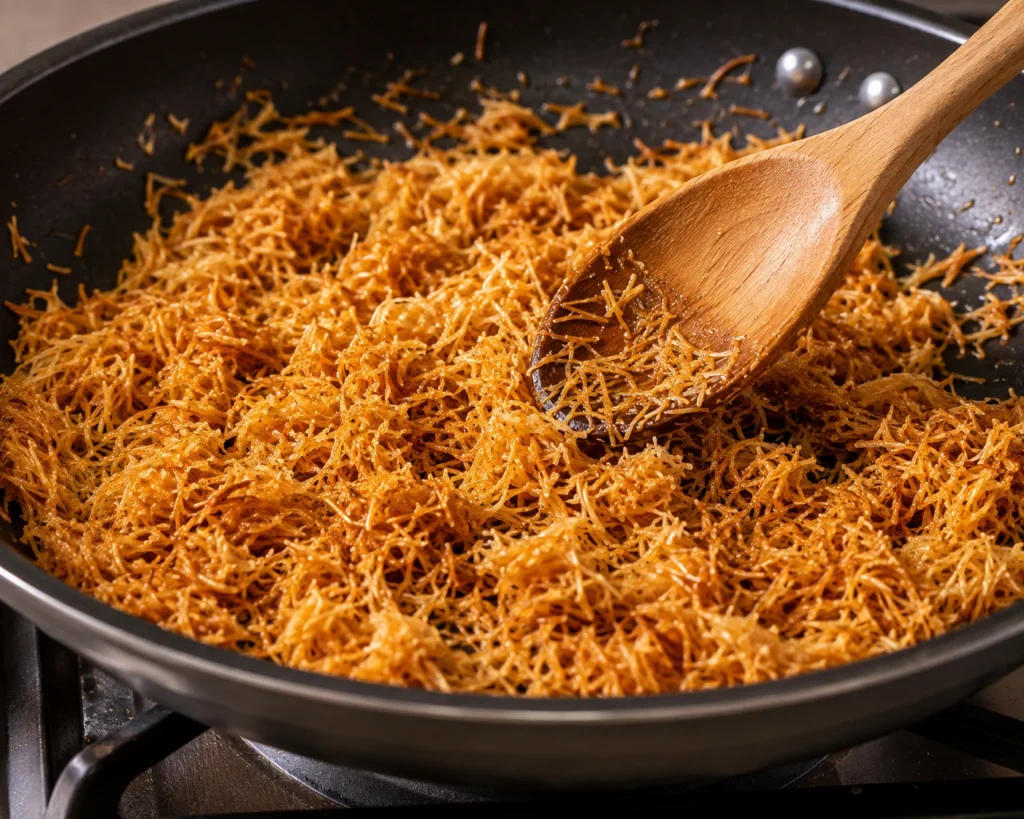
Finely chop your thawed kataifi pastry into tiny ½-inch pieces using a sharp chef’s knife. Melt 2 ½ tablespoons of unsalted butter in a non-stick skillet over medium-low heat. Add the chopped kataifi and stir continuously for 8 to 10 minutes. Cook until the pastry turns a uniform deep golden-brown and feels completely crisp and dry to the touch. Remove from heat immediately and transfer to a bowl to prevent carryover burning.
Step 2: Prepare the Pistachio Kunafa Filling
Allow the toasted kataifi to cool to room temperature for 5 minutes. Add ¾ cup of smooth pistachio cream, 1 ½ tablespoons of tahini, and a small pinch of fine sea salt directly into the toasted pastry. Stir thoroughly with a spatula until every crispy strand is coated in lush green cream. The mixture should hold together well while remaining thick and crunchy.

Step 3: Melt the Chocolate
Chop your milk chocolate (and dark chocolate, if using) finely. Place ⅔ of the chocolate into a dry, heatproof glass bowl. Microwave in 20-second bursts, stirring thoroughly between each interval, until completely smooth and melted (or melt over a double boiler). Add the remaining ⅓ of un-melted chopped chocolate and stir continuously until smooth to help temper the chocolate for a shiny finish.
Step 4: Coat the Chocolate Molds
If desired, flick a tiny amount of melted white chocolate across the bottom of your clean silicone molds using a fork or spoon for an artistic pattern, then let it set for 2 minutes. Next, pour approximately 2 to 3 tablespoons of melted milk chocolate into each cavity. Use a pastry brush or offset spatula to sweep the chocolate evenly up the sides and into every corner of the mold, creating a hollow chocolate shell.
Step 5: First Chill (Set the Shell)
Place the coated silicone molds onto a flat tray and slide them into the refrigerator for 10 to 12 minutes (or the freezer for 5 to 7 minutes) until the chocolate shell is completely firm and set.
Step 6: Pack in the Pistachio Kunafa Filling
Remove the molds from the fridge. Spoon a generous amount of your pistachio-kunafa mixture into the center of each hardened chocolate shell. Press the filling down gently with the back of a spoon to compact it, leaving a small ⅛-inch rim at the top edge of the mold so you can seal the base with chocolate.
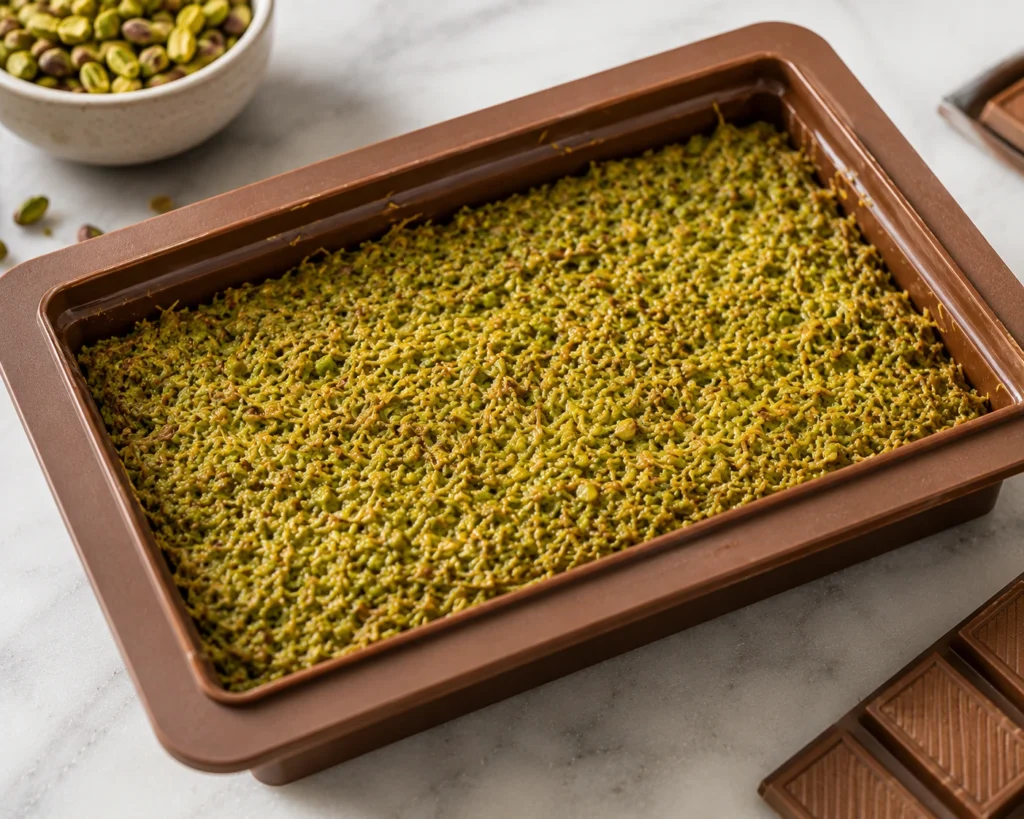
Step 7: Seal with the Bottom Chocolate Layer
Reheat your remaining melted chocolate briefly if it has thickened. Pour a fresh layer of melted chocolate over the pistachio filling in each mold. Use an offset spatula to smooth the top flat and scrape away any excess chocolate along the edges for a clean line.
Step 8: Final Chill
Return the molds to the refrigerator for 30 to 40 minutes until the chocolate is completely hardened, cool to the touch, and firmly set through to the core.
Step 9: Unmold the Chocolate Bars
Carefully peel the flexible silicone mold away from the edges of the chocolate bars, then gently push from the bottom to pop out your glossy, perfectly formed Dubai chocolate bars.
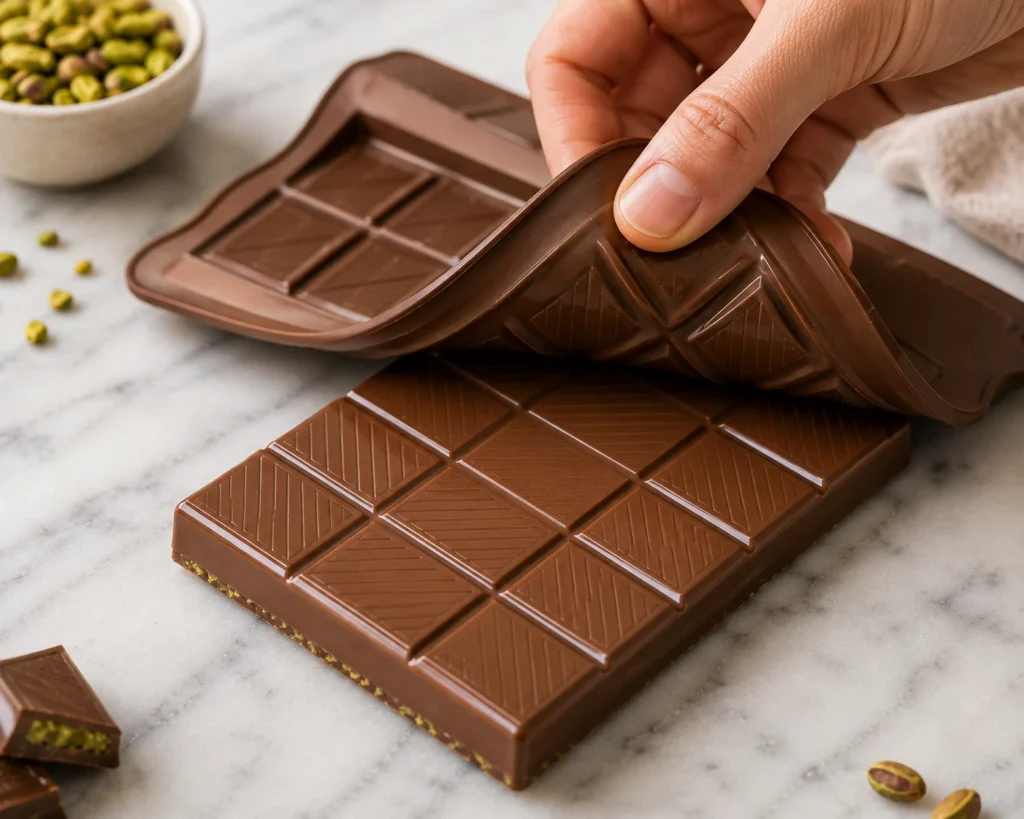
Step 10: Decorate and Serve
Garnish the top of your glossy bars with a light drizzle of melted white chocolate, a sprinkle of bright green crushed pistachios, and a touch of edible gold leaf. Slice with a sharp warm knife and serve!
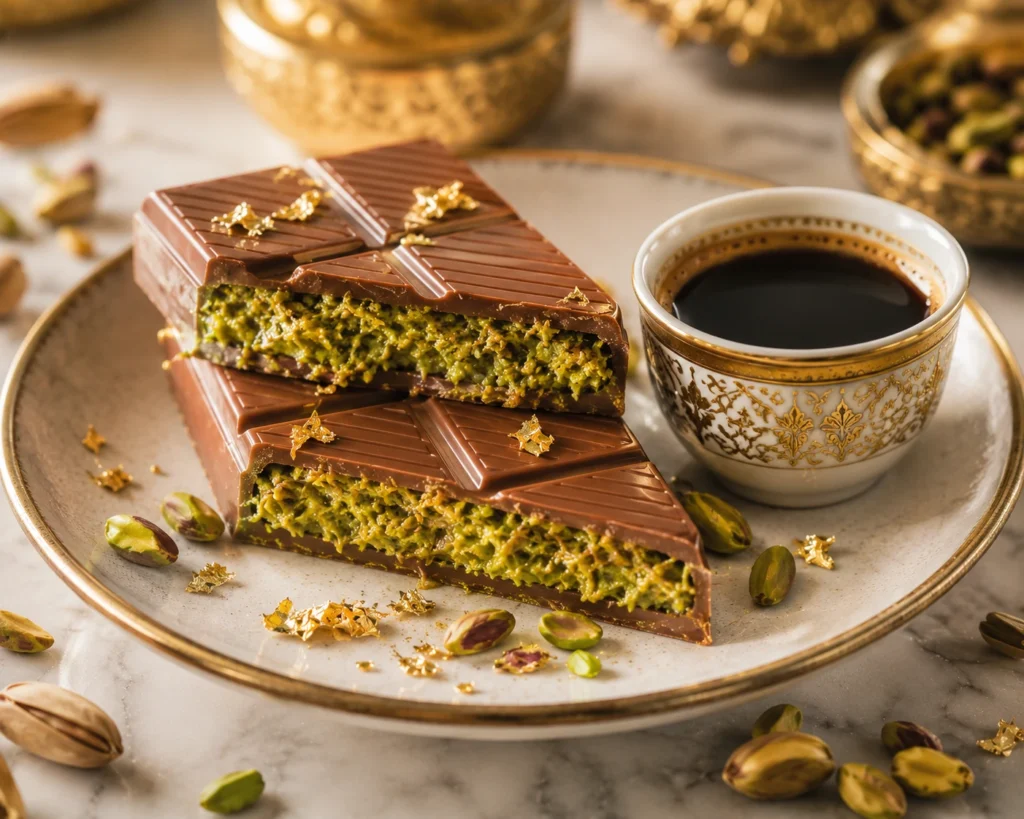
Expert Tips for Success
- Toast the Kataifi Thoroughly: Do not rush the pan-toasting step! If the kataifi is under-cooked or pale, it will turn soggy once mixed with the pistachio cream. It must be a rich, golden amber color for maximum crunch.
- Keep Water Far Away: A single drop of water will instantly “seize” your melting chocolate, turning it into a grainy, clumpy mess. Ensure all bowls, spatulas, and molds are bone-dry.
- Chill Between Every Layer: Rushing the chilling process causes warm filling to bleed into soft chocolate, ruining the clean, distinct layers of the final bar.
- Use Flexible Silicone Molds: Rigid plastic candy molds make removing thick, heavy stuffed chocolate bars difficult without cracking the shell. Silicone allows you to peel the mold away effortlessly.
- Slice with a Warm Knife: To get clean, dramatic cuts that showcase the green filling without shattering the chocolate shell, run your chef’s knife under hot water for 10 seconds, dry it completely with a towel, and slice through the bar in one firm motion.
Common Mistakes to Avoid
- Burning the Pastry: Kataifi contains tiny, thin dough strands that can go from golden to burnt in seconds. Keep your heat on medium-low and stir constantly.
- Overheating the Chocolate: Heating chocolate above 115°F (46°C) breaks its emulsion, making it thick, dull, and oily. Heat slowly and stir often.
- Filling the Shell Too High: Overfilling the molds leaves no room for the top layer of chocolate, making it impossible to seal the bar properly and causing the filling to spill out.
- Using Pure Raw Pistachio Butter Without Sweetener: Pure 100% pistachio paste contains no sugar and can taste bitter. Ensure you are using sweetened pistachio cream/spread, or add 2 to 3 tablespoons of powdered sugar if using pure paste.
- Skipping the Tahini: Leaving out tahini results in a flat, cloyingly sweet filling. The tiny bit of sesame paste provides essential balance.
Recipe Variations
- White Chocolate Dubai Chocolate: Swap the milk chocolate shell for high-quality white chocolate to highlight the bright green color of the pistachio filling.
- Dark Chocolate Version: Use 70% dark chocolate for the shell to create an intense, bittersweet contrast against the sweet, nutty filling.
- Nutella & Hazelnut Twist: Replace half of the pistachio cream with Nutella and top with toasted chopped hazelnuts for a chocolate-hazelnut crunch bar.
- Lotus Biscoff Crunch: Substitute the pistachio cream with smooth Lotus Biscoff spread and add crushed speculoos cookies alongside the toasted kataifi.
- Extra-Nutty Version: Mix ¼ cup of finely chopped toasted pistachios directly into the kataifi filling alongside the cream for double the crunch.
Best Toppings & Garnishes
- Crushed Raw Pistachios: Adds a vibrant green color burst on top of the dark shell.
- Edible Gold Leaf: Gives your homemade bar an authentic, ultra-luxurious Dubai aesthetic.
- White Chocolate Drizzle: Creates an artistic contrast across the smooth top.
- Freeze-Dried Raspberries: Provides a tangy, fruity tartness that balances rich chocolate.
- Flaky Sea Salt: A tiny pinch of Maldon salt on top cuts through sweetness beautifully.
What to Serve With Dubai Chocolate
- Arabic Coffee (Qahwa): Lightly roasted coffee infused with cardamom balances the rich sweet bar perfectly.
- Turkish Coffee: Dark, thick, intensely brewed coffee makes an ideal pairing for rich chocolate.
- Espresso or Cappuccino: A shot of dark roast coffee cuts through the sweetness of pistachio cream.
- Fresh Mint Tea: Steeped green tea with fresh mint leaves cleanses the palate between rich bites.
- Vanilla Bean Ice Cream: Serve a warm slice of the bar over a scoop of cold vanilla ice cream.
Storage Instructions
Room Temperature
Store finished chocolate bars in a cool, dry pantry (below 68°F / 20°C) inside an airtight container for up to 3 days. If your kitchen is warm or humid, store them in the fridge to prevent the shell from melting.
Refrigerator
Keep your bars stored in an airtight container lined with parchment paper in the fridge for up to 2 weeks.
Pro Tip: Take the bar out of the fridge 10 minutes before eating to allow the chocolate shell to soften slightly while keeping the interior filling cool and crisp!
Freezer
Wrap individual bars tightly in parchment paper, followed by a layer of plastic wrap and aluminum foil. Freeze for up to 2 months. Thaw in the refrigerator overnight before enjoying.
Can You Make It Ahead?
Yes! Dubai chocolate bars are one of the best make-ahead sweet treats. Because the filling contains low-moisture toasted pastry and oil-based nut cream, the internal kataifi retains its signature shatter-crunch for up to 7 to 10 days without softening. Prepare a double batch up to a week in advance for party favors, holiday gifts, or dinner party desserts.
Nutrition Information
Serving Size: 1 portion (approx. 1/4th of a large stuffed bar)
- Calories: 380 kcal
- Total Fat: 24 g
- Saturated Fat: 11 g
- Protein: 6 g
- Carbohydrates: 36 g
- Sugar: 26 g
- Fiber: 2.5 g
- Sodium: 65 mg
Frequently Asked Questions
What is Dubai chocolate?
Dubai chocolate is a viral stuffed chocolate bar filled with toasted, buttered kataifi pastry (shredded phyllo), smooth pistachio cream, and tahini, encased inside a rich milk chocolate shell.
Why is it called Dubai chocolate?
It was created by Fix Dessert Chocolatier, a boutique dessert shop based in Dubai, UAE. Their handcrafted stuffed bar went viral on TikTok and Instagram, earning it the nickname “Dubai Chocolate.”
Can I make it without kataifi pastry?
While kataifi provides the authentic crunch, you can substitute it in a pinch with crushed toasted vermicelli noodles, crispy puffed rice cereal, or crushed toasted phyllo sheets.
Where can I buy pistachio cream?
You can find pistachio cream (pistachio spread) at Italian specialty markets, Middle Eastern grocery stores, gourmet supermarket chains, or online via major retailers.
Do I need to temper the chocolate?
Tempering isn’t strictly mandatory if you store the bars in the fridge, but using real chocolate with cocoa butter (or adding a bit of un-melted chocolate back into warm melted chocolate) gives your bar a beautiful shine and crisp snap at room temperature.
How long does homemade Dubai chocolate last?
When kept in an airtight container in the refrigerator, it stays fresh, glossy, and crisp for up to 2 weeks.
Why isn’t my chocolate shiny?
If chocolate is overheated, cooled too slowly, or exposed to humidity, cocoa butter crystals separate, resulting in a dull surface or white streaks (known as chocolate bloom). Keeping your tools dry and cooling the molds in the fridge prevents this.
Pro Tips
- Finely Chop Your Pastry: Take extra time to chop your kataifi into tiny pieces before cooking. Smaller pieces integrate into the pistachio cream far better, ensuring a dense, uniform crunch in every bite.
- Keep Equipment 100% Dry: Water is the ultimate enemy of melted chocolate! Ensure all spoons, bowls, and silicone molds are completely dry before starting.
- Compact the Filling Firmly: Use the back of a small spoon to pack the pistachio filling into the mold corners. This eliminates air pockets and creates a beautiful cross-section when sliced.
- Store Cool to Protect the Crunch: Moisture and heat soften toasted kataifi over time. Keep your bars stored in a cool, airtight space to preserve that iconic crunch.
Dubai Chocolate vs. Regular Chocolate Bars
| Feature | Dubai Chocolate Bar | Regular Chocolate Bar |
| Interior Filling | Thick layer of toasted kataifi, pistachio cream, & tahini | Plain chocolate, solid caramel, nougat, or whole nuts |
| Texture Experience | Shatteringly crispy combined with ultra-creamy | Smooth, chewy, or soft throughout |
| Flavor Profile | Nutty pistachio, toasted pastry, sesame, & sweet milk chocolate | Single-note cocoa or simple caramel-vanilla notes |
| Bar Thickness | Deep, thick luxury bar (approx. ¾ to 1 inch thick) | Thin or medium standard slab (approx. ¼ to ½ inch) |
| Origin / Style | Middle Eastern dessert fusion | Western confectionery standard |
Related Recipes
Expand your dessert making with these delicious homemade recipes: