
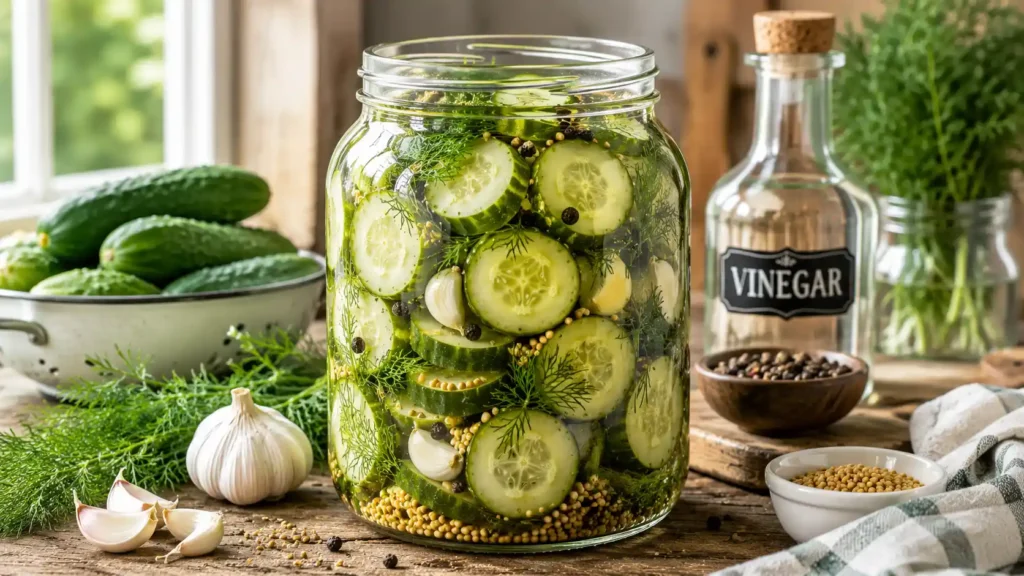
If you have ever been intimidated by traditional canning—the boiling water baths, sterilization rituals, pressure gauges, and fear of unsealed jars—it is time to discover the effortless world of refrigerator pickle recipes. Making homemade refrigerator pickles is one of the easiest, most rewarding food preservation projects you can tackle in your home kitchen. There is zero canning required, no special equipment needed, and the active prep time takes a swift 10 minutes.
Unlike cooked canned pickles, which often turn out soft or mushy due to the intense heat processing, quick pickles (also known as refrigerator pickles) retain their vibrant green color and a shatteringly crisp texture. By pouring a hot, seasoned vinegar brine directly over raw, fresh cucumbers, garlic, and herbs, you gently cure the vegetables without destroying their natural snap.
Within 24 hours of resting in your fridge, these cucumbers transform into tangy, garlicky, ice-cold delights that rival any boutique artisan brand you find at gourmet markets. Whether you want to pile them onto juicy backyard burgers, slide them into turkey wraps, chop them into potato salads, or simply eat them straight from the jar as a low-calorie, healthy snack, this beginner-friendly recipe will quickly become a permanent staple in your refrigerator.
Quick Recipe Card
| Detail | Information |
| Recipe Name | Garlic Dill Refrigerator Pickles |
| Cuisine | American |
| Course | Side Dish / Condiment |
| Prep Time | 10 Minutes |
| Rest Time | 24 Hours |
| Total Time | 24 Hours 10 Minutes |
| Servings | 8 Servings (1 quart jar) |
| Calories | Approx. 20 kcal per serving |
| Difficulty | Very Easy / Beginner Friendly |
Why You’ll Love These Refrigerator Pickle Recipes
- No Canning Required: Forget hot water baths and sealing tests. Just pack a jar, pour hot brine, and slide it directly into the fridge!
- Shatteringly Crisp Texture: Because the cucumbers are never boiled or pressure-cooked, they stay dramatically crunchier than traditional store-bought canned pickles.
- Ready Overnight: While flavor develops best over 48 hours, these overnight refrigerator pickles are delightfully tangy and ready to eat in just 24 hours.
- Simple Pantry Ingredients: Made with basic household items—white vinegar, water, kosher salt, a touch of sugar, fresh garlic, and herbs.
- Budget-Friendly & Reduces Waste: A fantastic way to preserve an abundance of summer garden cucumbers before they go soft in your crisper drawer.
- Fully Customizable: Easily tweak the garlic level, sweetness, or heat factor with jalapeños and red pepper flakes to craft your dream pickle profile.
- Long Shelf Life: Stored cold in a sealed glass jar, these no canning cucumber pickles stay fresh and crunchy for 3 to 4 weeks.
Ingredients
To make classic garlic dill refrigerator pickles, gather these simple ingredients:
For the Cucumber & Herb Base:
- 1 pound Fresh Cucumbers: Preferably Kirby, Persian, or mini cocktail cucumbers (sliced into ⅓-inch coins, spears, or chips).
- 4–5 sprigs Fresh Dill: Whole heads of flowering dill or leafy green dill sprigs.
- 4 cloves Fresh Garlic: Peeled and lightly smashed to release their fragrant oils.
- 1 teaspoon Mustard Seeds: Whole yellow or brown mustard seeds.
- 1 teaspoon Whole Black Peppercorns: Adds earthy warmth.
- ½ teaspoon Red Pepper Flakes (Optional): For a subtle background kick.
For the Easy Pickling Brine:
- 1 cup Distilled White Vinegar (5% acidity): Provides the clean, sharp acidity essential for flavor and preservation.
- 1 cup Filtered Water: Dilutes the acidity to make the brine perfectly balanced.
- 1 tablespoon Kosher Salt: Non-iodized salt dissolves cleanly without clouding the brine.
- 1 tablespoon Granulated Sugar: Just enough to round out the harsh vinegar bite (does not make the pickles taste sweet).
Ingredient Notes & Smart Substitutions
Cucumbers
The type of cucumber you choose makes or breaks your pickles! Seek out firm, small, thin-skinned varieties. Avoid standard thick-skinned, waxed “slicing” cucumbers from the produce section whenever possible, as their high seed-to-flesh ratio and heavy wax coating result in soggy, watery pickles.
The Vinegar
Distilled white vinegar (5% acidity) is the industry standard for clean, bright refrigerator pickles with vinegar. It lets the green herbs and white garlic shine without changing their color. However, Apple Cider Vinegar is a wonderful alternative if you enjoy a slightly fruitier, milder, and more complex tartness.
Salt Choice
Always use Kosher Salt or Pickling Salt! Table salt contains added iodine and anti-caking compounds that turn the pickling brine cloudy and can impart a faint metallic taste. If using fine sea salt instead of coarse kosher salt, reduce the volume measurement by about 25% to avoid over-salting.
Dill Options
Fresh dill sprigs or fresh dill umbels (flowering heads) yield superior, aromatic flavor. If you cannot source fresh dill, you can substitute 1 tablespoon of dried dill weed or whole dill seeds, though the fresh herb aroma will be somewhat muted.
Best Cucumbers for Refrigerator Pickles
Understanding cucumber varieties ensures you always get maximum crunch:
| Cucumber Variety | Skin Thickness | Water Content | Crispness Rating | Best For |
| Kirby Cucumbers | Thin, bumpy, unwaxed | Low | ⭐⭐⭐⭐⭐ (Superior) | BEST OVERALL (The gold standard for pickling; stays rock-solid in brine). |
| Persian Cucumbers | Very thin, smooth | Low | ⭐⭐⭐⭐⭐ (Excellent) | GREAT ACCESSIBLE CHOICE (Small, virtually seedless, and super crunchy). |
| Mini / Cocktail | Thin, tender | Low-Moderate | ⭐⭐⭐⭐ (Very Good) | CONVENIENT (Perfect size for slicing into thin coins or sandwich chips). |
| English Cucumbers | Thin, wrapped in plastic | Moderate | ⭐⭐⭐ (Good) | ACCEPTABLE (Seedless and crisp, but best enjoyed within 1 to 2 weeks). |
| Garden / Salad | Thick, waxy | Very High | ⭐ (Poor) | AVOID IF POSSIBLE (Large watery seed cavities cause mushy pickles). |
Kitchen Equipment Needed
- 1 Quart Mason Jar (Wide Mouth): Or two 1-pint glass canning jars with tight-fitting lids. Glass is non-reactive and won’t absorb odors or leach chemicals from vinegar.
- Chef’s Knife & Cutting Board: For uniform slicing into coins, spears, or sandwich chips.
- Small Stainless Steel Saucepan: To heat and dissolve the vinegar brine ingredients.
- Measuring Cups & Spoons: For accurate salt-to-vinegar ratios.
- Canning Funnel (Optional): Makes pouring hot brine into the glass jar clean and mess-free.
How to Make Refrigerator Pickles
Follow these step-by-step instructions to create the ultimate batch of crunchy homemade pickles without canning:
Step 1: Wash and Prepare Cucumbers
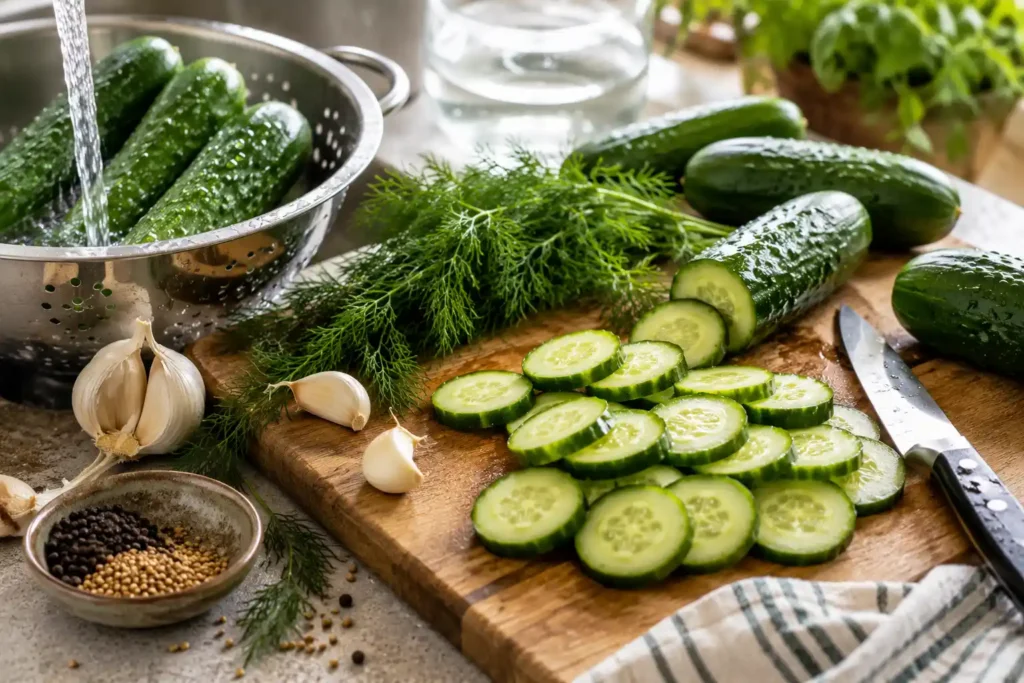
Wash 1 pound of fresh cucumbers thoroughly under cold running water, using a gentle vegetable brush to remove any soil. Pat them completely dry with a towel.
Crucial Step: Slice off and discard ¼-inch from the blossom end of each cucumber (the end opposite the stem). The blossom end contains an enzyme that breaks down pectin, which can make pickles go soft!
Step 2: Slice the Cucumbers
Cut the cucumbers into your preferred shape:
- Coins / Chips: Slice into ⅓-inch thick rounds for burger toppings.
- Spears: Cut lengthwise into quarters or eighths for snacking.
- Whole Baby Pickles: Leave tiny gherkins or mini Persians whole, pricking their skins twice with a toothpick.
Step 3: Pack the Aromatics into the Jar
At the bottom of a clean 1-quart glass mason jar, place 4 smashed garlic cloves, 4–5 fresh dill sprigs, 1 tsp mustard seeds, 1 tsp whole peppercorns, and optional ½ tsp red pepper flakes.
Step 4: Pack the Cucumbers Tightly
Pack the sliced cucumbers tightly into the jar over the aromatics. Push them down firmly so they fit snugly without crushing them. Leave about ½ inch of headspace at the top of the jar.
Step 5: Prepare the Hot Vinegar Brine
In a small saucepan, combine 1 cup distilled white vinegar, 1 cup water, 1 tablespoon kosher salt, and 1 tablespoon granulated sugar. Bring to a gentle simmer over medium-high heat, stirring for 1–2 minutes until the salt and sugar dissolve completely. Remove from heat.
Step 6: Pour Brine and Cool
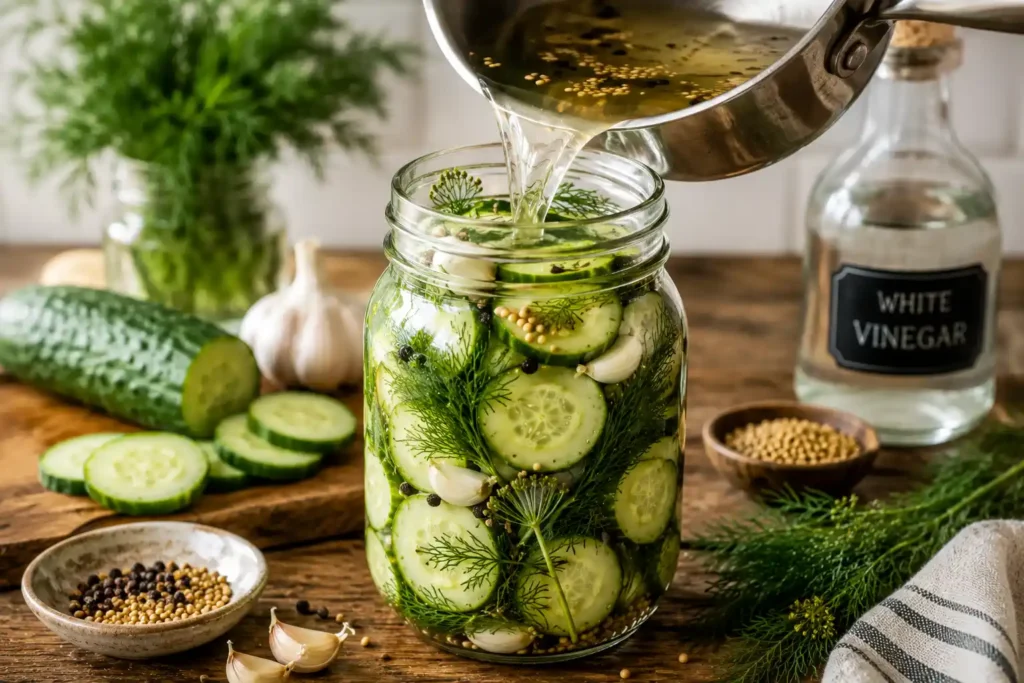
Carefully pour the hot brine over the packed cucumbers using a funnel, making sure all cucumbers are fully submerged under liquid. Leave ¼ inch of headspace at the top of the jar.
Let the unsealed jar sit open on the counter at room temperature for 30 to 45 minutes until the brine cools down completely.
Step 7: Seal and Refrigerate
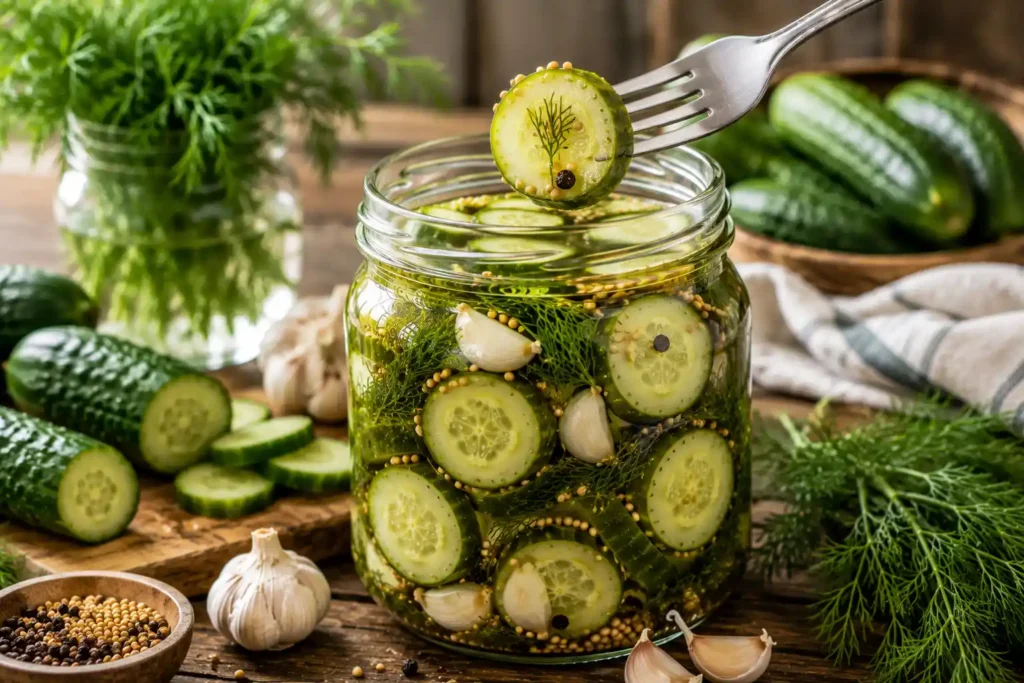
Once cooled to room temperature, screw the jar lid on tightly. Give the jar a gentle shake to distribute the garlic and spices. Place the jar in the refrigerator and let rest cold for at least 24 hours (48 hours offers optimal garlic-dill flavor depth!).
Expert Tips for Maximum Crunch
- Start with Ice-Cold, Firm Cucumbers: Never use limp or soft cucumbers. If your garden cucumbers feel slightly warm from the sun, submerge them in an ice-water bath for 30 minutes before slicing to firm up their cell walls.
- Cut Off the Blossom End: As mentioned in Step 1, trimming off the blossom tip removes enzymes that cause softening. This single tip guarantees a crispy refrigerator pickles recipe.
- Cool Before Sealing: Never trap hot steam inside a sealed jar in the fridge. Letting the brine cool to room temperature before screwing on the lid prevents internal condensation from diluting the brine or heat-steaming the cucumbers.
- Keep Vegetables Submerged: Cucumbers floating above the brine layer will lose their crispness and turn pale. Use a clean pickling weight or wedge a cross of fresh dill stems near the top to keep everything weighted down under the brine.
- Be Patient: Resist the temptation to open the jar after 2 hours! While they look like pickles, the vinegar and salt need a minimum of 24 to 48 hours to fully penetrate the core of the cucumber.
Common Mistakes to Avoid
- Using Waxed Supermarket Cucumbers: Standard slicing cucumbers are coated in food-grade paraffin wax to preserve moisture on grocery shelves. This wax prevents the brine from penetrating the skin, leading to bland, slippery pickles.
- Using Fine Table Salt with Iodine: Table salt turns your clear brine a murky, cloudy grey-brown and leaves a metallic aftertaste. Always pick kosher or pickling salt.
- Diluting the Vinegar Too Much: Never use more water than vinegar unless following a tested recipe. The 1:1 ratio of water to 5% acidity vinegar is the sweet spot for food safety, flavor balance, and crispness.
- Storing on the Fridge Door: Store your pickle jars near the back of the middle shelf where temperatures remain consistently cold (below 40°F / 4°C), rather than on the warmer refrigerator door.
Flavor Variations
Once you have mastered the basic garlic dill refrigerator pickles, try these creative spin-offs using the same base brine:
- Spicy Jalapeño Pickles: Add 1 sliced fresh jalapeño (with seeds) and increase red pepper flakes to 1 teaspoon for a fiery kick.
- Bread and Butter Pickles: Increase sugar to ½ cup, add ½ tsp celery seeds, ¼ tsp ground turmeric, and mix in sliced yellow onions with your cucumbers.
- Sweet Refrigerator Pickles: Increase sugar to ¾ cup and add 1 cinnamon stick and 3 whole cloves to the brine.
- Ranch-Infused Pickles: Add 1 tablespoon of dry ranch seasoning mix or a mix of fresh chives, parsley, and onion powder to the jar.
- Cajun Pickles: Add 1½ teaspoons of Cajun or Creole seasoning mix and 2 smashed garlic cloves to the brine base.
- Honey Dill Pickles: Replace white granulated sugar with 2 tablespoons of raw clover honey for a floral sweetness.
- Italian Herb Pickles: Add 1 teaspoon of dried Italian seasoning, crushed red pepper, and sliced banana peppers alongside garlic.
Storage Tips and Shelf Life
- Refrigerator Life: Store sealed in the refrigerator for 2 to 4 weeks. They remain safest and crunchiest during the first 14 days, though they remain tasty up to a month.
- Freezer Warning: Do not freeze refrigerator pickles! Freezing ruptures the raw cucumber’s cellular structure, turning them into a mushy, watery mess upon thawing.
- Sanitation: Always use a clean fork or tongs to remove pickles from the jar. Reaching in with bare fingers introduces unwanted bacteria that shortens their cold shelf life.
Serving Suggestions
Bright, acidic quick pickles cut through rich, fatty foods perfectly. Here are classic ways to serve them:
- Burgers & Sandwiches: Slide crispy chips onto grilled beef burgers, turkey clubs, pulled pork sliders, or crispy fried chicken sandwiches.
- Charcuterie & Snack Boards: Pair whole baby pickles with sharp cheddar cheese, cured salami, roasted nuts, and artisan crackers.
- BBQ Platters: A bowl of cold pickles balances smoked brisket, ribs, mac and cheese, and potato salad.
- Chop into Salads: Dice pickled coins into egg salad, classic potato salad, tuna salad, or creamy pasta salads for a tangy pop of flavor.
What to Serve With Refrigerator Pickles
- Classic Homemade Coleslaw
- Creamy Southern Potato Salad
- Air Fryer French Fries
- Juicy Smash Burgers
- Crispy Fried Chicken Sandwiches
- Smoked Pulled Pork Sandwiches
Troubleshooting Guide
Pickles Are Too Salty
- Cause: Used fine table salt instead of coarse kosher salt, or mismeasured.
- Fix: Pour out ¼ cup of the brine and replace it with ¼ cup of cold filtered water. Let sit in the fridge for 6 hours to rebalance.
Pickles Are Too Sour or Sharp
- Cause: High vinegar ratio or long steeping time.
- Fix: Stir 1 to 2 teaspoons of simple syrup or sugar directly into the cold jar brine and let rest for a few hours.
Pickles Turned Soft or Mushy
- Cause: Used old/waxed cucumbers, skipped removing the blossom end, or poured boiling brine and sealed immediately without cooling.
- Fix: Unfortunately, mushy pickles cannot be made crunchy again. Use them chopped up as a quick pickle relish for hot dogs!
Brine Turned Cloudy
- Cause: Used iodized table salt, hard tap water minerals, or natural yeast action over time.
- Fix: If the brine is cloudy from day one, it’s just mineral reaction from salt/water. However, if an old jar suddenly bubbles, swells, or smells off after 4 weeks, discard it.
Frequently Asked Questions
1. How long do refrigerator pickles last?
Stored continuously in the refrigerator in a sealed glass jar, they stay at peak crunchiness for 2 to 4 weeks.
2. Do refrigerator pickles need to be processed in a water bath?
No! Refrigerator pickles are not intended for long-term pantry shelf storage. They must be kept cold in the fridge at all times.
3. Can I use apple cider vinegar instead of white vinegar?
Yes! Apple cider vinegar gives pickles a slightly sweeter, fruitier, and smoother flavor profile, though it turns the brine slightly amber-colored.
4. Why aren’t my homemade pickles crunchy?
Soft pickles are caused by using old/large cucumbers, leaving the blossom end intact, using waxed cucumbers, or sealing hot jars in the fridge.
5. Can I reuse leftover pickle brine?
Yes, you can drop fresh cucumber slices into leftover brine one time for a second quick batch! However, discard the brine after the second round as the acidity becomes diluted.
6. Can I reduce or eliminate the sugar?
Yes. The sugar in this recipe simply balances acidity and does not act as a preservative. You can reduce or omit it entirely for a sharper, sugar-free keto pickle.
7. How long before refrigerator pickles taste good?
They are ready to eat after 24 hours, but their optimal, deeply infused garlic-dill flavor peak happens at 48 hours.
8. Which cucumber is absolute best for making pickles?
Kirby cucumbers are the gold standard due to their thin skin, firm flesh, low moisture content, and bumpy texture.
9. Can I pickling other vegetables with this same brine?
Absolutely! This exact brine works wonders on sliced red onions, jalapeños, green beans, cauliflower florets, radishes, and baby carrots.
10. Can I freeze refrigerator pickles?
No. Freezing destroys the raw cucumber cells, leaving you with mushy, limp pickles upon thawing.
Nutrition Information
Estimated breakdown per 1-serving portion (approx. 3–4 pickle coins with brine):
| Nutrient | Amount Per Serving |
| Calories | ~20 kcal |
| Carbohydrates | 4 g |
| Dietary Fiber | 0.5 g |
| Sugars | 2 g |
| Protein | 0.5 g |
| Total Fat | 0.1 g |
| Sodium | 320 mg |
| Potassium | 75 mg |
Note: Nutritional values are approximate estimates and vary based on exact salt absorption and sugar amounts used.
Printable Recipe Card
================================================================================
                 GARLIC DILL REFRIGERATOR PICKLES (NO CANNING)
================================================================================
Prep Time: 10 Mins  |  Rest Time: 24 Hours  |  Servings: 8  |  Calories: ~20 kcal

INGREDIENTS:
  • 1 lb fresh Kirby or Persian cucumbers (sliced ⅓-inch thick; blossom ends removed)
  • 4-5 sprigs fresh dill
  • 4 cloves fresh garlic, smashed
  • 1 tsp mustard seeds
  • 1 tsp whole black peppercorns
  • ½ tsp red pepper flakes (optional)

  Brine:
  • 1 cup distilled white vinegar (5% acidity)
  • 1 cup filtered water
  • 1 tbsp kosher salt
  • 1 tbsp granulated sugar

INSTRUCTIONS:
  1. PACK JAR: Place smashed garlic, fresh dill, mustard seeds, peppercorns, and
     pepper flakes in the bottom of a clean 1-quart glass mason jar.
  2. ADD CUCUMBERS: Pack sliced cucumbers tightly into the jar over aromatics.
  3. MAKE BRINE: In a small saucepan, bring vinegar, water, kosher salt, and sugar
     to a simmer over medium heat. Stir 1-2 mins until salt/sugar dissolve.
  4. POUR & COOL: Pour hot brine over cucumbers in jar, fully submerging them.
     Let jar sit uncovered at room temperature for 30-45 minutes to cool down.
  5. REFRIGERATE: Seal with tight lid. Refrigerate for at least 24 hours (48 hours
     best) before eating. Enjoy cold within 3-4 weeks!
================================================================================
Conclusion
Making easy refrigerator pickle recipes at home is proof that incredible, artisan-quality flavor doesn’t require hours of complicated labor or specialized canning equipment. With a single pound of fresh cucumbers, a quick 10-minute boil of basic pantry brine, and a little patience while your fridge does the heavy lifting overnight, you can enjoy the crispiest, tangiest, garlicky pickles imaginable.
Give this recipe a try today, customize the spice levels to your taste, and leave a 5-star rating and comment below sharing your favorite way to eat homemade quick pickles!