
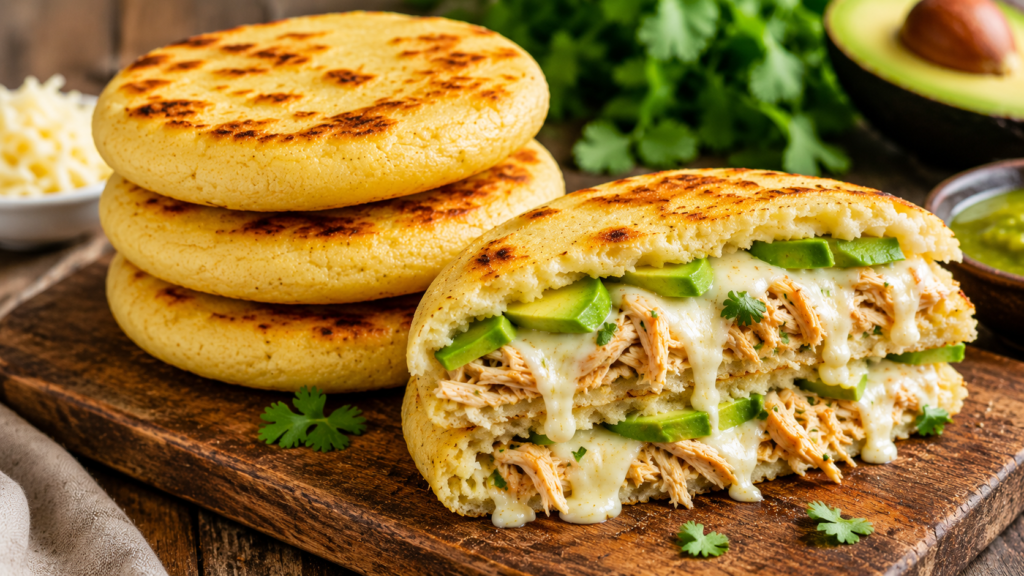
The very first time I held a fresh, steaming-hot arepa straight off a cast-iron griddle, I knew my breakfast routine was changed forever. Biting through that thin, golden, shatteringly crisp outer crust into a pillow-soft, sweet cornmeal center, especially when melted cheese pulls away with every bite, is pure comfort food bliss.
Arepas are a cherished daily staple deeply rooted in northern South American culinary heritage. Made from a simple dough of precooked cornmeal flour (masarepa), water, and a pinch of salt, these versatile corn cakes are naturally gluten-free and endlessly adaptable.
Whether you enjoy them split open and stuffed with shredded meats, creamy avocado, and black beans, or simply pan-fried with a pat of butter for breakfast, making authentic homemade arepas from scratch is surprisingly easy. With this tested recipe, you can recreate this iconic South American classic in under 30 minutes!
More Breakfast Recipes:
Are Arepas Colombian or Venezuelan?
One of the most frequent questions people ask when exploring South American cuisine is whether arepas originated in Colombia or Venezuela. The true answer lies in history: indigenous pre-Columbian peoples were preparing cornmeal cakes in regions that span modern-day Colombia and Venezuela long before present-day national borders were drawn.
Rather than claiming one country exclusively “owns” the dish, it is far more rewarding to celebrate how each country uniquely elevates it:
- Venezuelan Arepas: Typically thicker and larger, cooked on a flat griddle (budare) and often finished in the oven. They are almost always sliced open down the center to form a pocket, then stuffed with generous, multi-layered fillings like shredded beef, chicken salad, plantains, black beans, and grated cheese.
- Colombian Arepas: Tend to be slightly flatter and simpler, frequently incorporating cheese directly into the dough (arepa de queso). They are often served plain alongside meals, topped with fresh butter or farmer’s cheese, or baked sweet from fresh corn (arepa de choclo).
Both traditions yield extraordinarily delicious corn cakes, and this master recipe gives you the perfect foundation to enjoy them either style!
Arepas Recipe Card
| Recipe Information | Details |
|---|---|
| Prep Time | 10 minutes |
| Cook Time | 15–20 minutes |
| Total Time | 25–30 minutes |
| Servings | 6 arepas |
| Yield | 6 thick cornmeal cakes |
| Calories | 185 kcal per arepa (plain) |
| Course | Breakfast / Main Dish / Side Dish |
| Cuisine | Colombian / Venezuelan |
| Method | Stovetop Pan-Frying / Skillet |
| Keywords | arepas recipe, homemade arepas, how to make arepas, cornmeal arepas, masarepa recipe |
Why You’ll Love These Homemade Arepas
- Simple 3-Ingredient Base: Uses basic pantry staples—precooked corn flour, warm water, and salt.
- Naturally Gluten-Free: Made with 100% precooked cornmeal, making it a safe choice for gluten-sensitive diets (verify certified gluten-free packaging).
- Crispy Outside, Soft Inside: Delivering that ideal textural contrast between a crunchy seared crust and a tender, pillowy interior.
- Endlessly Customizable: Slice them open like a pita pocket and stuff them with endless sweet or savory fillings.
- Quick & Easy Preparation: Requires no yeast, no kneading time, and no proofing; ready in under 30 minutes!
- Budget Friendly: Costs just pennies per serving to make fresh at home.
- Great Make-Ahead Option: Cooked arepas reheat beautifully in a skillet or oven for quick weekday meals.
Ingredients for Arepas Recipe
Main Dough Ingredients
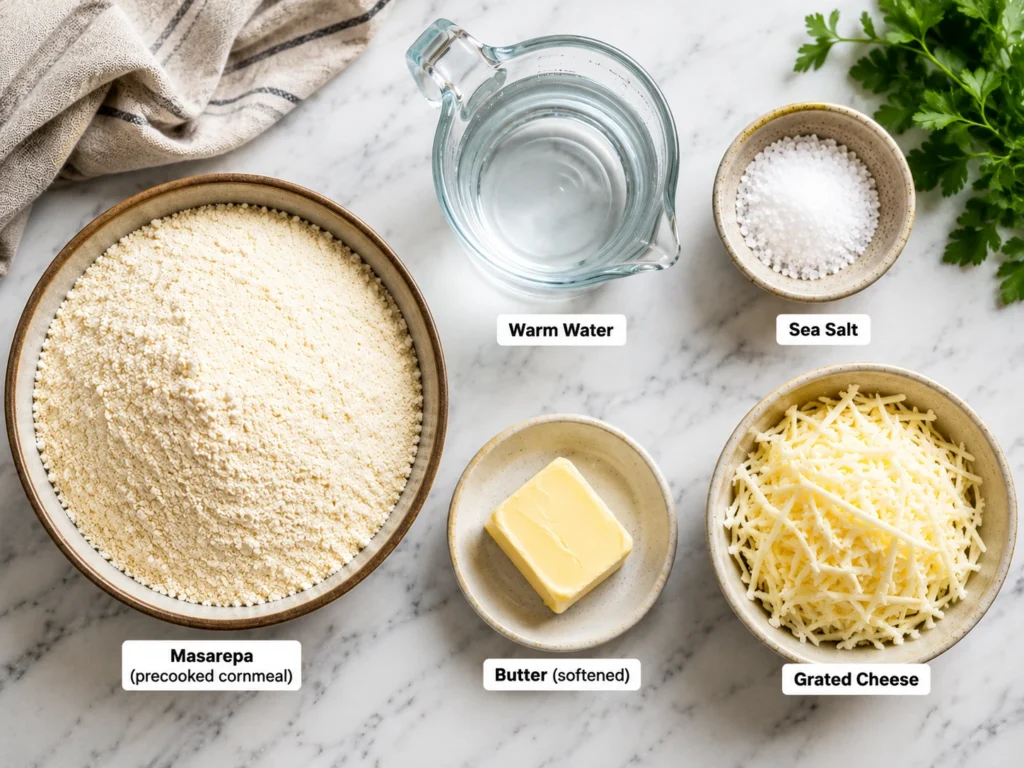
- 2 cups precooked cornmeal flour (such as P.A.N. brand Masarepa—white or yellow)
- 2 ½ cups warm water
- 1 teaspoon fine sea salt
- 1 tablespoon unsalted butter or vegetable oil (optional, for extra dough richness)
- 1 tablespoon oil or butter (for greasing the skillet)
Optional Mix-Ins
- ½ cup shredded mozzarella or queso fresco (folded directly into the dough)
- ¼ teaspoon garlic powder
Ingredient Notes
Masarepa (Precooked Cornmeal)
This is the single most critical ingredient! Masarepa is precooked, dehydrated corn flour. Because the corn kernel is cooked before milling, it absorbs liquid instantly without needing long cooking times.
- White vs. Yellow Masarepa: Both function identically! White masarepa yields a milder, lighter cake, while yellow masarepa offers a brighter color and slightly sweeter corn flavor.
- Crucial Distinction: Do NOT substitute regular raw cornmeal, cornstarch, or Mexican masa harina (nixtamalized corn flour for tortillas). Regular cornmeal will remain gritty and raw inside, while masa harina gives an entirely different tortilla-like flavor and texture.
Warm Water
Using warm water (around 105°F / 40°C) hydrates the precooked corn flour quickly, relaxing the starches so the dough stays pliable, smooth, and crack-free while shaping.
Salt & Butter
Salt gives the corn flavor its punch. Adding a small pat of butter or a splash of oil into the warm water enriches the dough, keeping the interior extra soft while cooking.
Equipment Required For Arepas
- Large Mixing Bowl: For combining and resting the dough.
- Measuring Cups & Spoons: For precise hydration ratios.
- Cast-Iron Skillet, Griddle, or Nonstick Pan: Heavy cast iron retains heat best to build that iconic golden, crispy outer crust.
- Thin Spatula: For flipping the arepas without tearing the crust.
- Clean Kitchen Towel: For wrapping cooked arepas to keep them warm and soft while finishing the rest of the batch.
- Serrated Knife: For carefully slicing open hot arepas to stuff them.
How to Make Arepas
Step 1: Mix Water and Salt
In a large mixing bowl, combine 2 ½ cups of warm water and 1 teaspoon of sea salt (plus 1 tablespoon of melted butter, if using). Stir with a spoon until the salt dissolves completely.
Step 2: Add the Masarepa Gradually
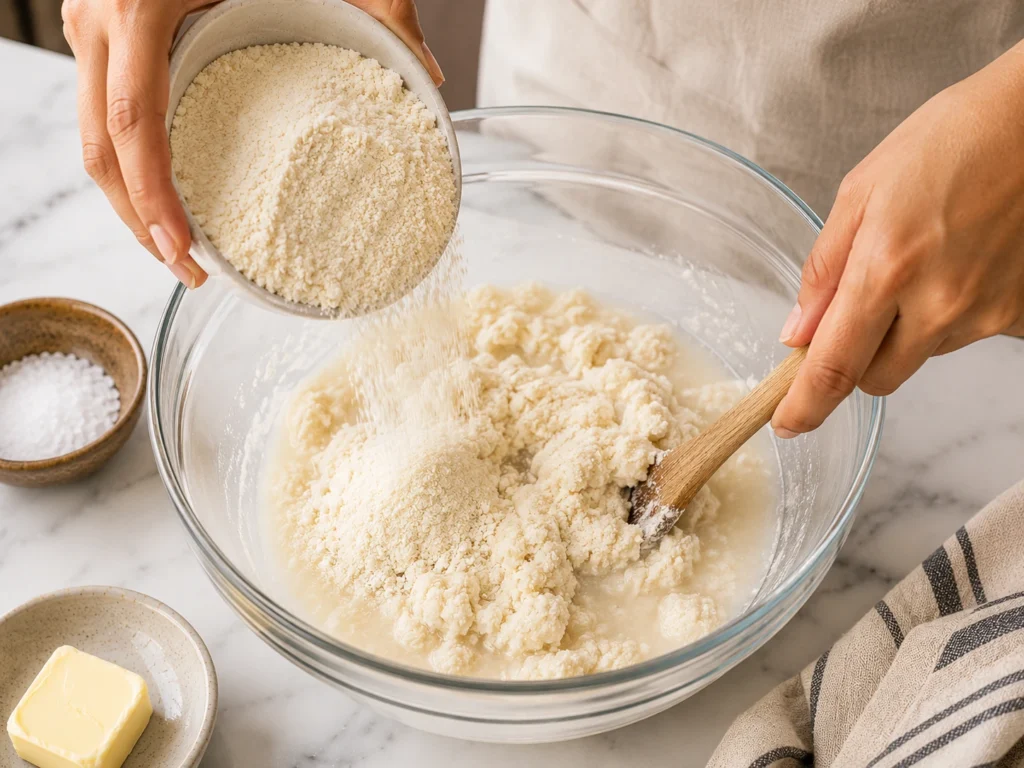
Slowly pour the precooked cornmeal (masarepa) into the liquid with one hand while continuously mixing with your other hand. Pouring gradually prevents dry lumps from forming in the dough.
Step 3: Knead the Dough
Knead the mixture inside the bowl using your hands for 1 to 2 minutes. The dough should feel soft, smooth, moist, and pliable—similar to soft playdough or mashed potatoes. It should hold its shape without sticking aggressively to your fingers.
Step 4: Rest the Dough
Set the dough aside in the bowl to rest for 5 minutes. This resting phase allows the precooked cornmeal grains to absorb the liquid completely. If the dough feels too firm or cracks easily after resting, knead in an additional 1 to 2 tablespoons of warm water.
Step 5: Shape the Arepas
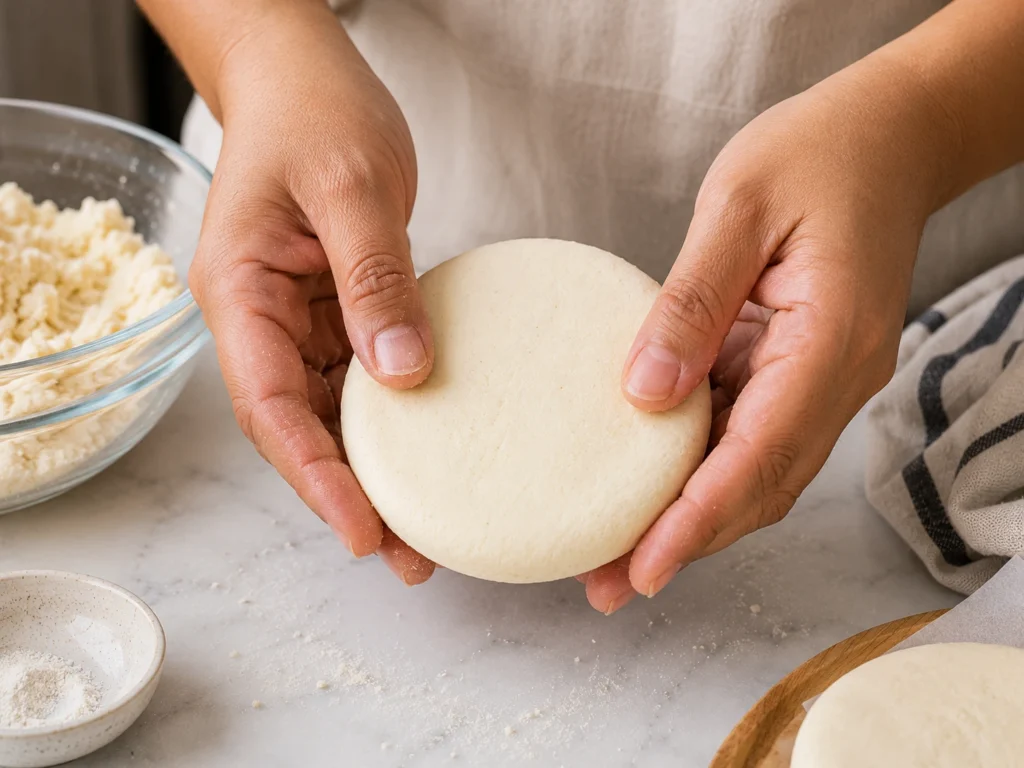
Divide the dough into 6 equal portions. Roll each portion between your palms into a smooth ball. Gently press down on the ball between your palms to flatten it into a thick disc, roughly ½ inch to ¾ inch (1.5 cm) thick and 3 to 4 inches in diameter. Smooth any tiny cracks along the outer edges using a damp finger.
Step 6: Pan-Fry Until Golden
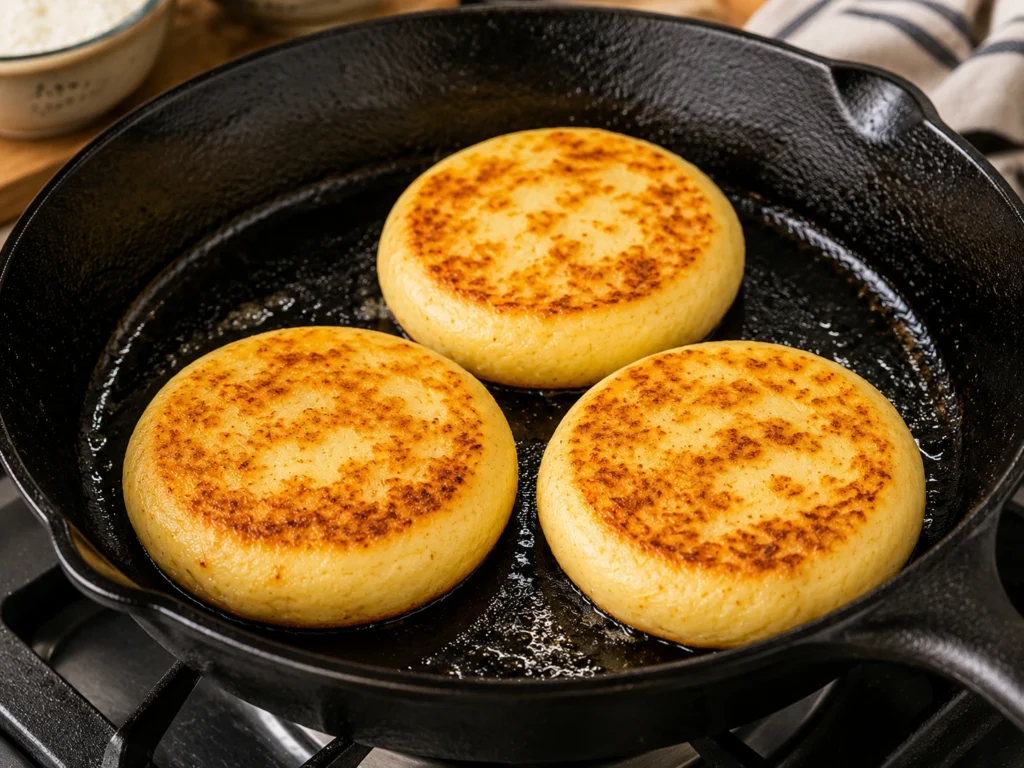
Heat 1 tablespoon of oil or butter in a heavy cast-iron skillet over medium heat. Place the shaped arepas into the hot skillet. Cook undisturbed for 6 to 8 minutes until a golden-brown, crispy crust forms on the bottom.
Step 7: Flip and Finish Cooking
Flip the arepas over using a spatula and cook the second side for another 6 to 8 minutes until golden.
Optional Oven Finish: For extra thick arepas (¾ inch or thicker), transfer the pan-seared arepas to a 350°F (175°C) oven for 8 to 10 minutes. This bakes the center completely through without over-browning the outer crust!
Step 8: Slice and Serve
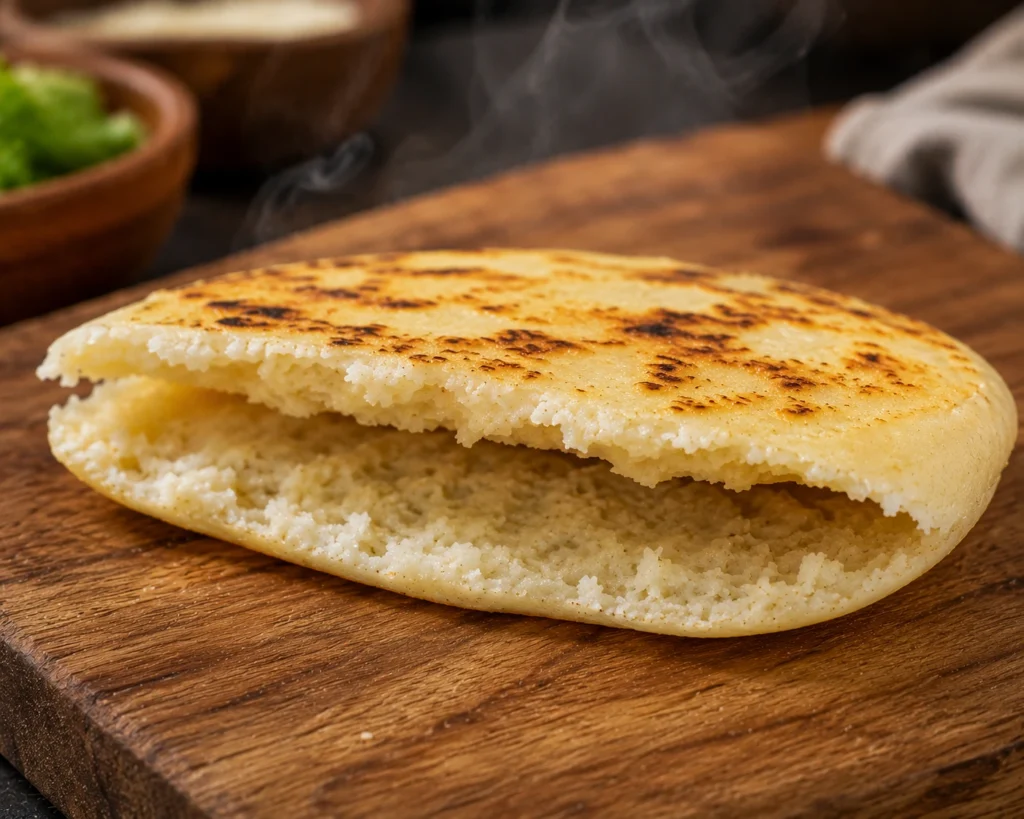
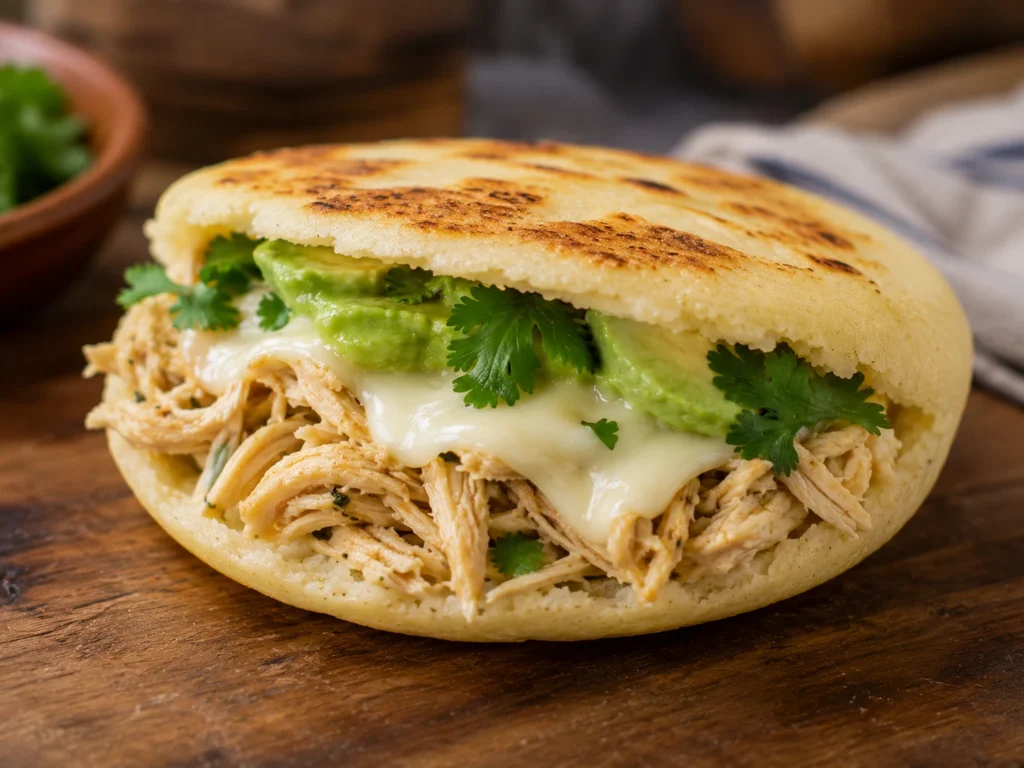
Remove from the heat and let the arepas cool for 2 to 3 minutes on a wire rack or clean towel. Hold an arepa vertically using a towel and use a serrated knife to cut a horizontal pocket through the center, leaving three-quarters of the edge intact. Fill with your favorite ingredients and serve warm!
How to Know When Arepas Are Done
Knowing when your arepas are cooked through takes a bit of visual and tactile cues:
- The Tap Test: Give the center top of an arepa a light tap with your finger. If it makes a hollow, thumping drum sound, the interior steam has created a well-baked center!
- The Crust: The exterior should be firm, golden-brown, and slightly crispy to the touch without feeling soft or wet.
- No Raw Center: Slicing into a done arepa should reveal a soft, moist, bread-like crumb rather than sticky, wet paste.
Expert Tips for Perfect Arepas
- Source Genuine Masarepa: Look for brands like P.A.N., Goya, or Selecta labeled specifically as Harina de Maíz Blanco/Amarillo Precocida.
- Hydrate Correctly: Never skip the 5-minute resting period! Cornmeal absorbs water slowly. Letting it rest reveals whether your dough needs an extra splash of liquid.
- Keep Hands Slightly Moist: Wet your hands with a little warm water while shaping the dough rounds. This prevents sticking and seals any edge cracks.
- Fix Cracking Edges: If your dough cracks significantly when flattened, it is telling you it’s thirsty! Knead in 1 or 2 tablespoons of warm water until smooth.
- Cook on Medium Heat: Cooking over excessively high heat scorches the outer crust while leaving the center raw and gummy. Medium heat allows heat to penetrate to the core.
Common Mistakes to Avoid
Why Are My Arepas Cracking?
Your dough is too dry. Precooked corn flour absorbs a surprising amount of water. Add water 1 tablespoon at a time and knead until the dough is supple.
Why Are My Arepas Hard or Tough?
You likely used too little water or cooked them too long over low heat, drying out the cornmeal starches. Ensure your dough feels soft like playdough before shaping.
Why Are My Arepas Raw Inside?
Your stove burner was too hot, or your arepas were shaped too thick. If the crust browns before the center cooks through, bake them in a 350°F (175°C) oven for 10 minutes to finish the interior safely.
Can I Use Regular Cornmeal or Masa Harina?
No. Regular coarse cornmeal does not absorb water without boiling, resulting in crunchy, raw-tasting cakes. Masa harina (used for Mexican corn tortillas) undergoes nixtamalization with lime, producing a completely different texture and tortilla flavor. Stick to masarepa.
Popular Arepa Filling Ideas
The beauty of a freshly opened arepa is its versatility! Try these delicious filling combinations:
| Filling Name | Style / Origin | Key Ingredients |
|---|---|---|
| Reina Pepiada | Venezuelan Classic | Shredded chicken, mashed avocado, mayonnaise, cilantro, & lime. |
| La Pelúa | Venezuelan Classic | Seasoned shredded beef (carne desmechada) & shredded cheddar cheese. |
| Domino | Venezuelan Classic | Warm seasoned black beans & crumbled white cheese (queso blanco). |
| Arepa de Queso | Colombian Style | Stuffed with thick slices of mozzarella or queso fresco melted until gooey. |
| Pabellón | Venezuelan Classic | Shredded beef, black beans, fried sweet plantains, & white cheese. |
| Breakfast Style | Universal | Soft scrambled eggs, crispy bacon or chorizo, & melted cheese. |
What to Serve With Arepas
- Tropical Fruits & Drinks: Serve alongside fresh papaya slices, mango, or a warm cup of Colombian hot chocolate or café con leche.
- Sauces & Dips: Pair with fresh guacamole, hogao (Colombian tomato and onion sauce), guasacaca (Venezuelan avocado herb sauce), or pico de gallo.
- Protein Sides: Complements grilled flank steak, chorizo sausages, black bean soup, or fried plantains (tajadas).
Are Arepas Gluten-Free & Vegan?
- Gluten-Free: Yes! Arepas made with 100% pure precooked cornmeal are naturally gluten-free. Always double-check ingredient labels for certified gluten-free processing if serving anyone with Celiac disease.
- Vegan: The basic dough (masarepa, water, salt) is 100% vegan! Simply use vegetable oil instead of butter when cooking the skillet cakes, and fill with black beans, avocado, and plantains.
Storage & Reheating Instructions
Refrigerator Storage
Store fully cooked, cooled arepas in an airtight container or wrap them tightly in foil. Store in the refrigerator for up to 4 days.
Freezing Instructions
You can freeze both raw shaped dough and cooked arepas!
- Raw Dough: Shape the discs, arrange them on a parchment-lined baking sheet, and freeze until solid. Wrap individually in plastic wrap and store in a freezer bag for up to 3 months. Thaw overnight in the fridge before frying.
- Cooked Arepas: Freeze cooked, cooled arepas stacked with parchment paper between them for up to 2 months.
How to Reheat Arepas
Avoid the microwave, which turns corn cakes rubbery! To restore that crisp crust:
- Skillet: Heat a lightly oiled skillet over medium heat and warm for 3 to 4 minutes per side.
- Oven / Toaster Oven: Preheat to 375°F (190°C) and bake for 6 to 8 minutes until crisp and hot throughout.
- Air Fryer: Air fry at 350°F (175°C) for 4 to 5 minutes.
Nutrition Information
Calculated for 1 plain arepa (1/6th of recipe without extra butter or fillings).
| Nutrient | Amount Per Serving |
|---|---|
| Calories | 185 kcal |
| Total Carbohydrates | 38 g |
| Dietary Fiber | 3 g |
| Sugars | 0 g |
| Protein | 4 g |
| Total Fat | 1.5 g |
| Saturated Fat | 0.3 g |
| Sodium | 390 mg |
Frequently Asked Questions
What are arepas made of?
Arepas are made from precooked cornmeal flour (masarepa), water, and salt. Oil, butter, or cheese are sometimes added for extra flavor.
What is the best flour for arepas?
Precooked white or yellow cornmeal flour, universally known as masarepa (popularly sold under the P.A.N. brand label).
What is the difference between masarepa and masa harina?
Masarepa is precooked ground corn flour used for arepas. Masa harina is corn flour treated with limewater (nixtamalized) used to make tortillas and tamales. They cannot be substituted for one another.
What do arepas taste like?
They have a mild, sweet, comforting corn flavor with a subtle buttery note. Their appeal comes from the textural contrast of a crispy outer shell and a soft, tender interior.
How do I stop my arepas from drying out while cooking?
Keep the heat at medium rather than low, don’t over-cook them beyond 8 minutes per side, and wrap finished hot arepas in a clean kitchen towel while cooking the remaining batch.
Arepas vs. Corn Tortillas
| Feature | Arepas | Corn Tortillas |
|---|---|---|
| Flour Type | Precooked corn flour (Masarepa) | Nixtamalized corn flour (Masa Harina) |
| Thickness | Thick discs (½ to ¾ inch thick) | Thin, flexible flatbreads |
| Preparation | Pan-fried, grilled, or baked whole | Flash-cooked on a dry griddle (comal) |
| Serving Style | Sliced open and stuffed as a sandwich | Rolled or folded around ingredients (tacos) |
| Texture | Crispy exterior with a soft, bread-like center | Soft, pliable, and uniform throughout |
Pro Tips
- Combine White & Yellow Masarepa: Mix equal parts white and yellow masarepa for a gorgeous pastel-yellow color and balanced corn sweetness.
- Wrap Hot Arepas in a Towel: Placing seared arepas into a clean dish towel traps steam inside briefly, softening the center while keeping the outer crust crisp.
- Slice with a Serrated Bread Knife: A smooth chef’s knife can crush a hot arepa. A serrated knife gently saws through the crust cleanly.
- Add Cheese to the Dough: For an authentic Colombian arepa de queso, fold 1 cup of shredded mozzarella directly into the water and flour mix before shaping!
Related Recipes
Expand your Latin American cooking skills with these delicious recipes: