
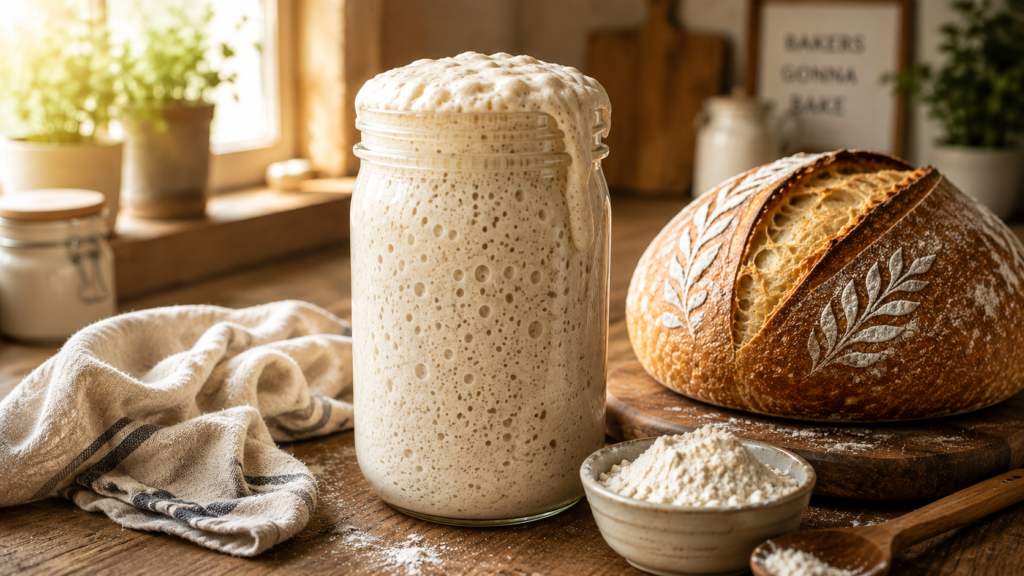
The very first time I baked a successful loaf of artisan sourdough bread, I didn’t reach for a yellow packet of commercial yeast. Instead, I used a jar of bubbling, tangy flour-and-water mixture that I had been nurturing on my kitchen counter for a week. The feeling of pulling a crackling, golden loaf out of the oven using wild yeast you cultivated yourself is unmatched in the world of home baking.
A sourdough starter, often called a levain, mother culture, or wild yeast starter, is a natural fermented mixture of flour and water. Flour naturally carries wild yeasts and beneficial lactic acid bacteria (Lactobacilli). When you combine flour with water, these dormant microbes wake up, consume the carbohydrates in the grain, and produce carbon dioxide gas alongside organic acids. The gas creates air bubbles that make bread dough rise, while the acids deliver that signature, complex sourdough flavor.
If you have ever felt intimidated by wild yeast baking, let me reassure you: you do not need a degree in microbiology to make this work. You only need two basic ingredients, a clean glass jar, and a few minutes of attention each day. Within 5 to 7 days, you will have a resilient, active culture ready to bake artisan bread, pizza crusts, fluffy pancakes, tender bagels, and rich cinnamon rolls.
Why You’ll Love This Sourdough Starter Recipe
- Only Two Basic Ingredients: Requires nothing more than flour and water—no added commercial yeast, sugar, juice, or artificial boosters.
- 100% Commercial Yeast-Free: Relies entirely on wild yeasts captured from nature and grain for a truly natural fermentation process.
- Beginner Friendly: Clear daily instructions take all the guesswork out of feedings, timing, and hydration ratios.
- Budget Friendly: Costs pennies to make compared to buying expensive store-bought starters or specialized bread products.
- Strong & Predictable Fermentation: My tested feeding ratio establishes a healthy bacterial balance for reliable dough expansion.
- Superior Flavor Development: Cultivates complex, aromatic notes ranging from creamy and buttery to pleasantly sour.
- Low Daily Commitment: Takes less than 3 minutes of active effort per day during the initial 7-day creation process.
- Long-Lasting Kitchen Heirloom: Once established, a sourdough starter can live indefinitely in your kitchen with basic care—passing down through generations!
Sourdough Starter Recipe Card
- Prep Time: 5 minutes daily
- Fermentation Time: 7 days
- Total Time: 7 days
- Servings: 1 active starter culture (yields infinite feedings)
- Yield: Approx. 1 ½ cups (300 g) active starter per feeding cycle
- Calories: 30 kcal per tablespoon (15 g)
- Course: Baking / Fermented Basics
- Cuisine: Traditional Artisan Baking
- Author: DishFry Culinary Team
Ingredients For Sourdough Starter Recipe
Day 1 (Initial Setup)
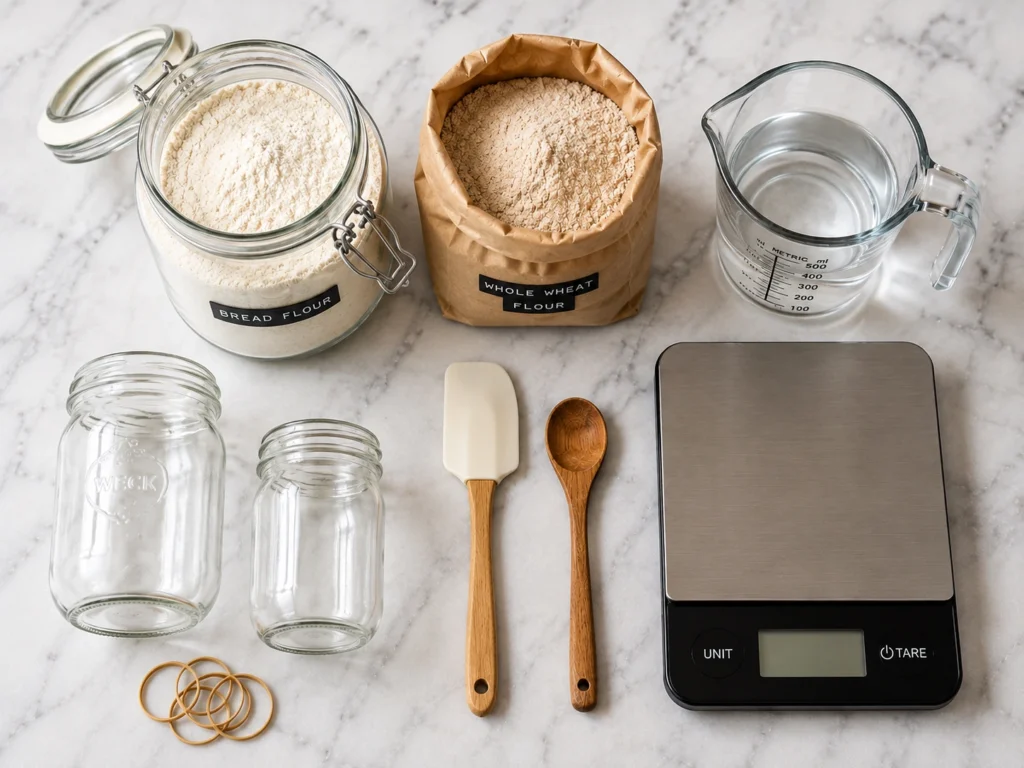
- ½ cup (60 g) whole wheat flour or dark rye flour
- ¼ cup + 1 tablespoon (60 g) filtered water, room temperature (75°F / 24°C)
Days 2–7 (Daily Feeding Cycle)
- ½ cup (60 g) unbleached bread flour (or unbleached all-purpose flour)
- ¼ cup + 1 tablespoon (60 g) filtered water, room temperature (75°F / 24°C)
- 60 g reserved starter from the previous day (discarding the remainder)
Ingredient Notes
Building a thriving sourdough starter depends heavily on the quality and characteristics of your grain and water:
- Why Whole Wheat Jumpstarts Fermentation: Whole wheat and rye flours retain the outer bran and germ layer of the grain kernel, which harbors a rich population of wild yeast spores and natural enzymes. Using whole wheat on Day 1 provides an instant jumpstart to microbial activity.
- Why Bread Flour Strengthens the Starter: Bread flour has a higher protein content (typically 12–14%) compared to standard flour. This strong protein matrix forms gluten networks that hold onto carbon dioxide gas bubbles effectively, allowing your starter to rise high and hold its structure.
- Importance of Filtered Water: Tap water often contains municipal chlorine or chloramines added to kill bacteria. Unfortunately, these additives can also kill or suppress the delicate wild yeasts and beneficial bacteria in your starter. Always use filtered, spring, or distilled water.
- Best Flour Brands: Look for high-quality, unbleached flours. Brands such as King Arthur, Bob’s Red Mill, or local organic stone-ground millings work exceptionally well. Avoid bleached flours entirely, as the bleaching process strips away natural microbes.
- Ideal Water Temperature: Aim for water around 72°F to 78°F (22°C to 26°C). Cold water slows yeast activity down to a crawl, while hot water above 110°F (43°C) will kill the wild yeast entirely.
Kitchen Equipment
Before beginning your sourdough journey, set up these simple baking tools:
- Straight-Sided Glass Jar (approx. 24–32 oz / 750–1000 ml): A straight-sided Weck jar, wide-mouth Mason jar, or glass container makes mixing, measuring, and cleaning easy. Avoid narrow-necked bottles.
- Digital Kitchen Scale: Measuring ingredients by weight (grams) rather than volume (cups) is the single most critical factor for consistent 100% hydration starters.
- Silicone Spatula or Wood Stirrer: Ideal for scraping down the inner sides of the glass jar to keep your container clean and mold-free.
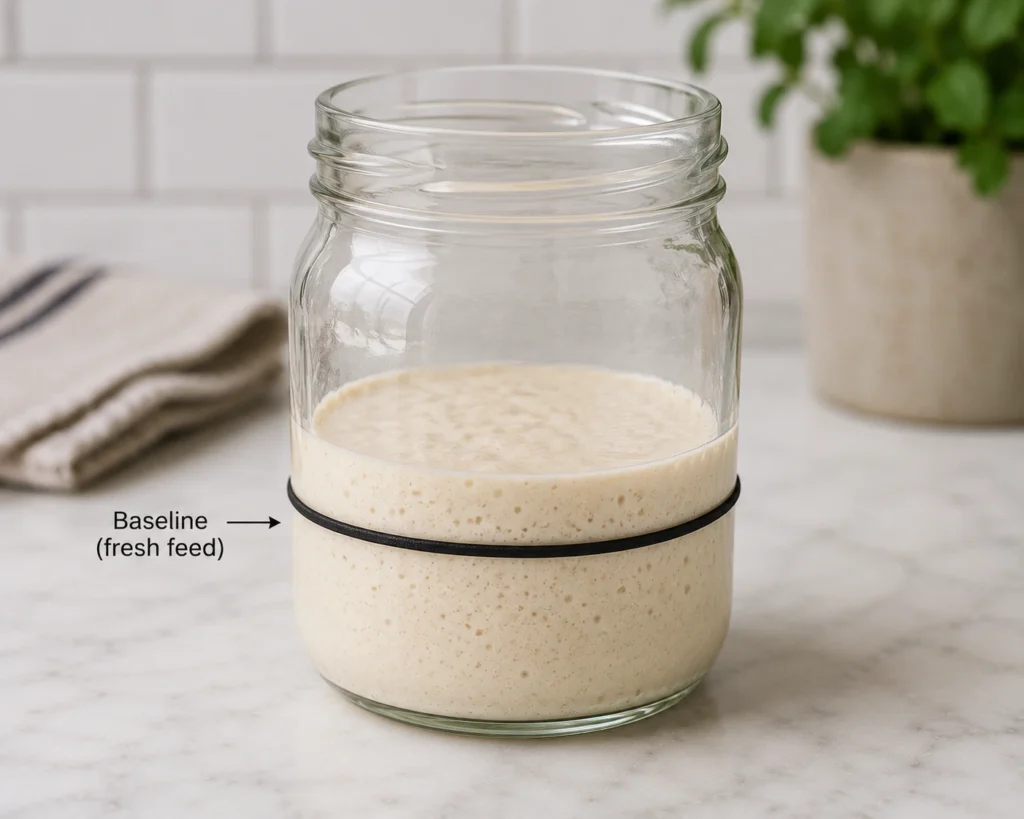
- Rubber Band: Placed around the outside of your glass jar to mark the starting height of your starter right after a feeding. This gives you a clear visual indicator when it doubles or triples in volume.
- Loose-Fitting Lid or Cloth Cover: A glass lid without a rubber seal, a loose screw-band, or a paper towel held by a rubber band allows fermentation gases to escape safely without building up dangerous pressure.
How to Make Sourdough Starter
Step 1: Mix Flour and Water (Day 1)
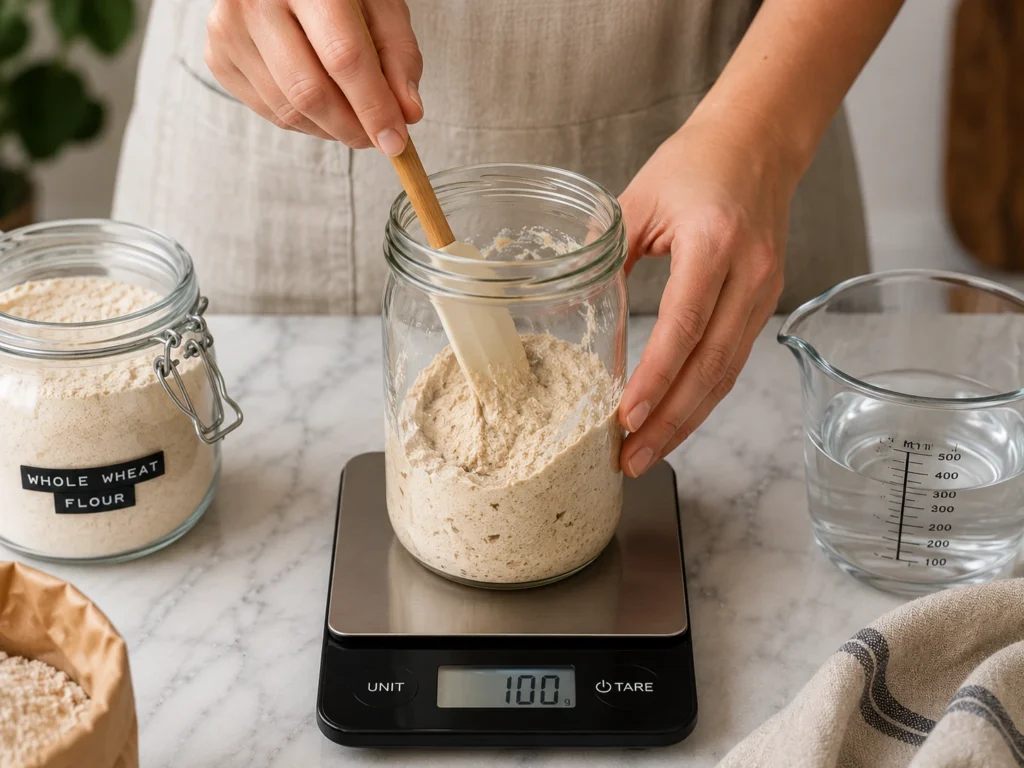
Place your clean glass jar on your digital kitchen scale and tare (zero) it out. Add 60 grams of whole wheat flour (or rye flour) and 60 grams of filtered room-temperature water. Stir thoroughly with your spatula for about 1 minute until no dry flour spots remain. The mixture will look like a thick, shaggy paste. Scrape down the inner walls of the jar.
Step 2: Cover Loosely and Mark Height
Place a rubber band around the outside of the glass jar right at the top line of the mixed batter. Cover the top of the jar loosely with its lid (do not seal air-tight) or a cloth cover so gas can vent naturally.
Step 3: Rest for 24 Hours
Place the jar in a warm, draft-free spot in your kitchen with an ambient temperature of 72°F to 78°F (22°C to 26°C). Let it sit undisturbed for 24 hours.
Step 4: Inspect and Discard (Day 2)
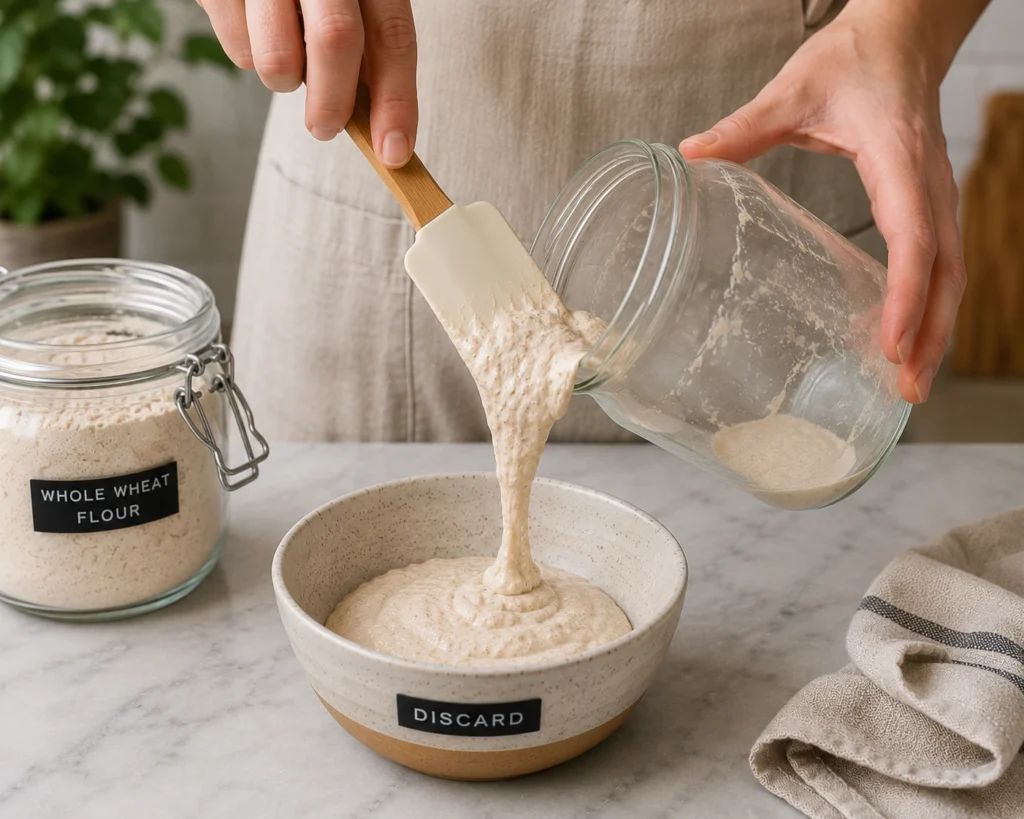
After 24 hours, you may see a few tiny bubbles, or perhaps no visible change at all—both scenarios are completely normal! Stir the mixture. Discard all but 60 grams of the starter from the jar into your trash or compost bin (do not pour raw flour paste down your sink drain).
Step 5: Feed Fresh Flour and Water
To the 60 grams of starter remaining in your jar, add 60 grams of unbleached bread flour (or all-purpose flour) and 60 grams of room-temperature filtered water (this is a 1:1:1 feeding ratio by weight). Mix vigorously until smooth, scrape down the jar sides, adjust your rubber band to the new lower level, and cover loosely.
Step 6: Repeat Daily Feedings (Days 3–5)
Repeat the exact same discarding and feeding process every 24 hours at roughly the same time of day.
- Day 3: You will begin to smell a faint fruity, sour aroma and spot small bubbles throughout the batter.
- Day 4: The mixture may expand slightly and show a network of small fermentation bubbles along the glass sides.
- Day 5: The sour scent will deepen into a pleasant, yeasty yogurt aroma, with visible activity after each feeding.
Step 7: Watch for the Rise (Days 6–7)
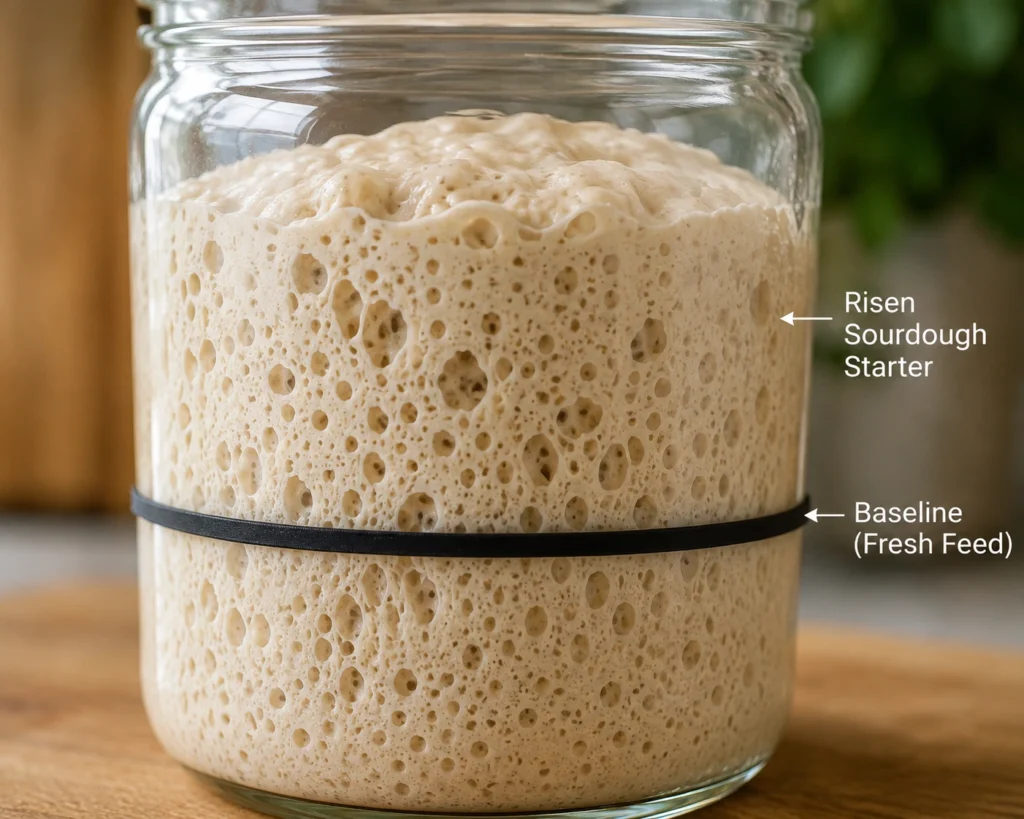
By Days 6 and 7, your starter will begin to show true strength. Within 4 to 8 hours after a feeding, the batter should swell, fill with large pockets of gas, and rise significantly above your rubber band marker.
Step 8: Perform the Float Test
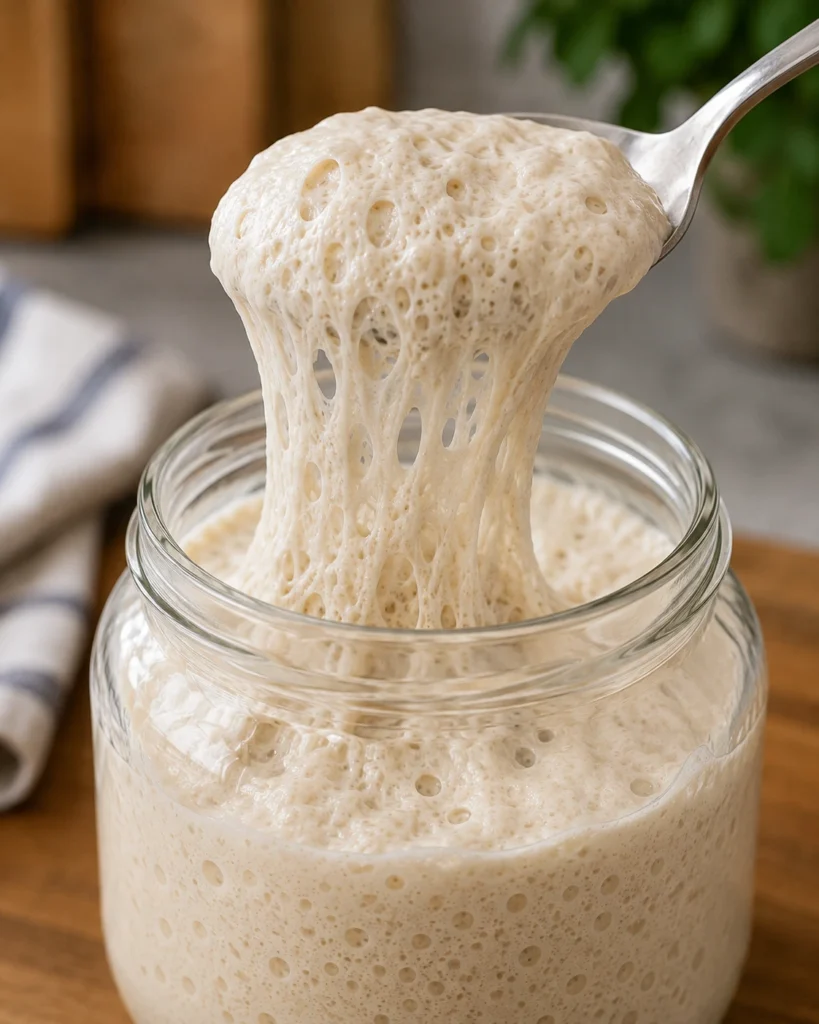
Once your starter reliably doubles or triples in size within 4 to 6 hours of feeding, test its baking readiness! Gently spoon ½ teaspoon of active starter into a glass of room-temperature water. If it floats light as a feather on top of the water, the wild yeast has trapped enough carbon dioxide gas for baking bread! If it sinks, it needs 1 to 2 more days of daily feedings to build strength.
Step 9: Bake or Store
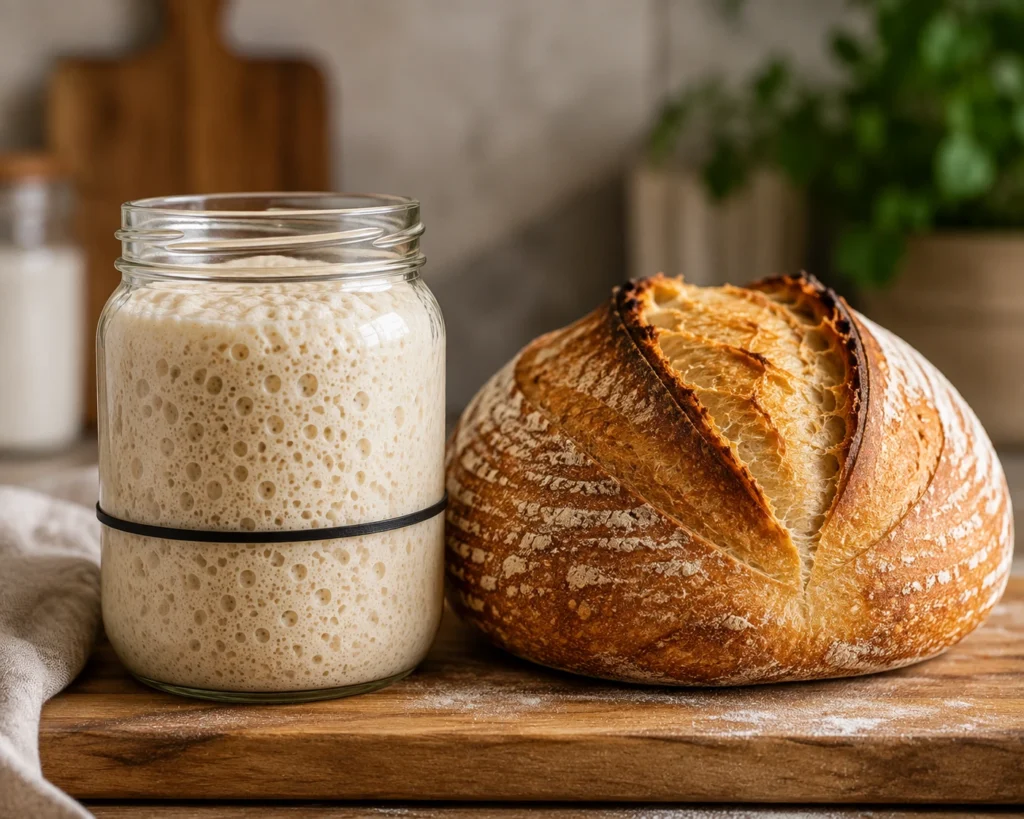
Your starter is now officially established! You can immediately measure out what you need to bake artisan sourdough loaves, or transfer the jar into your refrigerator for long-term weekly maintenance.
Feeding Schedule
This quick reference table outlines what to expect during your starter’s first week of development:
| Day | Action / Feeding Ratio | Ingredients Added | What You Will See & Smell |
| Day 1 | Initial Mix (1:1) | 60g Whole Wheat + 60g Water | Thick, pasty, wet dough mixture. Earthy grain smell. |
| Day 2 | Discard down to 60g starter; Feed (1:1:1) | 60g Bread Flour + 60g Water | Little to no growth. Few microscopic bubbles. Flat surface. |
| Day 3 | Discard down to 60g starter; Feed (1:1:1) | 60g Bread Flour + 60g Water | Small bubbles appearing. Mildly sweet, tangy yeast aroma. |
| Day 4 | Discard down to 60g starter; Feed (1:1:1) | 60g Bread Flour + 60g Water | More bubbles throughout. Starter expands by 25–50%. Sour scent. |
| Day 5 | Discard down to 60g starter; Feed (1:1:1) | 60g Bread Flour + 60g Water | Active bubbling. Starter expands by 50–75%. Tangy yogurt aroma. |
| Day 6 | Discard down to 60g starter; Feed (1:1:1) | 60g Bread Flour + 60g Water | Strong expansion. Starter doubles in volume in 4–8 hours. |
| Day 7 | Discard down to 60g starter; Feed (1:1:1) | 60g Bread Flour + 60g Water | Ready to bake! Triples in volume, dome-shaped top, passes float test. |
Signs Your Starter Is Ready to Bake
To ensure your bread dough rises high without adding commercial yeast, look for these key visual and sensory cues before baking:
- Doubles or Triples in Volume: Expands predictably to at least twice its original height within 4 to 6 hours after a standard 1:1:1 feeding at room temperature.
- Dome-Shaped Surface with Gas Bubbles: The top of the starter forms a slightly rounded, convex dome covered in tiny, stretched air bubbles just before it reaches its peak.
- Spongy, Web-Like Interior: Looking through the side of your glass jar reveals a complex, airy honeycomb matrix of trapped gas.
- Passes the Float Test: A small sample dropped gently into a cup of water floats on the surface without dissolving immediately.
- Pleasant Aromatic Scent: Smells delightfully tangy, yeasty, and fruity, akin to craft beer, fresh yogurt, or sourdough bread dough (rather than harsh fingernail polish remover).
Expert Tips for Sourdough Success
- Always Feed by Weight, Not Volume: A cup of flour weighs vastly different depending on how tightly it is packed, whereas 60 grams of flour is always 60 grams. Investing in an inexpensive digital scale guarantees 100% hydration consistency.
- Establish a Daily Routine: Feed your starter at roughly the same time every day (for example, every morning at 8:00 AM). Consistency helps stabilize yeast activity.
- Maintain the Ideal Room Temperature: Wild yeast thrives best between 72°F and 78°F (22°C to 26°C). If your house is cold in the winter, place your jar inside an unheated oven with the interior light turned on, or set it on top of your refrigerator.
- Scrape Jar Walls Clean: Use a narrow silicone spatula to push stray flour down the interior jar walls after every feeding. Dried crusty flour along the top rim can attract unwanted mold spores.
- Never Seal the Glass Lid Tight: Active yeast generates carbon dioxide gas continuously. Sealing a glass jar airtight can build up intense internal pressure and cause the glass to crack or shatter.
Common Mistakes to Avoid
- Using Chlorinated Municipal Tap Water: Chlorine inhibits bacterial growth and kills wild yeast. If you don’t have filtered water, let tap water sit uncovered in an open bowl for 24 hours so the chlorine gas evaporates before using it.
- Baking in a Cold Kitchen Environment: Temperatures below 68°F (20°C) cause yeast metabolism to slow down drastically, stretching a 7-day starter timeline out to 14 days or longer.
- Skipping Daily Feedings: Leaving a young, unestablished starter on the counter without food for two days lets acid build up too quickly, starving the wild yeast population.
- Closing Container Lids Airtight: Trapping fermentation gases without venting can compromise your glass jar.
- Giving Up Too Early: Day 2 or 3 often experiences a brief lull where activity seems to pause entirely. Don’t throw it out! The bacterial culture is simply adjusting its pH balance. Keep feeding daily, and it will bounce back strongly by Day 5.
How to Store Your Starter
Once your sourdough starter is mature and active, you have three flexible storage options based on how frequently you plan to bake:
1. Countertop Storage (For Frequent Bakers)
If you bake bread 3 or more times per week, keep your starter at room temperature on your kitchen counter. Feed it once every 24 hours using a 1:1:1 ratio (starter:flour:water by weight) to keep it primed for immediate baking.
2. Refrigerator Storage (For Weekend Bakers)
If you only bake once a week or every two weeks, store your starter in the fridge! The cold temperature (around 38°F / 3°C) puts the yeast into a semi-dormant state.
- Maintenance: Feed your starter once a week. Remove it from the fridge, discard all but 60g, feed it fresh flour and water, let it sit on the counter for 1 to 2 hours until you spot a few bubbles, then seal loosely and return it to the fridge.
3. Freezer Storage (For Long-Term Preservation)
If you are going away on vacation or taking a break from baking for several months, you can freeze your starter.
- To Freeze: Take active, freshly fed starter, spread a thin layer onto a piece of parchment paper, and let it dry completely at room temperature for 24 hours. Break the dried flakes into an airtight container and freeze for up to 2 years.
How to Reactivate a Stored Starter
Re-energizing a dormant starter from the refrigerator or freezer is straightforward:
- From the Refrigerator: Remove the jar from the fridge 24 to 48 hours before you plan to bake. Discard down to 60 grams, feed with 60 grams of flour and 60 grams of warm water (78°F / 26°C), and keep in a warm spot. Repeat this feeding every 12 hours for 2 to 3 cycles until the starter reliably doubles in size within 4 hours.
- From Dried/Frozen Flakes: Dissolve 20 grams of dried starter flakes in 40 grams of lukewarm filtered water. Let sit for 15 minutes, then stir in 30 grams of unbleached bread flour. Feed daily at room temperature for 3 to 4 days until bubbly and active.
Ways to Use Sourdough Starter
An active sourdough starter isn’t just for classic artisan boules! You can use your levain to naturally leaven a wide range of baked goods:
- Artisan Sourdough Boules & Batards: The ultimate rustic crusty loaf with an open, airy crumb.
- Soft Sourdough Sandwich Bread: Fluffy, tender sliced loaves perfect for everyday toasts and sandwiches.
- Sourdough Pizza Crust: Yields a chewy, bubbly crust with charred blistered spots and incredible flavor depth.
- Sourdough Cinnamon Rolls: Soft, pillowy dessert rolls balanced with a subtle tangy undertone.
- Sourdough Bagels: Chewy, boiled artisan bagels with an authentic bakery texture.
- Sourdough Focaccia: Drizzled with olive oil, rosemary, and sea salt for a soft, pillowy sheet-pan bread.
- Sourdough Pretzels & English Muffins: Classic boiled or griddle-cooked staples with rich sourdough character.
Sourdough Starter Variations
Depending on your grain preferences or dietary needs, you can easily customize your wild yeast culture:
- Whole Wheat Starter: Fed exclusively with unbleached whole wheat flour. Creates a robust, nutty, earthier starter that ferments quickly.
- Rye Sourdough Starter: Fed with dark or light rye flour. Rye contains abundant fermentable sugars that create a highly active, fruity, deeply tangy culture.
- Bread Flour Starter: The standard choice for white artisan loaves. Creates a clean, mild flavor profile with high gluten strength and a snow-white appearance.
- Gluten-Free Sourdough Starter: Built using whole grain brown rice flour, sorghum flour, or teff flour paired with filtered water. Follows the exact same feeding schedule and yields a 100% gluten-free wild starter!
Troubleshooting Common Starter Issues
Why isn’t my starter bubbling or rising?
- Cause: Your kitchen may be too cold (below 70°F / 21°C), or your tap water contains chlorine that is suppressing microbial growth.
- Solution: Move the jar to a warmer spot (75°F / 24°C) and ensure you are using filtered, non-chlorinated spring water.
What is the dark liquid forming on top (Hooch)?
- Cause: A clear, dark gray, or brownish liquid layer on top of your starter is called hooch. It is a harmless alcohol byproduct indicating your starter is hungry and has run out of carbohydrates to consume.
- Solution: Simply pour off the dark liquid (or stir it back in for extra tanginess), discard your excess starter, and feed fresh flour and water immediately.
Why does my starter smell like nail polish remover or acetone?
- Cause: High acidity caused by yeast starvation or high ambient temperatures.
- Solution: Increase your feeding frequency to twice daily (every 12 hours) or increase your feeding ratio to 1:2:2 (e.g., 30g starter + 60g flour + 60g water) to dilute the acid build-up.
How do I know if my starter has gone bad or has mold?
- Identification: True spoilage is rare due to the high acidic protection of sourdough. However, if you see pink, orange, green, or fuzzy black spots, or if white mold threads appear on the surface or jar rim, throw the starter away immediately and thoroughly sterilize your jar before starting fresh.
Delicious Sourdough Discard Ideas
During the first week of building a starter, you discard excess flour paste daily to keep ingredient volume manageable. Once your starter reaches Day 4 or 5 (and smells pleasantly tangy without spoilage), don’t waste that discard! Save it in a tub in your fridge to make these quick, non-leavened treats:
- Sourdough Discard Pancakes & Waffles: Adds incredible flavor and light texture when combined with baking powder.
- Crispy Sourdough Crackers: Mixed with melted butter, herbs, and sea salt, then baked thin on a sheet pan.
- Sourdough Biscuits & Scones: Creates flaky, tender buttery layers with a subtle tangy bite.
- Sourdough Banana Bread & Muffins: Enhances sweetness and moisture while balancing rich banana flavor.
- Sourdough Flatbreads & Tortillas: Easy stovetop skillet breads made in minutes using leftover discard.
Nutrition Information
Serving Size: 1 tablespoon (15 g active starter)
- Calories: 30 kcal
- Total Carbohydrates: 6 g
- Protein: 1 g
- Total Fat: 0 g
- Dietary Fiber: 0.3 g
- Sodium: 0 mg
Frequently Asked Questions
What is a sourdough starter?
A sourdough starter is a live fermented culture of flour and water that captures wild yeasts and beneficial lactic acid bacteria from the environment. It is used to naturally leaven bread without commercial yeast.
How long does it take to make a sourdough starter from scratch?
It typically takes 5 to 7 days of daily feedings to build an active, bubbly starter strong enough to bake bread, though cold temperatures can extend this to 10–14 days.
Can I use all-purpose flour instead of bread flour?
Yes! Unbleached all-purpose flour works very well. Just ensure it is unbleached so the natural enzymes remain intact.
Why do I have to discard part of the starter before every feeding?
If you don’t discard, the volume of starter would grow exponentially each day, requiring kilograms of flour for every feeding. Discarding keeps the culture manageable while diluting built-up acids so fresh yeast can thrive.
How do I know when my sourdough starter is active enough to bake?
Your starter is ready when it predictably doubles or triples in size within 4 to 6 hours after a feeding, shows a bubbly dome-shaped top, and floats in a cup of water.
What does “hooch” mean?
Hooch is the liquid alcohol byproduct that accumulates on top of a sourdough starter when it has consumed all its available food and needs to be fed.
Pro Tips
- Maintain a Backup Supply: Once your starter is strong, smear 2 tablespoons onto parchment paper, let it dry into hard flakes, and store them in a zip-top bag in your pantry. If your main jar ever breaks or gets contaminated, you can restore your culture in 48 hours!
- Mark Daily Progress with a Rubber Band: Always align your exterior rubber band with the top of the fresh batter right after feeding so you can accurately track expansion height.
- Use Unbleached Flour Exclusively: Bleaching treatments strip grains of natural microflora, slowing down yeast development.
- Keep Metal Lids Away from Fermenting Starter: The natural acids in active sourdough can corrode metal lids over time. Stick to glass lids, plastic caps, or cloth covers during daily fermentation.
Sourdough Starter vs. Commercial Packaged Yeast
| Feature | Sourdough Starter (Wild Yeast) | Commercial Packaged Yeast |
| Leavening Agent | Wild yeasts (Saccharomyces exiguus) & Lactobacilli | Concentrated Saccharomyces cerevisiae |
| Flavor Profile | Complex, tangy, aromatic, sourdough notes | Mild, neutral, purely yeasty flavor |
| Fermentation Speed | Slow, gentle fermentation (4 to 24 hours) | Rapid fermentation (1 to 2 hours) |
| Digestibility | Breaks down phytic acid & gluten proteins for easier digestion | Minimal gluten breakdown during short rises |
| Shelf Life | Indefinite lifetime with regular feedings | Limited shelf life based on expiration date |
| Daily Maintenance | Requires periodic flour and water feedings | Zero maintenance; stored dry in packets |
Related Recipes
Expand your sourdough baking skills with these related step-by-step guides: