
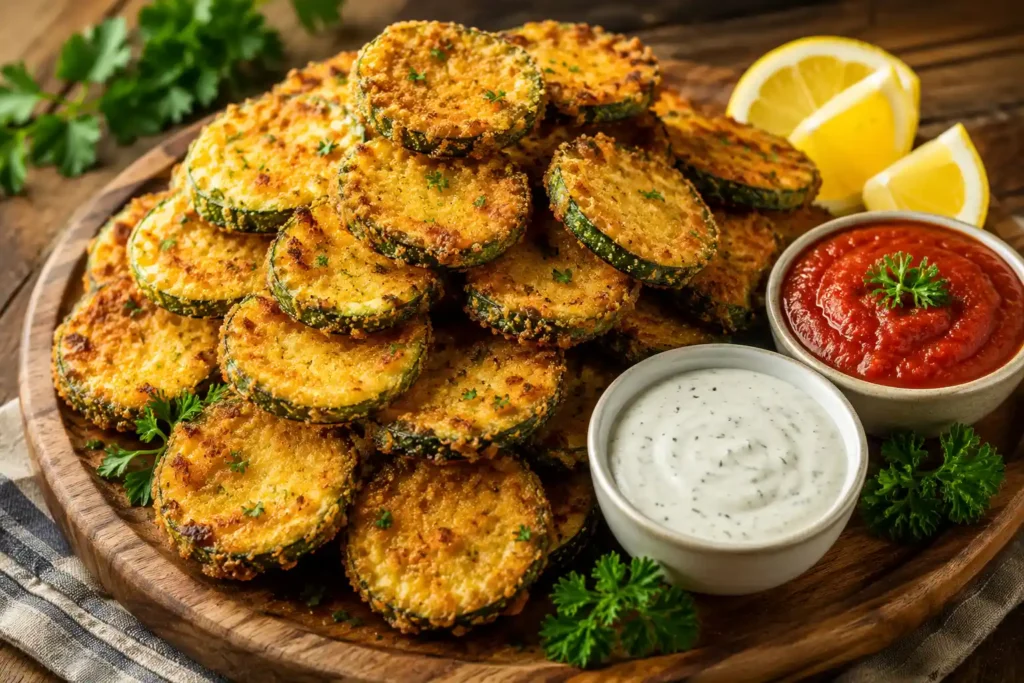
If there is one vegetable that completely transforms under the influence of a little seasoned flour, an egg wash, and hot oil, it is fresh summer zucchini. Every year when my home garden starts overflowing with an abundance of zucchini, my absolute favorite way to prepare them is by turning them into crispy fried zucchini.
There is something downright addictive about biting through a shattered-crisp, savory breadcrumb-Parmesan crust into a hot, tender, melt-in-your-mouth zucchini core. Whether you serve these golden rounds as a game-day zucchini appetizer, a party snack, or a quick dinner side, they disappear off the plate in minutes.
The best part about this easy fried zucchini recipe? It comes together in under 30 minutes using basic pantry staples you likely already have in your kitchen. It is completely beginner-friendly, budget-conscious, and a guaranteed crowd-pleaser, even for picky eaters who claim they don’t like green vegetables! Let me walk you through my tried-and-true method for making the crispiest, non-soggy breaded fried zucchini you will ever taste.
My Journey to the Crispiest Fried Zucchini
For years, I struggled with making fried zucchini slices at home. Every time I ordered them at local diners or Italian trattorias, they arrived with a loud, crunchy breading that stayed perfectly attached to the squash. But in my own kitchen? My early attempts were a disaster. The breading would slide right off in the hot oil, or worse, the zucchini would release so much moisture inside that the crust turned into a soggy, greasy mess before it even hit the serving plate.
I was determined to fix this. I spent weeks experimenting with different slicing techniques, moisture-removal methods, breadcrumb mixtures, and oil temperatures.
I tested salted vs. unsalted zucchini, panko vs. traditional Italian breadcrumbs, and baking vs. pan-frying. Through all that trial and error, I discovered three crucial steps that guarantee a shatteringly crispy crust every single time: patting the zucchini bone-dry, using a three-station dredge, and setting the fried zucchini on a wire cooling rack instead of paper towels. Once I nailed this process, my homemade version blew every restaurant version out of the water. I am excited to share my exact, foolproof method with you today!
Quick Recipe Overview
| Detail | Information |
| Recipe Name | Crispy Homemade Fried Zucchini |
| Cuisine | American / Italian-American |
| Course | Appetizer / Side Dish |
| Prep Time | 15 Minutes |
| Cook Time | 10 Minutes |
| Total Time | 25 Minutes |
| Servings | 4 Servings |
| Calories | Approx. 240 kcal per serving |
| Difficulty | Easy / Beginner Friendly |
Why You’ll Love This Fried Zucchini Recipe
- Shatteringly Crispy Outside: The combination of Italian breadcrumbs, fine cornstarch/flour, and freshly grated Parmesan creates a loud, savory crunch in every single bite.
- Tender, Juiceless Core: Thanks to proper prep, the interior becomes buttery soft without turning mushy or watery.
- Ready in Under 30 Minutes: A quick 15-minute prep and a fast 10-minute fry time mean you can have a fresh batch ready on short notice.
- Budget-Friendly Pantry Staples: Uses simple, inexpensive ingredients like fresh squash, flour, eggs, breadcrumbs, and basic seasonings.
- Ultimate Crowd-Pleaser: Works brilliantly as a party starter, game-day snack, or an easy vegetable side dish that kids genuinely love.
- Versatile Cooking Options: While shallow pan-frying gives the most authentic results, this recipe adapts effortlessly to air fryers or oven baking!
Ingredients for Crispy Fried Zucchini Recipe
To achieve the ultimate crispy fried zucchini, I divide the components into three simple dredging stations plus the frying oil:
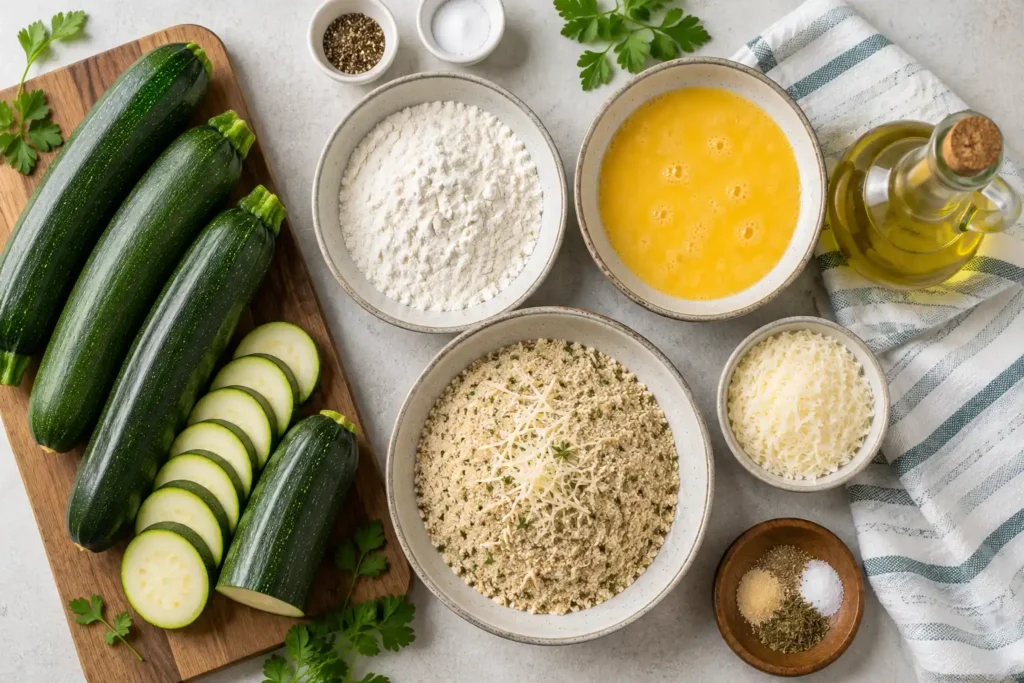
Main Ingredients:
- 2 medium fresh zucchini: (Appx. 1 lb total), washed and dried thoroughly.
- ½ cup all-purpose flour: Helps the egg wash adhere to the smooth vegetable surface.
- 2 large eggs: Room temperature, beaten smooth to act as the “glue.”
- 2 tablespoons milk or water: Whisked into the eggs to thin the wash slightly.
- 1 cup Italian breadcrumbs: Pre-seasoned for built-in flavor depth. (Optionally swap half for Panko for extra crunch!).
- ½ cup freshly grated Parmesan cheese: Adds a salty, nutty, savory crust finish.
- 1 teaspoon garlic powder: Gives the breading a warm garlic punch.
- ½ teaspoon onion powder: Enhances savory depth.
- ½ teaspoon smoked or sweet paprika: For subtle warmth and a gorgeous golden hue.
- ½ teaspoon kosher salt: (Plus extra for seasoning right out of the skillet).
- ¼ teaspoon freshly cracked black pepper:
- Vegetable oil or canola oil: For shallow frying (about 1 cup, depending on skillet size).
Optional Garnishes & Serving Extras:
- Fresh parsley: Fine chopped for a vibrant green pop.
- Lemon wedges: A fresh squeeze of acid right before eating cuts through the richness.
- Dipping Sauces: Creamy ranch dressing, warm marinara sauce, or garlic aioli.
Ingredient Notes
Choosing the Best Zucchini
Size matters when making fried zucchini rounds! I always choose small-to-medium zucchini (about 6 to 8 inches long). Small zucchini have fewer seeds, lower water content, and a firmer texture. Giant garden zucchini might look impressive, but they contain large, spongy seed cavities and excess moisture that will make your fried coating soggy.
Fresh vs. Frozen Zucchini
Always use fresh zucchini for this recipe! Frozen zucchini releases too much water upon thawing, making it impossible to get a crisp coating. Save frozen zucchini for soups, stews, or baked zucchini bread.
Breadcrumb Selections
I prefer traditional fine Italian breadcrumbs because they cling tightly to the egg wash and create an even, full-coverage coat. However, if you crave maximum texture, feel free to use a 50/50 blend of Italian breadcrumbs and Japanese Panko breadcrumbs!
Cheese Choice
Use freshly grated Parmesan (the fine powder or finely microplaned variety) rather than large pre-shredded cheese strands. Fine Parmesan melts seamlessly into the breadcrumbs, creating a uniform, crispy shell.
Oil Selection
Select a neutral oil with a high smoke point. Vegetable oil, canola oil, peanut oil, or corn oil work best. Avoid extra virgin olive oil for frying because its low smoke point causes it to burn quickly at 350°F, leaving a bitter taste.
Kitchen Equipment
You don’t need fancy tools to fry zucchini at home, but having these basics organized on your counter makes the process seamless:
- Sharp Chef’s Knife & Cutting Board: For slicing uniform round coins.
- Paper Towels: For patting the raw slices thoroughly dry.
- Three Shallow Bowls or Pie Dishes: For setting up your standard 3-step dredging station.
- Large Heavy Skillet: A 12-inch cast-iron skillet or heavy stainless steel pan is ideal for maintaining steady oil heat.
- Deep-Fry/Candy Thermometer: Ensures your oil stays within the ideal 350°F–375°F window.
- Wire Cooling Rack & Baking Sheet: Place the rack inside a sheet pan. Resting fried items on a wire rack keeps air circulating underneath so the bottoms don’t get soggy!
- Tongs or Slotted Metal Spoon: For safe, splash-free turning in hot oil.
How to Make Crispy Fried Zucchini
Follow these detailed step-by-step instructions for perfect, golden homemade fried zucchini:
Step 1: Wash, Trim, and Slice
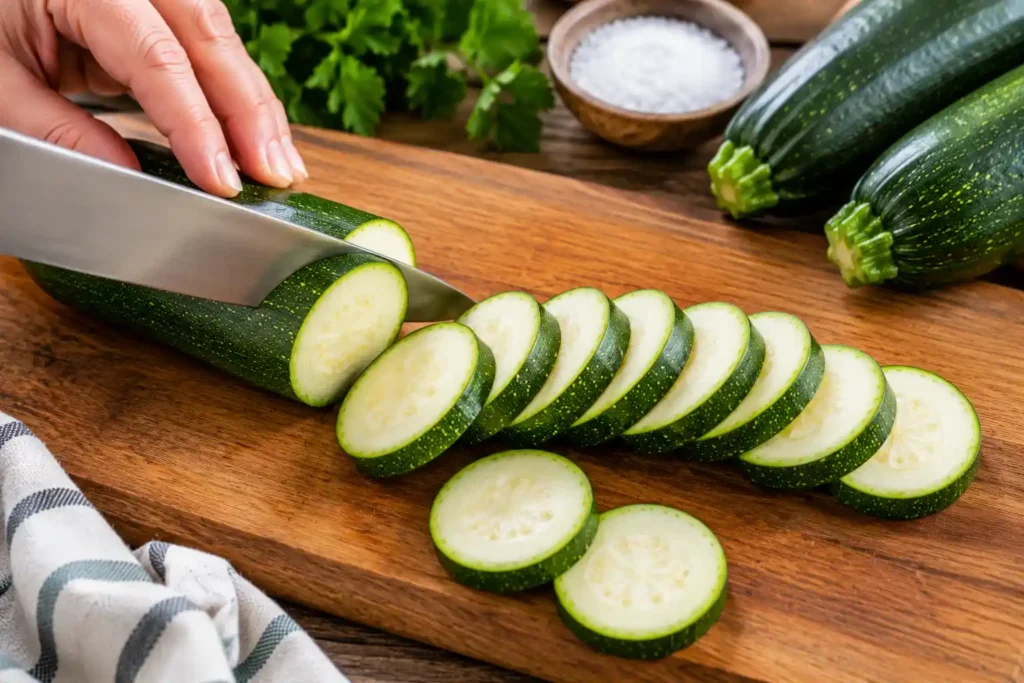
Wash 2 medium zucchini under cold water and dry them completely with a towel. Trim off the stem and blossom ends. Using a sharp knife, slice the zucchini into uniform coins about ¼-inch thick.
My Key Tip: Don’t slice them too thin (or they’ll turn mushy) or too thick (or the center won’t cook through before the crust burns). ¼-inch is the sweet spot!
Step 2: Dry the Zucchini Slices
Lay the sliced zucchini rounds in a single layer over a double sheet of paper towels. Press another paper towel firmly over the top to absorb as much surface moisture as possible. The drier the surface, the better the flour will adhere!
Step 3: Set Up Your Dredging Station
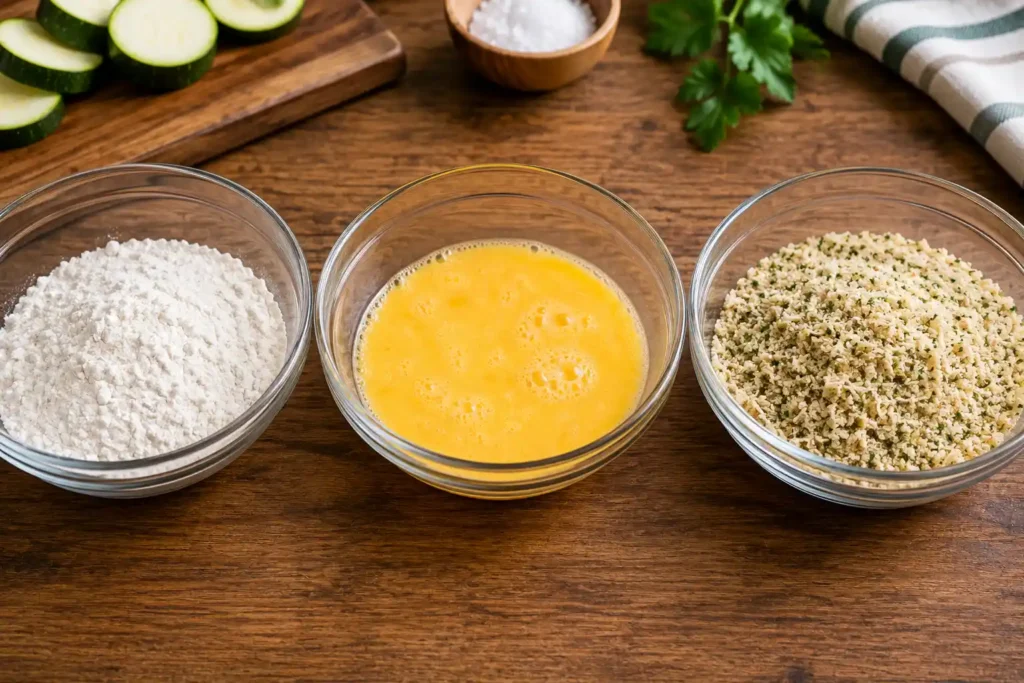
Arrange three shallow bowls side-by-side in an assembly line:
- Bowl 1 (Flour): Add ½ cup all-purpose flour.
- Bowl 2 (Egg Wash): Beat 2 large eggs with 2 tablespoons of milk until smooth.
- Bowl 3 (Breadcrumb Coating): Whisk together 1 cup Italian breadcrumbs, ½ cup grated Parmesan cheese, 1 tsp garlic powder, ½ tsp onion powder, ½ tsp paprika, ½ tsp salt, and ¼ tsp black pepper.
Step 4: Bread the Zucchini Slices
Working in small batches of 4 to 6 slices at a time:
- Dredge a slice in the flour, shaking off any excess.
- Dip into the egg wash, ensuring it is completely coated, and let excess drip off.
- Press firmly into the breadcrumb mixture, turning to coat both sides and edges evenly.
- Transfer breaded slices to a clean plate or cutting board while you finish the rest.
Step 5: Heat the Oil
Pour vegetable oil into your skillet until it reaches about ¼-inch to ½-inch deep. Heat over medium-high heat until the oil reaches 350°F to 375°F (175°C–190°C).
Step 6: Fry to Golden Perfection
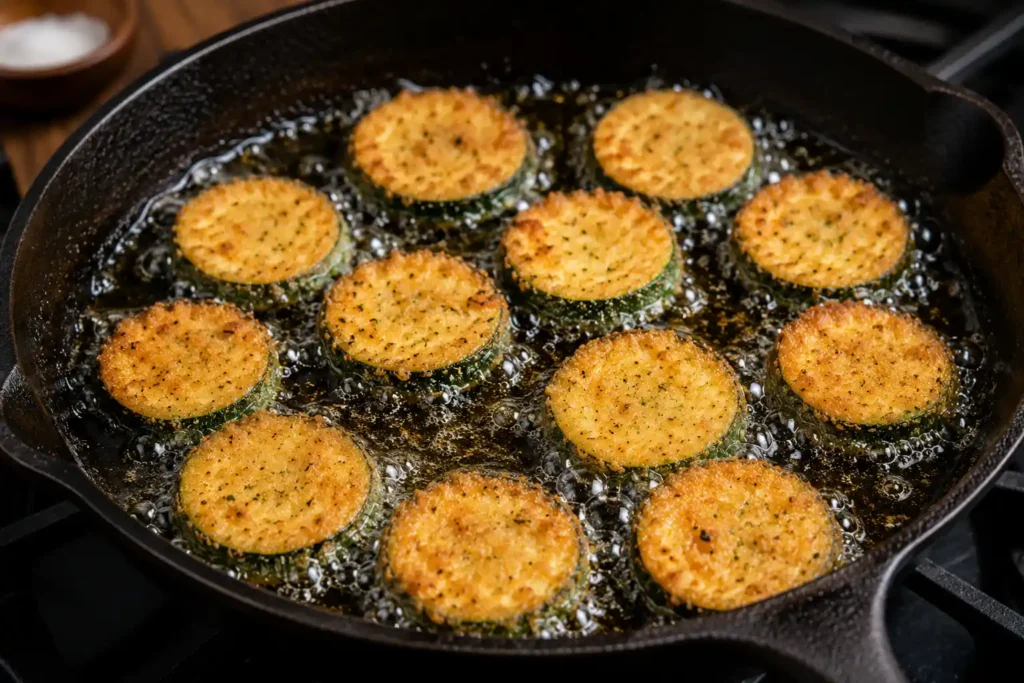
Carefully lay the breaded zucchini slices into the hot oil using tongs. Do not overcrowd the pan, fry in batches of 8 to 10 slices at a time, leaving space between each piece.
Fry for 1½ to 2 minutes per side, turning once, until the crust turns a deep golden brown and crisp.
Step 7: Drain, Season, and Serve
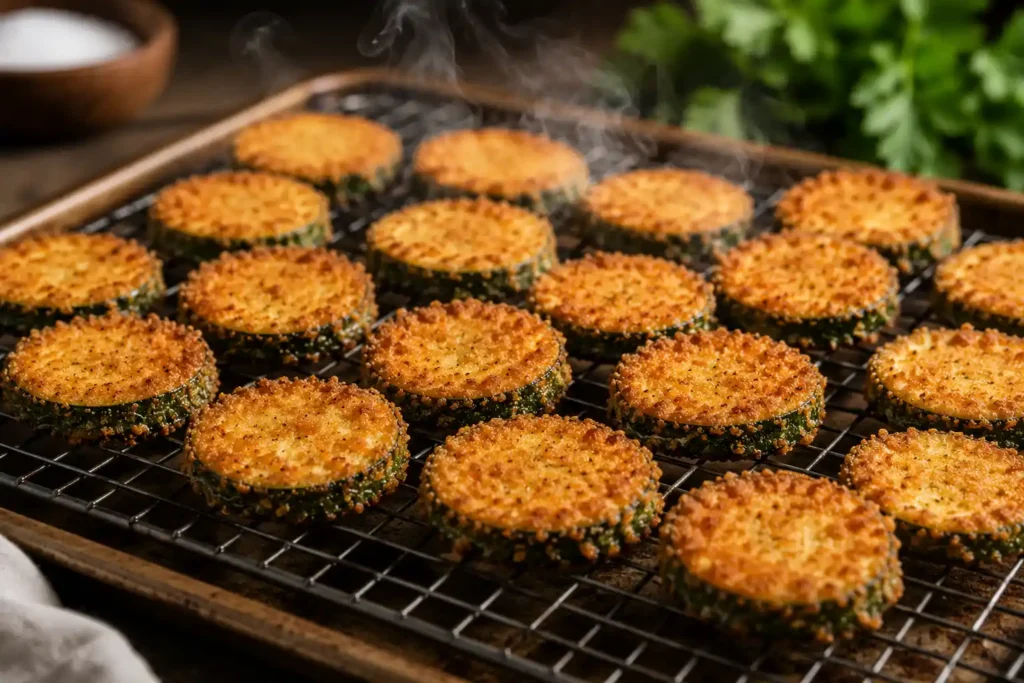
Use tongs or a slotted spoon to transfer the golden fried zucchini directly onto your wire cooling rack set over a baking sheet. Immediately sprinkle a light pinch of kosher salt over the hot slices while the oil is fresh. Repeat with remaining batches.
Garnish with chopped fresh parsley and lemon wedges, and serve hot with your favorite dipping sauces!
Expert Tips for Extra Crispy Fried Zucchini
- Never Skip the Surface Drying: Moisture is the primary enemy of crispiness. Pressing raw slices between paper towels removes excess water so the flour grips tightly instead of turning pasty.
- Maintain Your Oil Temperature: Keep an eye on your oil heat. If the oil drops below 350°F, the breading will absorb oil like a sponge and turn greasy. If it exceeds 380°F, the outside will burn before the zucchini inside cooks.
- Use a Wire Rack, Not Paper Towels: Placing freshly fried food directly on paper towels traps escaping steam underneath, making the bottom crust soft and soggy. A wire rack allows steam to vent completely around the slices.
- Freshly Grate Your Parmesan: Pre-packaged shaker cheese contains anti-caking additives that prevent clean melting. Freshly microplaned Parmesan melts directly into the breadcrumb matrix for superior crunch.
- Double-Coat for Heavy Duty Crunch: If you love a extra-thick crust, repeat the egg wash and breadcrumbs step a second time before laying the slices into the oil!
- Salt After Frying: Never salt raw zucchini slices too far ahead unless you plan on rinsing and draining them for an hour. Adding salt early draws out moisture, creating a wet coating. Salt them immediately when they come out of the hot oil!
Common Mistakes to Avoid
- Slicing Zucchini Unevenly: Thick pieces won’t cook through, while ultra-thin slices turn into limp mush. Stick to an even ¼-inch thickness.
- Overcrowding the Skillet: Dumping too many cold pieces into the skillet at once drops the oil temperature drastically, resulting in greasy, soggy zucchini.
- Frying in Cold Oil: Laying breaded zucchini into lukewarm oil washes the breading off and drenches the vegetable in cold fat. Wait for proper sizzling heat!
- Flipping Too Frequently: Let each side fry undisturbed for a full 90 to 120 seconds to establish a solid brown crust before flipping once.
- Reheating in the Microwave: Microwaving fried foods steam-cooks the crust, leaving it rubbery. Always use an oven or air fryer to reheat leftovers!
Best Dipping Sauces to Pair
A plate of hot crispy zucchini fries or rounds deserves a sensational dipping sauce! Here are my favorite pairings:
- Cool Creamy Ranch: The ultimate classic pairing! The cool herbs and garlic buttermilk contrast beautifully with hot, crispy breading.
- Warm Homemade Marinara: Sweet tomato, basil, and garlic sauce bring out Italian-restaurant flavors.
- Garlic Aioli: A rich mayonnaise-based sauce mixed with fresh crushed garlic, lemon juice, salt, and black pepper.
- Spicy Mayo: Mayonnaise whisked with sriracha, a touch of honey, and lime juice for a kick.
- Chipotle Dipping Sauce: Sour cream or mayo blended with chipotle peppers in adobo for smoky heat.
- Zesty Lemon Pepper Dip: Greek yogurt whisked with lemon zest, cracked pepper, and fresh dill.
Recipe Variations & Cooking Methods
Prefer baking or air frying? Want a low-carb alternative? Check out these easy recipe adjustments:
Recipe Variations Comparison Table:
| Variation | Key Change | Cooking Temp | Cook Time |
| Classic Pan-Fried | Italian breadcrumbs + oil fry | 350°F–375°F | 3–4 mins total |
| Air Fryer Zucchini | Light oil spray, single layer | 400°F (200°C) | 8–10 mins (flip halfway) |
| Oven Baked Version | High-heat bake on parchment | 425°F (220°C) | 18–22 mins |
| Keto / Low-Carb | Crushed pork rinds + Parmesan | 350°F–375°F | 3–4 mins total |
| Gluten-Free Version | GF flour + GF breadcrumbs | 350°F–375°F | 3–4 mins total |
| Spicy Cajun Style | Add ½ tsp cayenne + Cajun seasoning | 350°F–375°F | 3–4 mins total |
Method Details:
Air Fryer Instructions:
Preheat your air fryer to 400°F (200°C). Bread the zucchini slices as directed. Arrange them in a single layer in your air fryer basket without overlapping. Generously spray the tops with olive oil or cooking spray. Air fry for 8 to 10 minutes, flipping halfway through and spraying again, until deep golden and crispy.
Oven-Baked Instructions:
Preheat your oven to 425°F (220°C) and line a large baking sheet with parchment paper or a greased wire rack. Place breaded zucchini slices in a single layer and spray lightly with cooking spray. Bake for 18 to 22 minutes, flipping halfway through, until crisp and golden brown.
What to Serve With Fried Zucchini
This versatile zucchini side dish pairs effortlessly with almost any main course:
- Classic Burgers & Sandwiches: Swap standard potato chips or french fries for crispy zucchini slices alongside juicy smash burgers, turkey burgers, or chicken paninis.
- Grilled Meats: Serves as a crisp, savory counterpart to grilled steak, pork chops, or BBQ chicken.
- Pasta Dinners: Pair with classic Italian dishes like spaghetti marinara, fettuccine Alfredo, baked ziti, or chicken Parmesan.
- Seafood Favorites: Serve alongside fried fish fillets, grilled shrimp skewers, or crab cakes.
- Pizza Night: A fabulous homemade appetizer to nibble on while your favorite pizza bakes in the oven.
Storage & Reheating Instructions
Refrigerator Storage:
Allow leftover fried zucchini to cool completely on a wire rack. Place leftovers in an airtight container lined with paper towels (to absorb ambient moisture) and store in the refrigerator for up to 3 days.
Freezing Guidance:
While you can freeze fried zucchini, keep in mind that squash releases moisture upon thawing, so the crust won’t be quite as crisp as fresh. Flash-freeze cooked rounds on a baking sheet for 1 hour, then transfer to a freezer-safe bag for up to 2 months. Reheat directly from frozen!
How to Reheat for Maximum Crispness:
- Air Fryer (Recommended): Reheat at 375°F (190°C) for 3 to 5 minutes until hot and sizzling crisp.
- Oven / Toaster Oven: Bake on a wire rack set inside a sheet pan at 400°F (200°C) for 8 to 10 minutes.
- Avoid the Microwave: Microwaving will turn the breading rubbery and soggy!
Can You Make Fried Zucchini Ahead of Time?
Because fried foods are best enjoyed fresh, I don’t recommend frying them completely hours in advance. However, you can do all the prep work ahead:
- Slice and bread the zucchini rounds up to 2 hours ahead.
- Arrange the breaded, un-cooked slices in a single layer on a baking sheet lined with parchment paper.
- Cover loosely with plastic wrap and store in the refrigerator.
- When your guests arrive or dinner is ready, fry them fresh straight from the fridge!
Frequently Asked Questions
1. Why is my fried zucchini soggy?
Soggy fried zucchini usually stems from three main culprits: using oil that wasn’t hot enough (below 350°F), overcrowding the frying pan, or placing hot fried zucchini directly on paper towels where steam gets trapped underneath.
2. Should zucchini be peeled before frying?
No! You do not need to peel zucchini before frying. The skin is delicate, full of nutrients, holds its structure, and adds a beautiful green border to your golden slices.
3. Do you need to salt zucchini before frying?
For small-to-medium zucchini cut into ¼-inch coins, salting in advance to draw out water is optional. Simply patting them thoroughly dry with paper towels works perfectly! If using larger, wetter zucchini, you can salt the slices, let them rest 20 minutes, rinse, and dry before breading.
4. Can I use Panko breadcrumbs instead of Italian breadcrumbs?
Yes! Panko breadcrumbs produce a lighter, extra-crunchy exterior. Since Panko is unseasoned, make sure to add extra Italian seasoning, garlic powder, salt, and Parmesan to your mixture.
5. What is the best oil for frying zucchini?
Vegetable oil, canola oil, corn oil, or peanut oil are best due to their high smoke points and neutral flavors.
6. Can I use yellow summer squash instead of green zucchini?
Yes, absolutely! Yellow summer squash has a very similar texture and water content and can be substituted 1:1 in this exact recipe.
7. How do I keep the breading from falling off?
Make sure you follow the 3-step dredge sequence: Flour $\rightarrow$ Egg Wash $\rightarrow$ Breadcrumb. The flour dries the surface so the egg sticks, and the egg acts as glue for the breadcrumbs. Shake off excess flour so the egg doesn’t slide off!
8. Is fried zucchini healthy?
Zucchini itself is low in calories and rich in vitamins A and C, potassium, and antioxidants. While pan-frying adds calories and fat, using proper high-heat oil ensures minimal absorption, keeping it a light and delicious vegetable treat.
Nutrition Information
Estimated nutrition breakdown per 1 serving (approx. ¼ of recipe):
| Nutrient | Amount Per Serving |
| Calories | ~240 kcal |
| Protein | 9 g |
| Total Carbohydrates | 22 g |
| Dietary Fiber | 2 g |
| Sugars | 3 g |
| Total Fat | 13 g |
| Saturated Fat | 3.5 g |
| Sodium | 480 mg |
Note: Nutrition values are estimates and vary based on oil drainage and exact breadcrumb brands.
Related Recipes
If you enjoyed this crispy fried zucchini recipe, explore these delicious appetizer and vegetable side recipes from our kitchen:
- Air Fryer Zucchini Fries — A lighter alternative packed with garlic Parmesan crunch.
- Homemade Creamy Ranch Dressing — The ultimate scratch-made dip for fresh vegetables.
- Easy Garlic Aioli Dip — Rich, zesty, and perfect for dipping fried appetizers.
- Crispy Homemade Onion Rings — Classic pub-style beer-battered onion rings.
- Golden Fried Pickles — Tangy dill pickle chips fried in a crispy cornmeal batter.
- Cheesy Mozzarella Sticks — Ooey-gooey fried cheese sticks served with warm marinara.
External References and Food Safety
- USDA Food Safety Guidance: For safe home frying, maintain oil temperatures between 350°F and 375°F to prevent smoke hazards and ensure food safety. Reference: USDA Deep Fat Frying Safety.
Final Thoughts
There is nothing quite like a platter of piping-hot, golden crispy fried zucchini fresh out of the kitchen. By taking just a couple of extra minutes to pat your squash dry, maintaining the right oil heat, and draining your batches on a wire rack, you’ll get restaurant-quality crunch right in your own home.
Give this recipe a try next time your garden delivers fresh squash or when you need a crowd-pleasing appetizer for game day. If you tried making these, please leave a comment below, I’d love to hear what dipping sauce you paired with them! Happy frying!